


To embed Spline scenes in Divi, you can use Divi’s Code Module. It lets you paste Spline’s embed code directly into your Divi page.
Or you can use DiviFlash’s Spline module to load Spline scenes. It will also give extra controls for loading behavior (auto, lazy, or eager), interaction hints, loading animation, and mouse events to control scene interactions.
In this guide, we will show you both methods so that you can choose the one that best fits your needs.
Let’s start with the basic method using Divi’s Code Module.
Method 1: Using Divi’s Built-in Code Module (With Custom Coding)
You can embed a Spline scene in Divi using the built-in Code Module. This is the simplest approach if you just want to display a 3D scene on your page without any extra configuration.
Here is how to do it:
Step 1: Export from Spline
First, open your project in Spline and click on the Export options. For embedding in Divi, you have two choices:
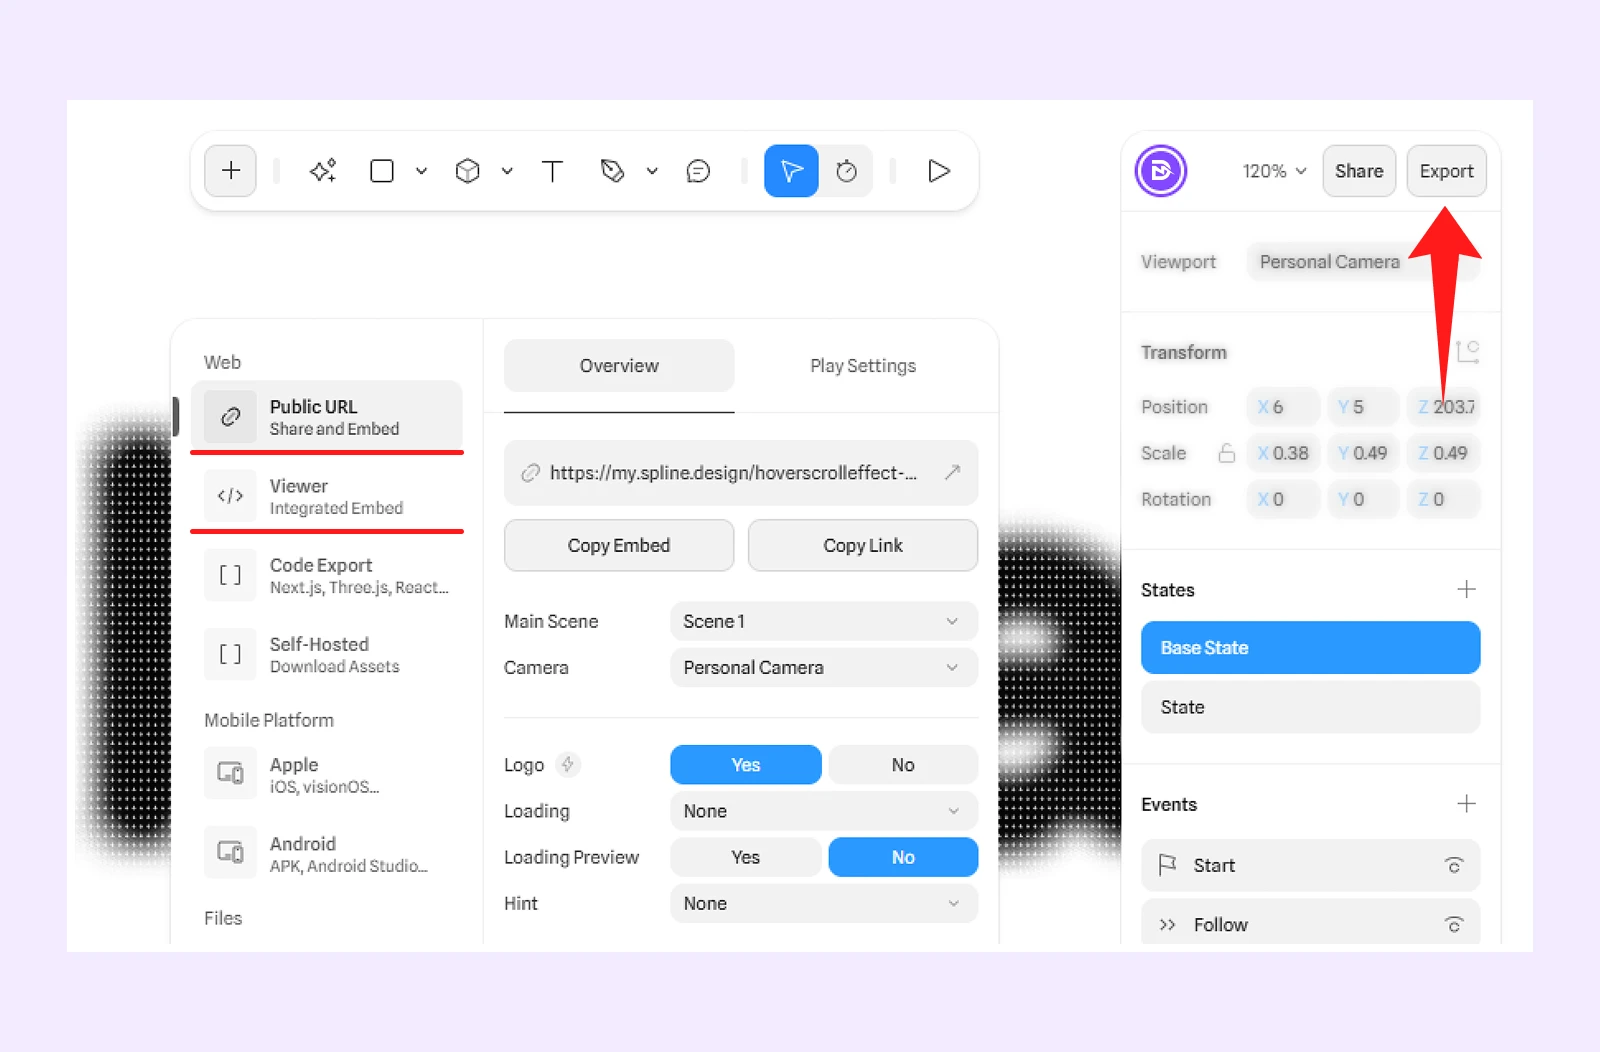
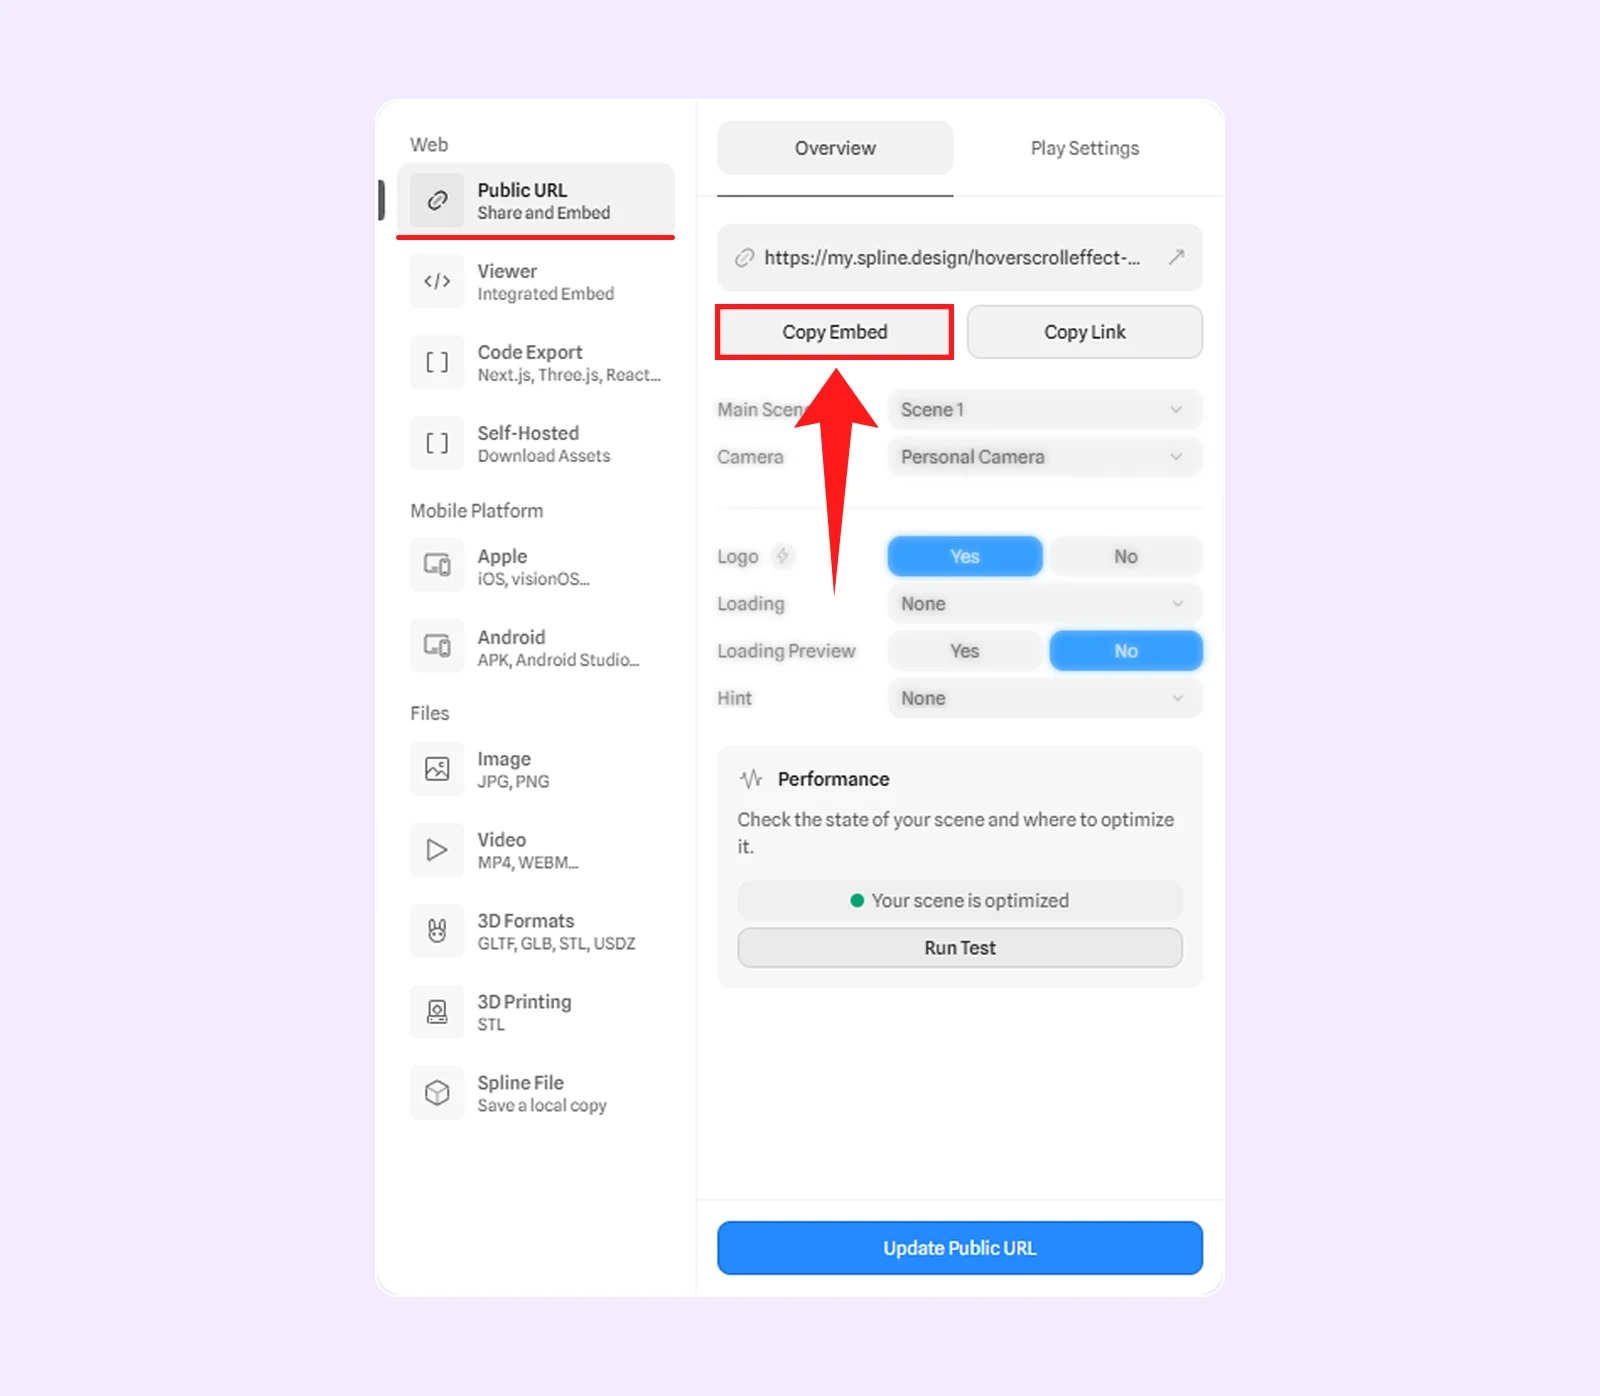
- Public URL: Click Copy Embed. This is best for a simple 3D embed. The scene will appear inside your Divi page, and visitors can interact with it only inside the embedded area.
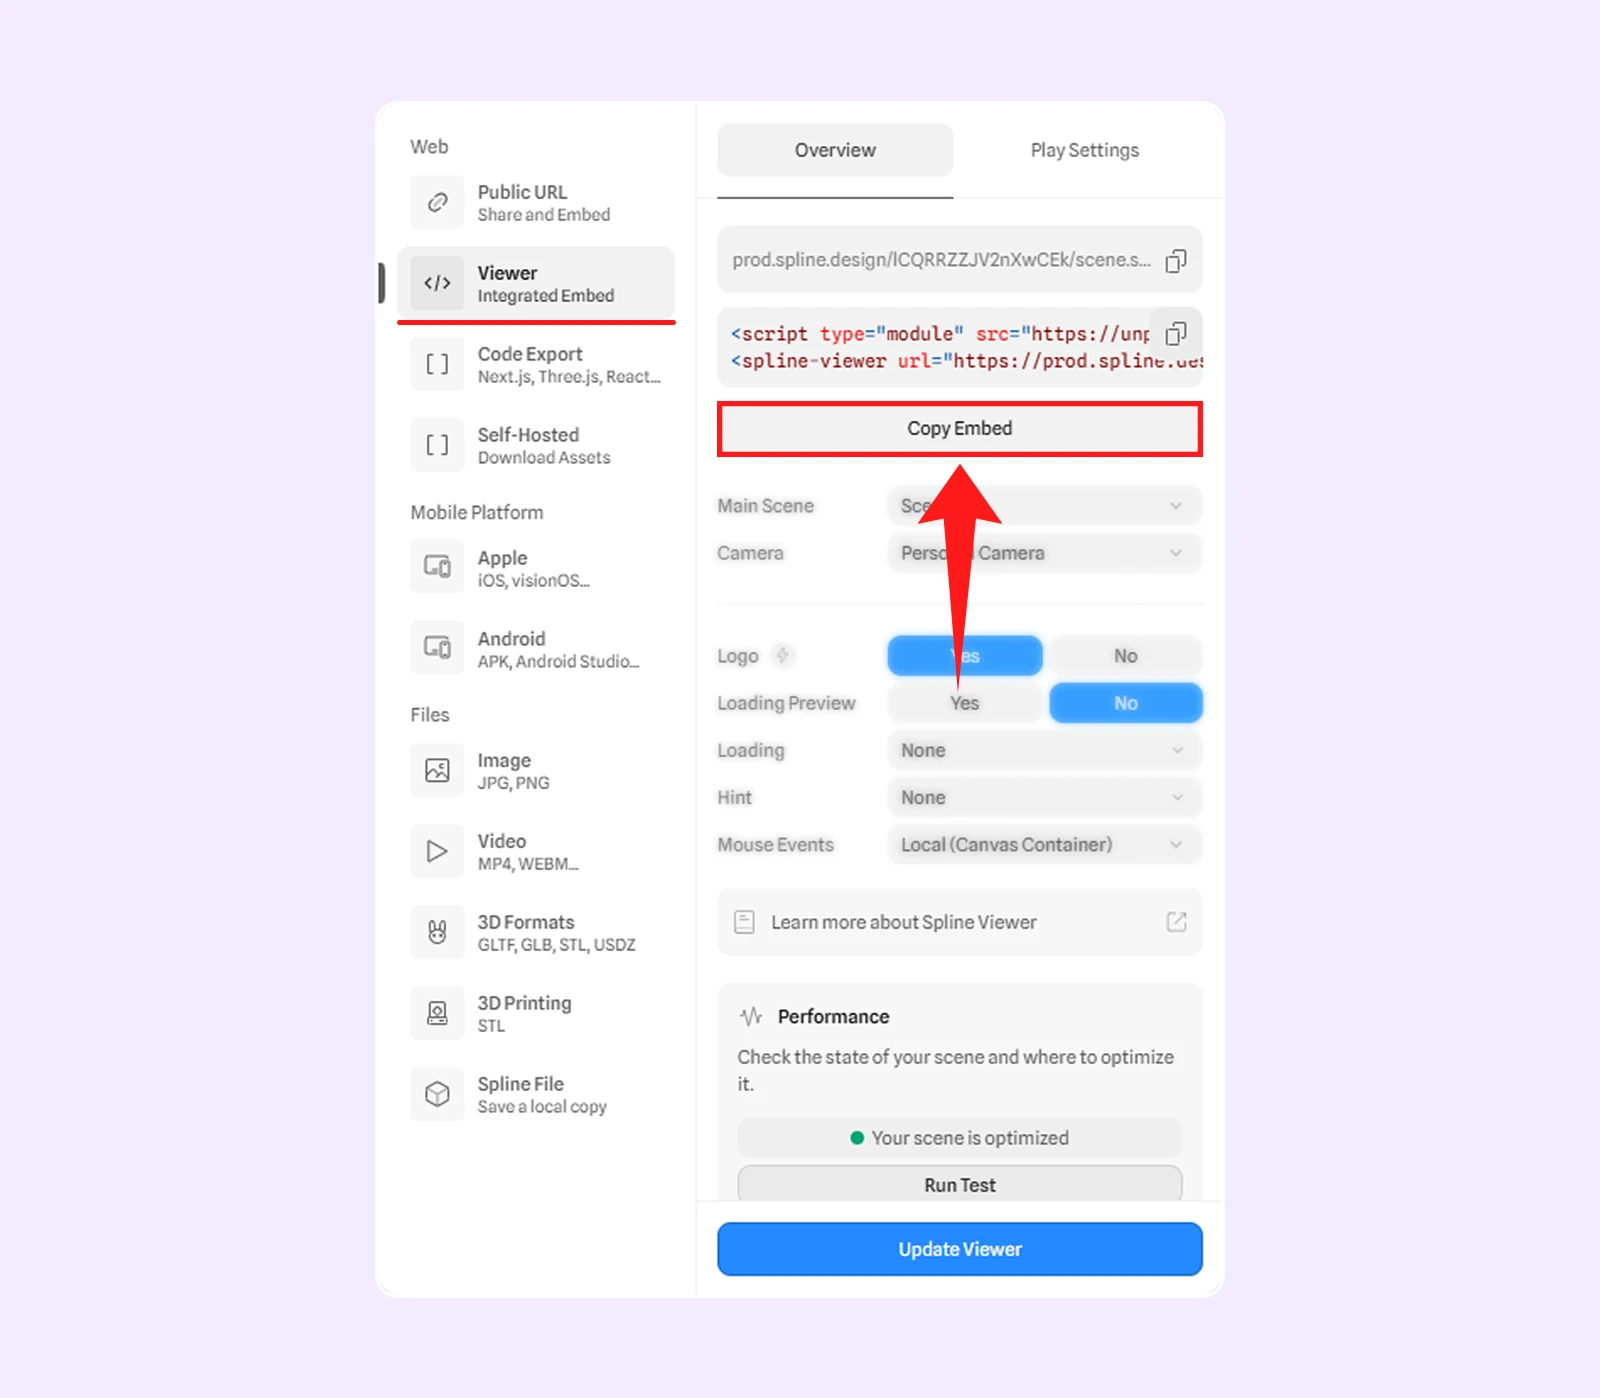
- Viewer: Click Copy Embed. Use this if you want the scene to support page-level interactions, such as mouse movement outside the embedded area. (Viewer uses an HTML-based embed, so it can respond to broader browser interactions.)
Step 2: Add a Code Module in Divi
- Open your page with the Divi 5 Visual Builder.
- Then add a Code Module where you want the Spline scene to appear.
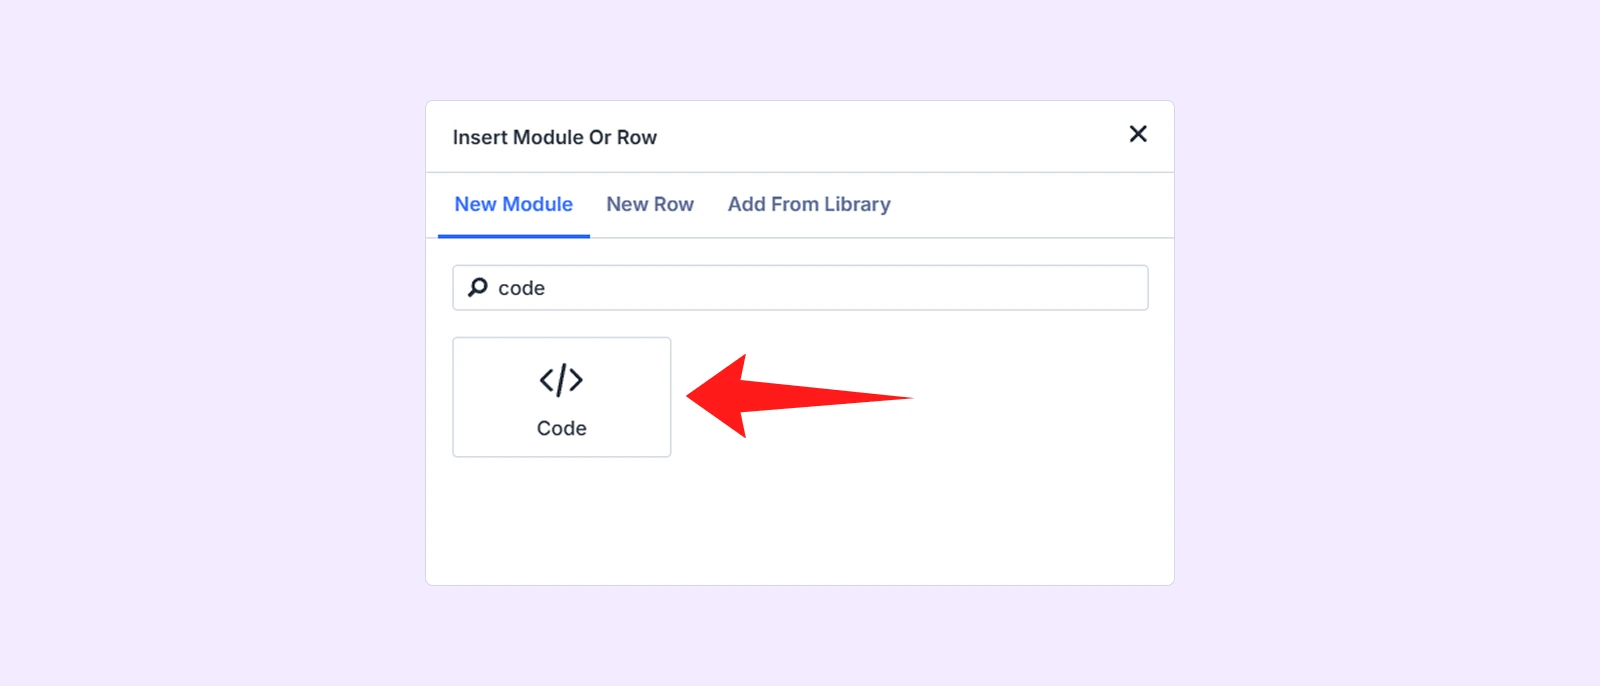
- Paste the Spline embed code into the Code Module.
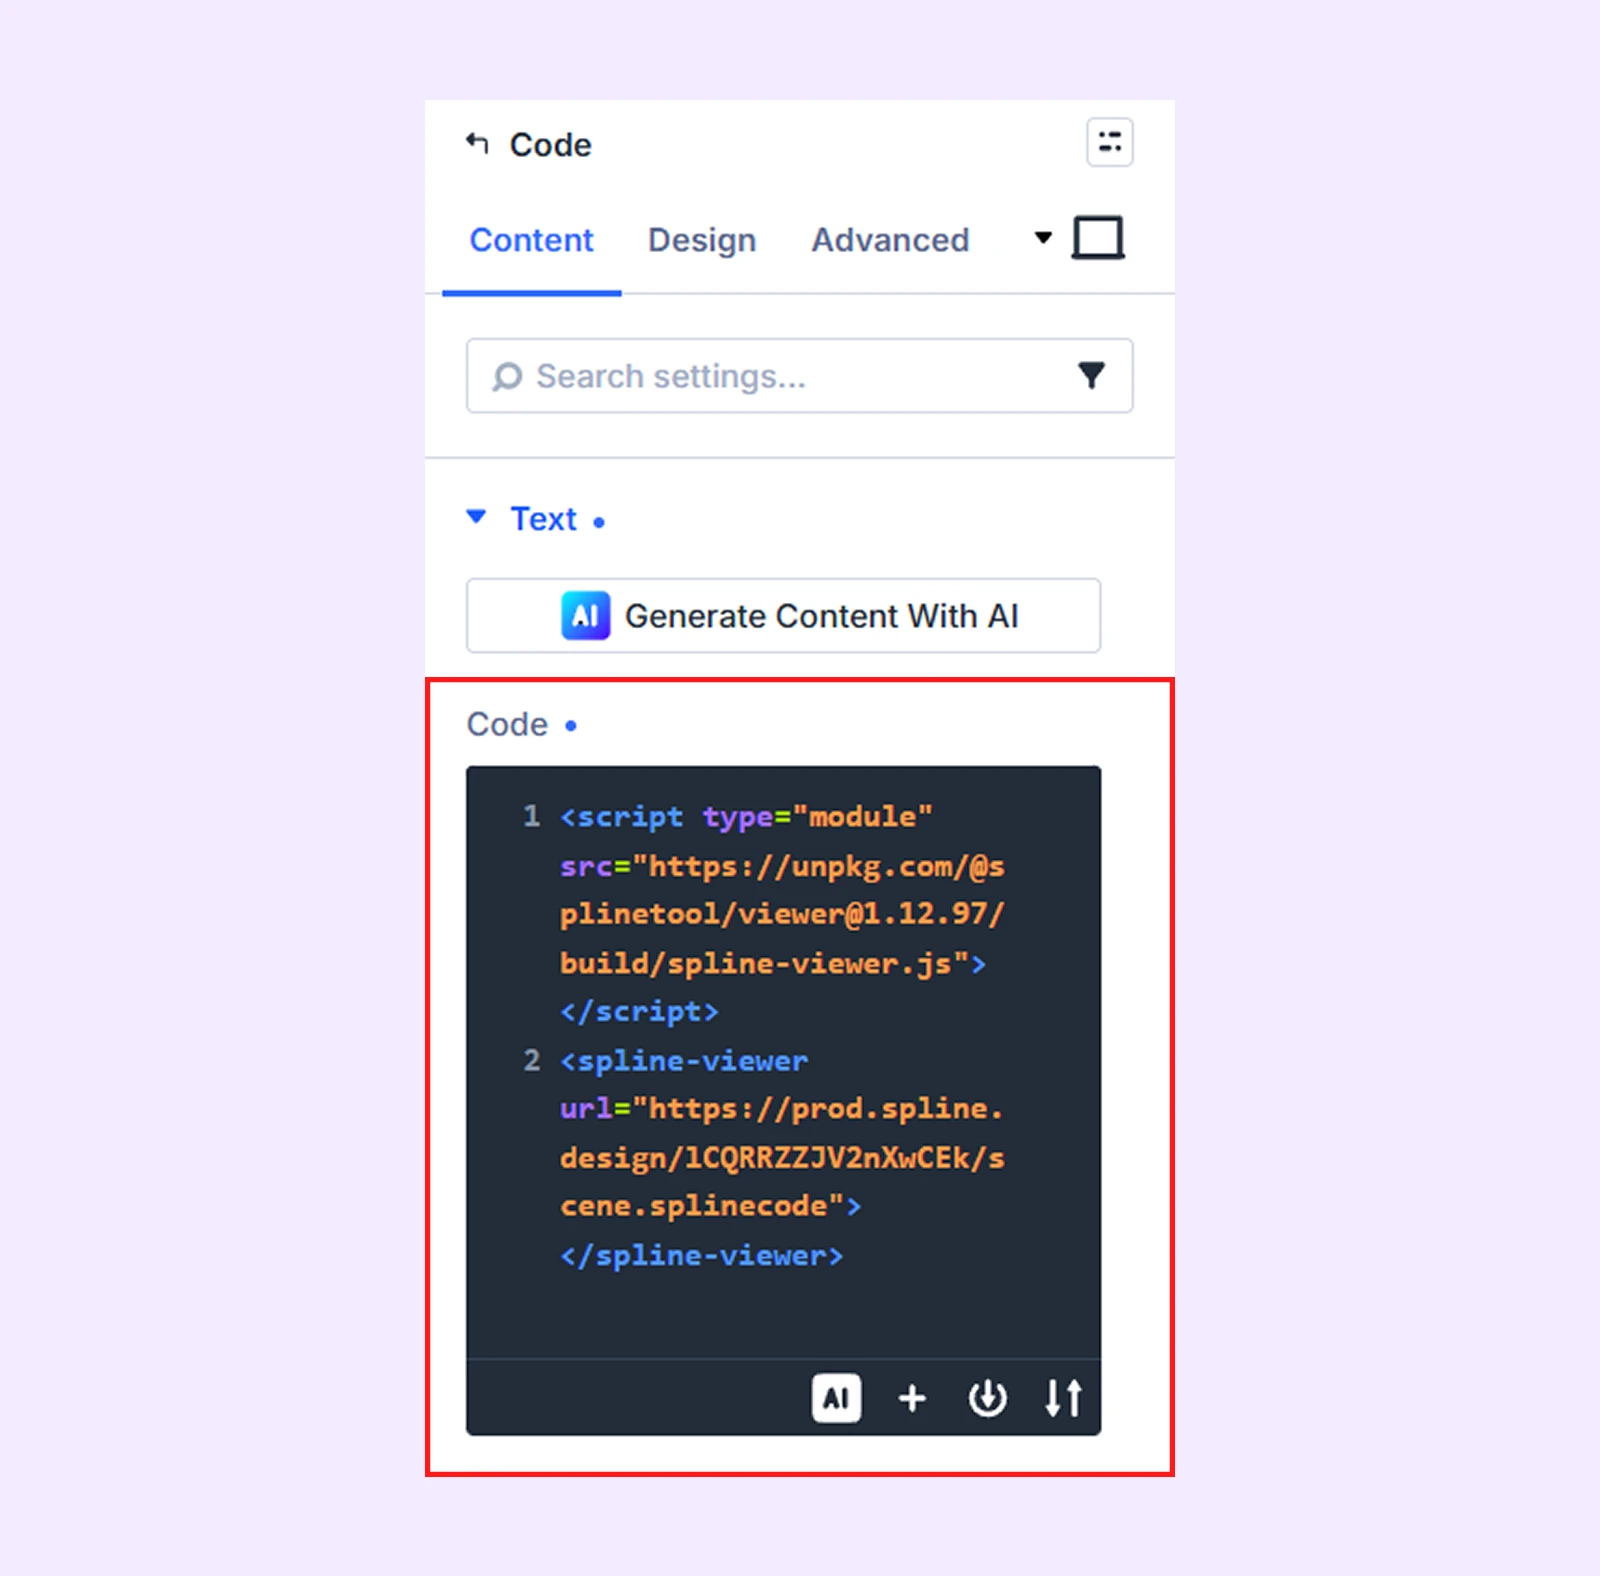
Step 3: Save and Preview
Click Save, then open the page in a new tab to see it live.
Method 2: Using the DiviFlash Spline Module (More Control, No Code)
The most flexible way to embed Spline scenes in Divi is with the DiviFlash Spline Module. It lets you load a scene and gives you full control over loading behavior, interactions, mouse events and more.
Here is how to use it.
Step 1: Get DiviFlash Plugin
Get DiviFlash from its official website, then install and activate it like any other premium plugin. (If you already use DiviFlash, just update to the version 5.1.0 or higher)
Step 2: Export from Spline
Open your project in Spline and click Export from the top-right corner. Then select Code Export. Next, export the file with one of the two following ways:
- Download: Save a .splinecode file to your device.
- Copy Link: Generate a URL that you can paste directly into Divi.
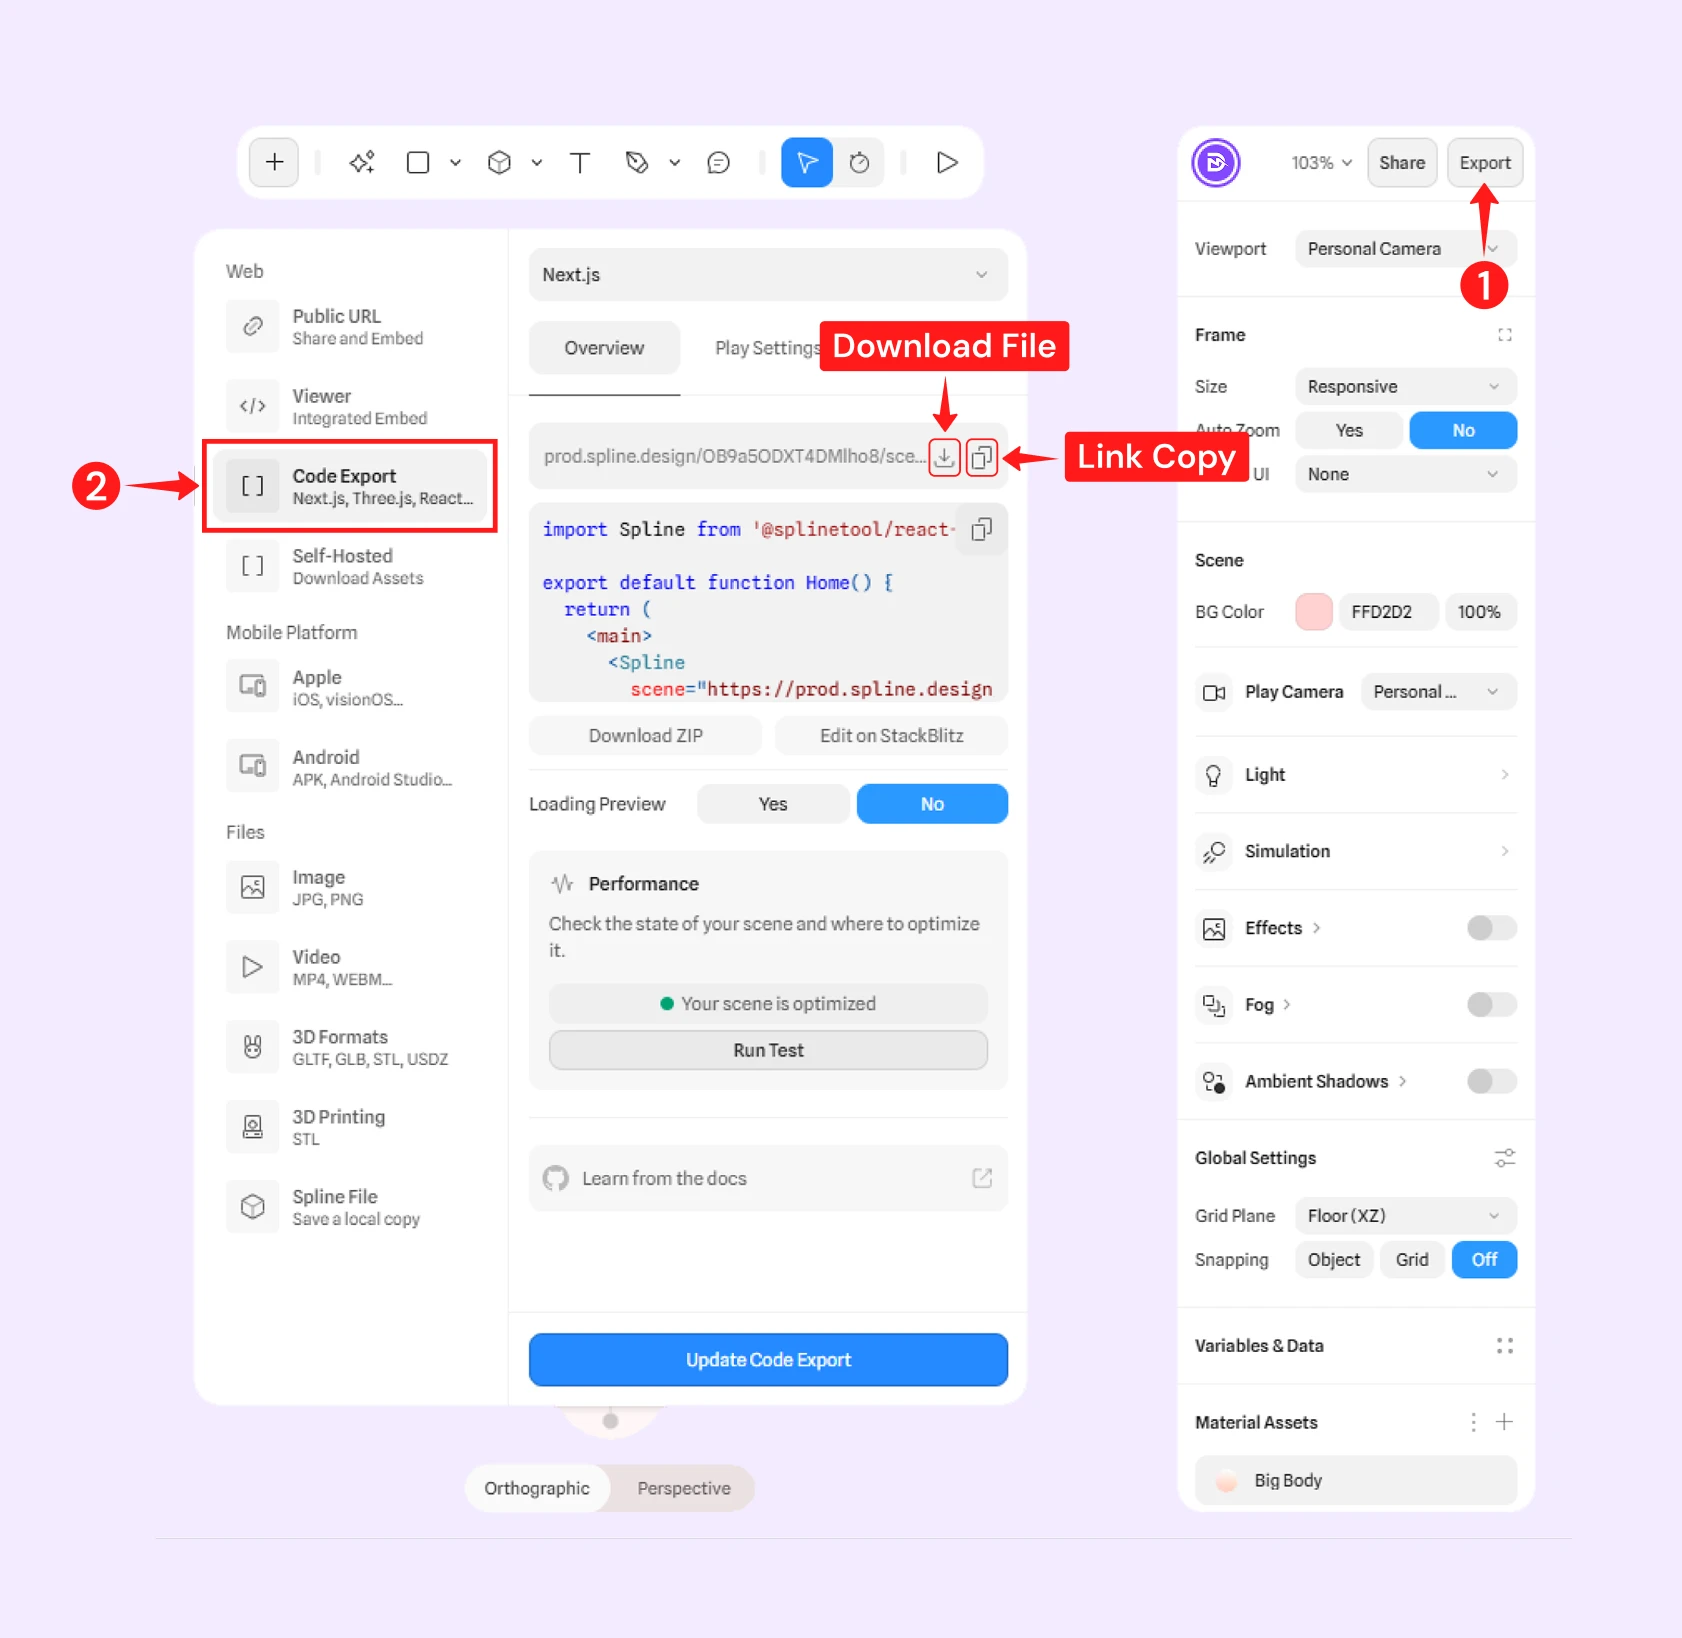
Note: Make sure to use Code Export, as the DiviFlash Spline Module only supports .splinecode files and URLs.
Step 3: Add the DiviFlash Spline Module
Open your page in the Divi Visual Builder, then:
- Add a section, row, and column where you want the 3D scene to appear.
- Click Add New Module.
- Search for Spline and select the module.
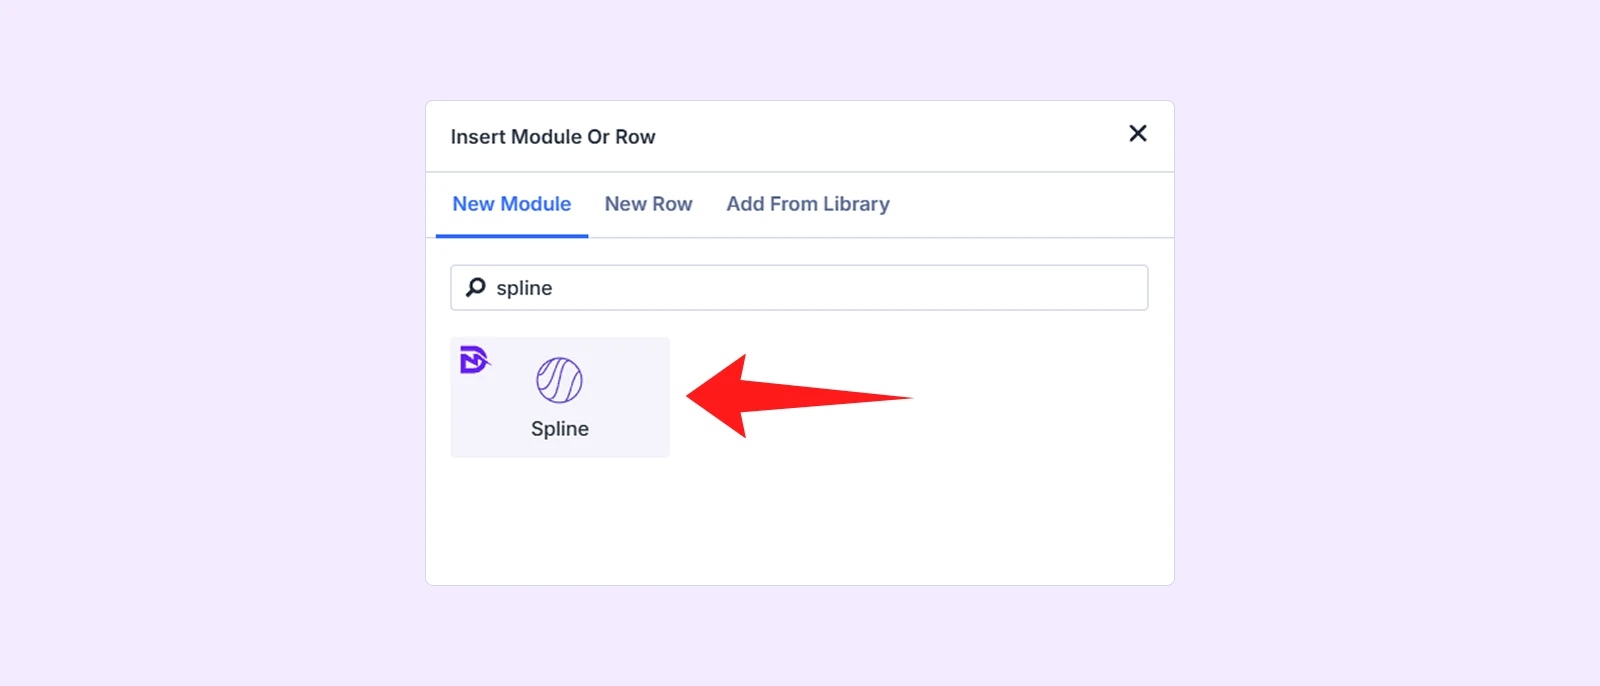
Step 4: Load Your Scene
In the module settings, locate the Spline Source option and choose how to load your scene:
- Spline Scene URL: Paste the URL you copied from Spline. The scene will load directly from the Spline link.
- Upload Splinecode File: Upload your .splinecode file from your device to the WordPress Media Library.
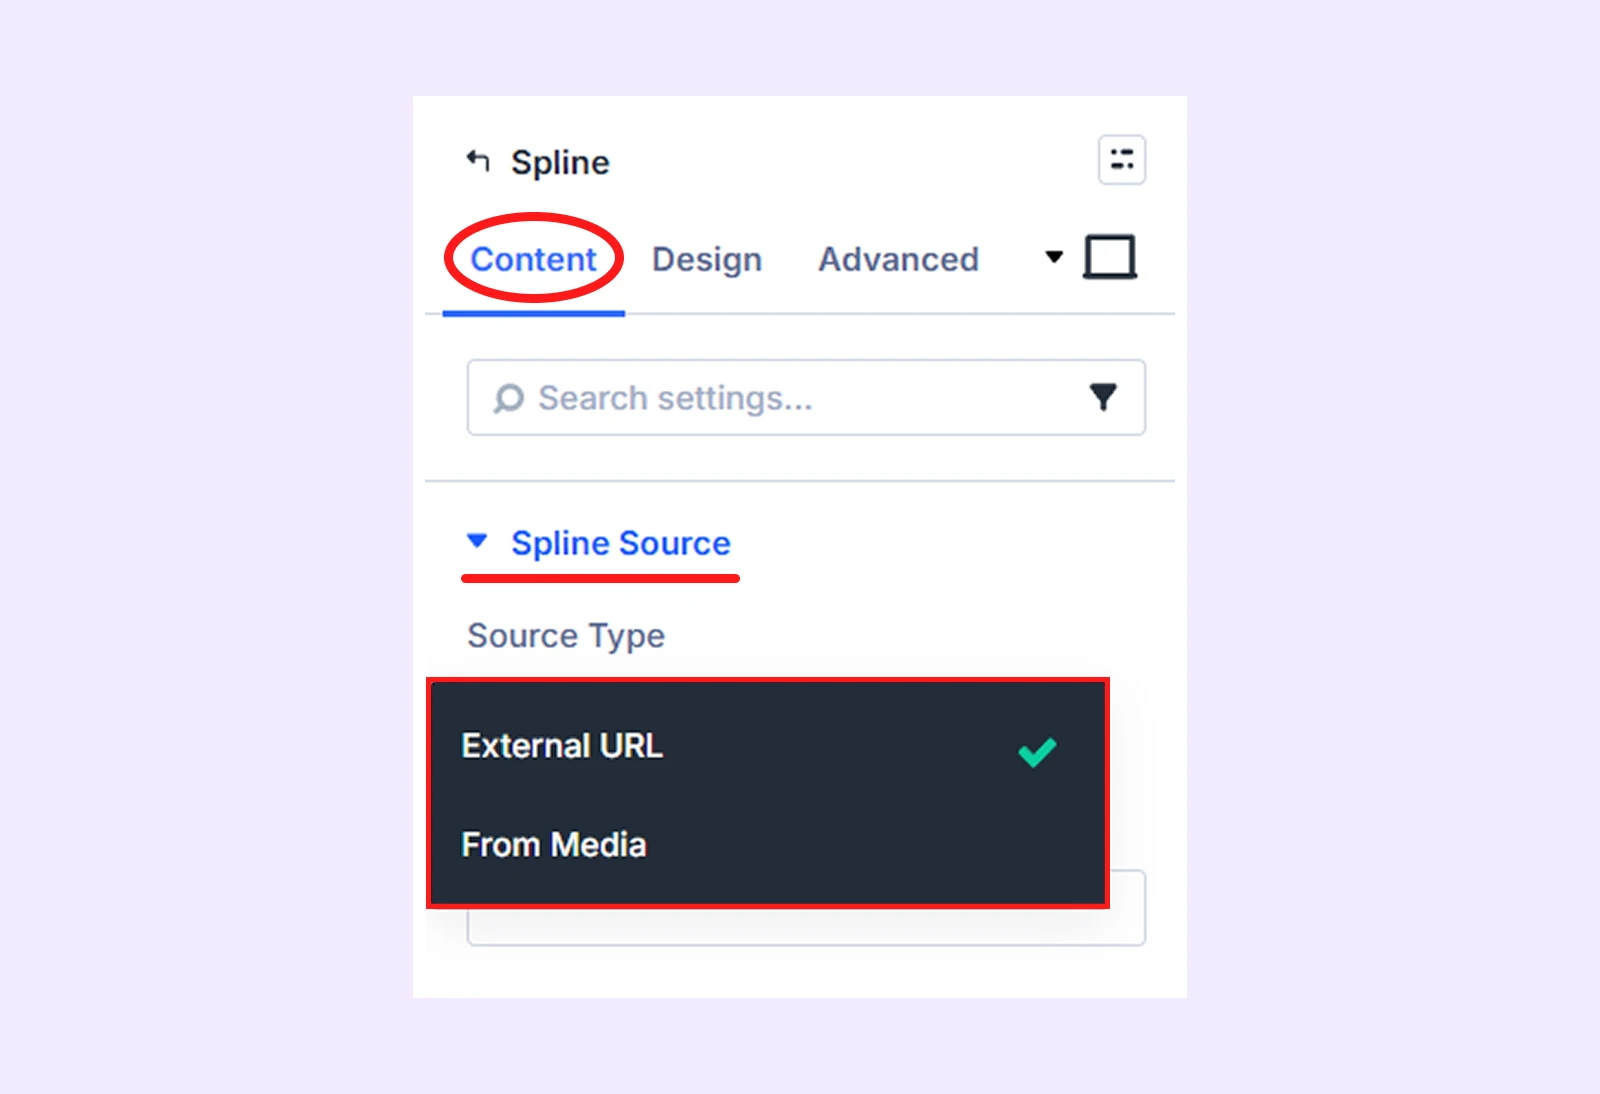
Note: Before uploading a .splinecode file, you need to enable it first. Go to WordPress dashboard > DiviFlash > Settings and enable the .splinecode.
Step 5: Configure the Module Settings
Once your scene is loaded, open the Spline Settings panel to control how the scene behaves.
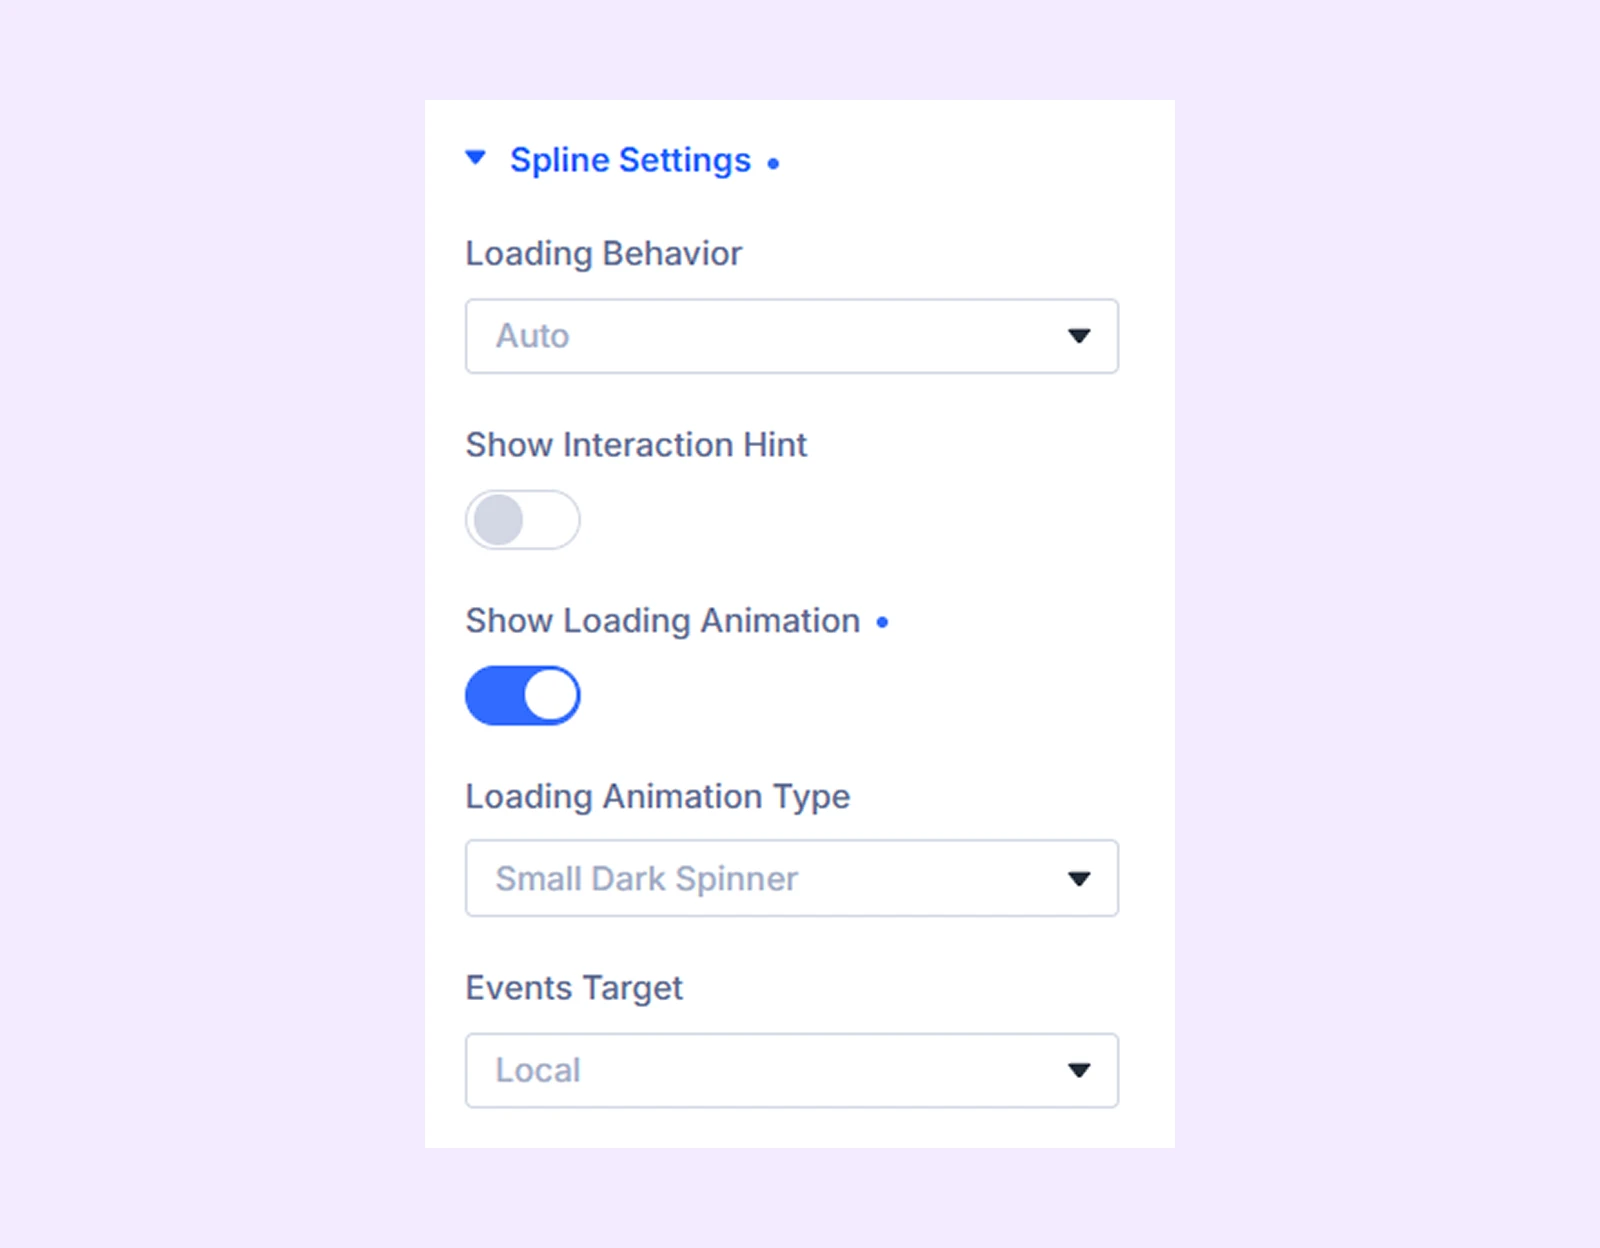
- Loading Behavior: Controls when the scene loads and you will have 3 options:
- Auto: Loads with the page.
- Lazy: Loads when the scene becomes visible on screen (recommended for better performance).
- Eager: Loads as soon as possible.
- Show Interaction Hint: Turn this on to display a hint to let visitors know the scene is interactive.
- Show Loading Animation: Turn this on to show a preloader while the Spline scene is loading. You can choose from 4 loading animation styles.
- Events Target: Controls how the 3D scene responds to mouse movement. You can choose between two following options:
- Local: The scene reacts only when your cursor is over the module. Once you move away, it stops responding.
- Global: The scene reacts to your cursor anywhere on the page, even outside the module area.
Note: In the Design and Advanced tabs, you can further customize the module’s design, spacing, sizing, visibility, and other advanced settings.
Step 6: Save and Publish
Save the page and preview it on the front end. Your Spline scene is now live.
Final Thoughts: Which Method to Choose?
To give you an idea of which method will work best for what, we created a table. Have a look:
| Feature | Divi Built-in Code Module | DiviFlash Spline Module |
| Best for | Basic Spline embeds | Flexible Spline embeds with extra controls |
| Export type needed | Public URL or Viewer embed | Code Export URL or .splinecode file |
| Code required | Yes, you need to paste embed code | No embed code needed |
| Loading control | Needs custom code | Auto, Lazy, and Eager loading options |
| Loading animation | Needs custom code | Built-in loading animation options |
| Interaction hint | Needs custom code | Built-in interaction hint option |
| Mouse event control | Limited to the embed behavior | Local and Global event target options |
| Ease of editing | Less convenient | Easier as settings are available inside the module |
We believe the blog and the table will help you choose the right method for embedding Spline 3D scenes in Divi.
It’s always better to go for a plugin as it offers more flexibility, better design control, better performance control, and easier editing without needing to touch code.
While 3D scenes look great, they can slow down your site. And if you need a lighter option, you can also consider lottie. We have a detailed guide on Spline vs Lottie to help you choose the right option for your website.


0 Comments