

To create an evergreen countdown timer in Divi, you will need DiviFlash’s Advanced Countdown Timer. That’s because Divi’s Countdown Timer module only allows to create fixed-date countdowns.
An evergreen countdown works differently. It gives each visitor their own deadline, such as 24 hours from their first visit. It saves a cookie in the visitor's browser so the timer continues when they return later.
Now, we will walk through the full process of creating an evergreen countdown timer in Divi step by step.
Let’s dive in.
Our Created Evergreen Countdown Timer
To show you the creation process of the evergreen countdown timer in Divi, we will create the following design.

Note: We will only cover the countdown timer setup. You can download the complete design for free from DiviFlash’s Advanced Countdown Timer demo page.
Required Setup
Before starting, make sure the following are ready:
- Latest version of Divi (Divi 5) is installed and activated.
- DiviFlash version 5.2.0 or higher is installed and activated.
Once these are ready, let’s start building.
Step 1: Add Advanced Countdown Timer Module
Open the page where you want to display the evergreen timer and click Enable Visual Builder. Then:
- Add a Section, Row, and Column
- Click the + icon
- Search for Advanced Countdown Timer
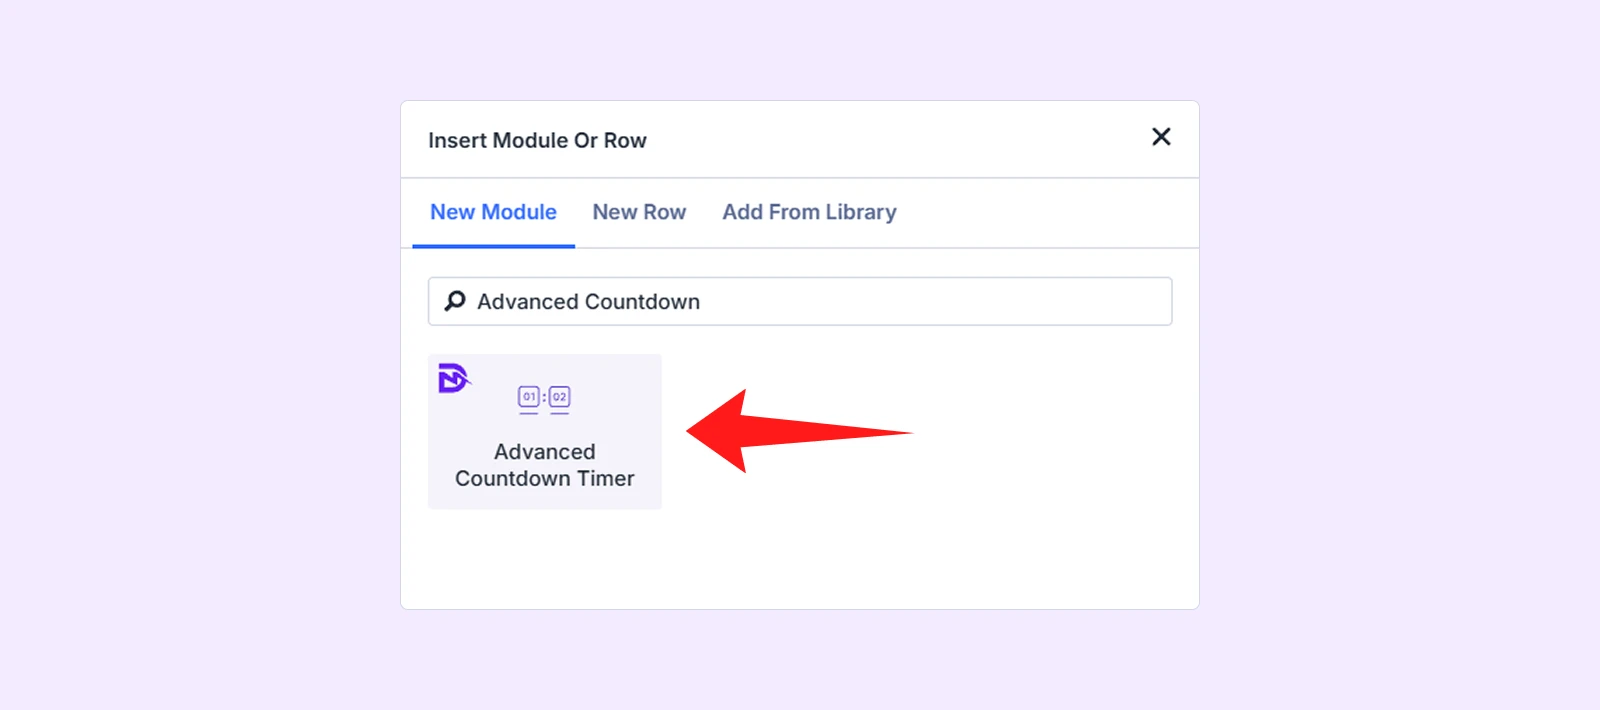
- Insert the module
Note: If you cannot find the module, go to WordPress Dashboard > DiviFlash > Modules and toggle on Advanced Countdown Timer.
Step 2: Choose Evergreen as the Countdown Type
Inside the module settings, go to: Content Tab > General Settings > Countdown Type and from the dropdown menu, select Evergreen.
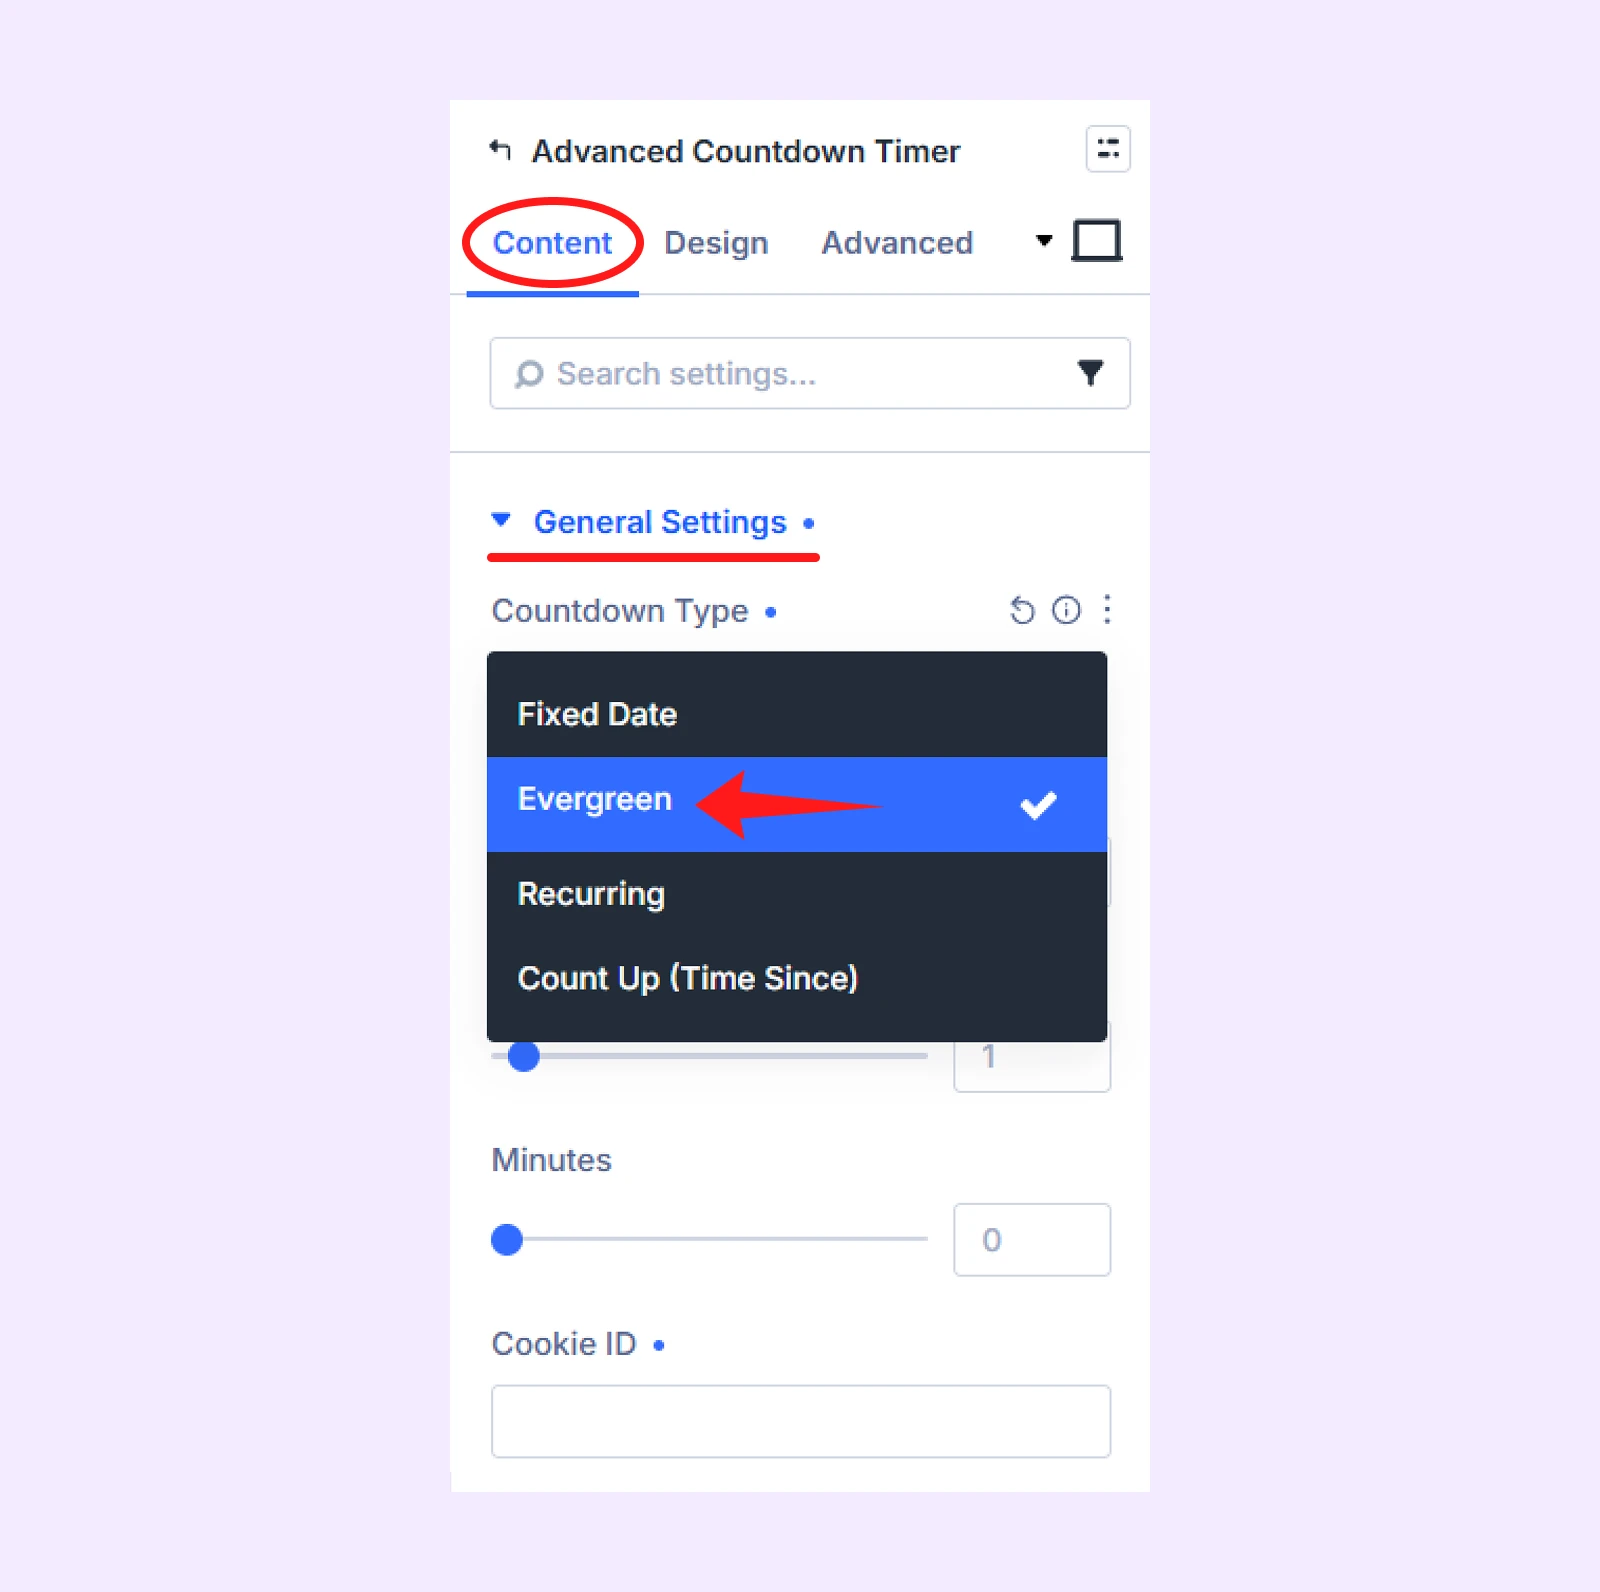
Note: Inside the General Settings, you will also find other options like fixed-date, recurring settings and count up.
Step 3: Set the Countdown Duration
After selecting Evergreen, set how long the timer should run for each visitor. Available fields:
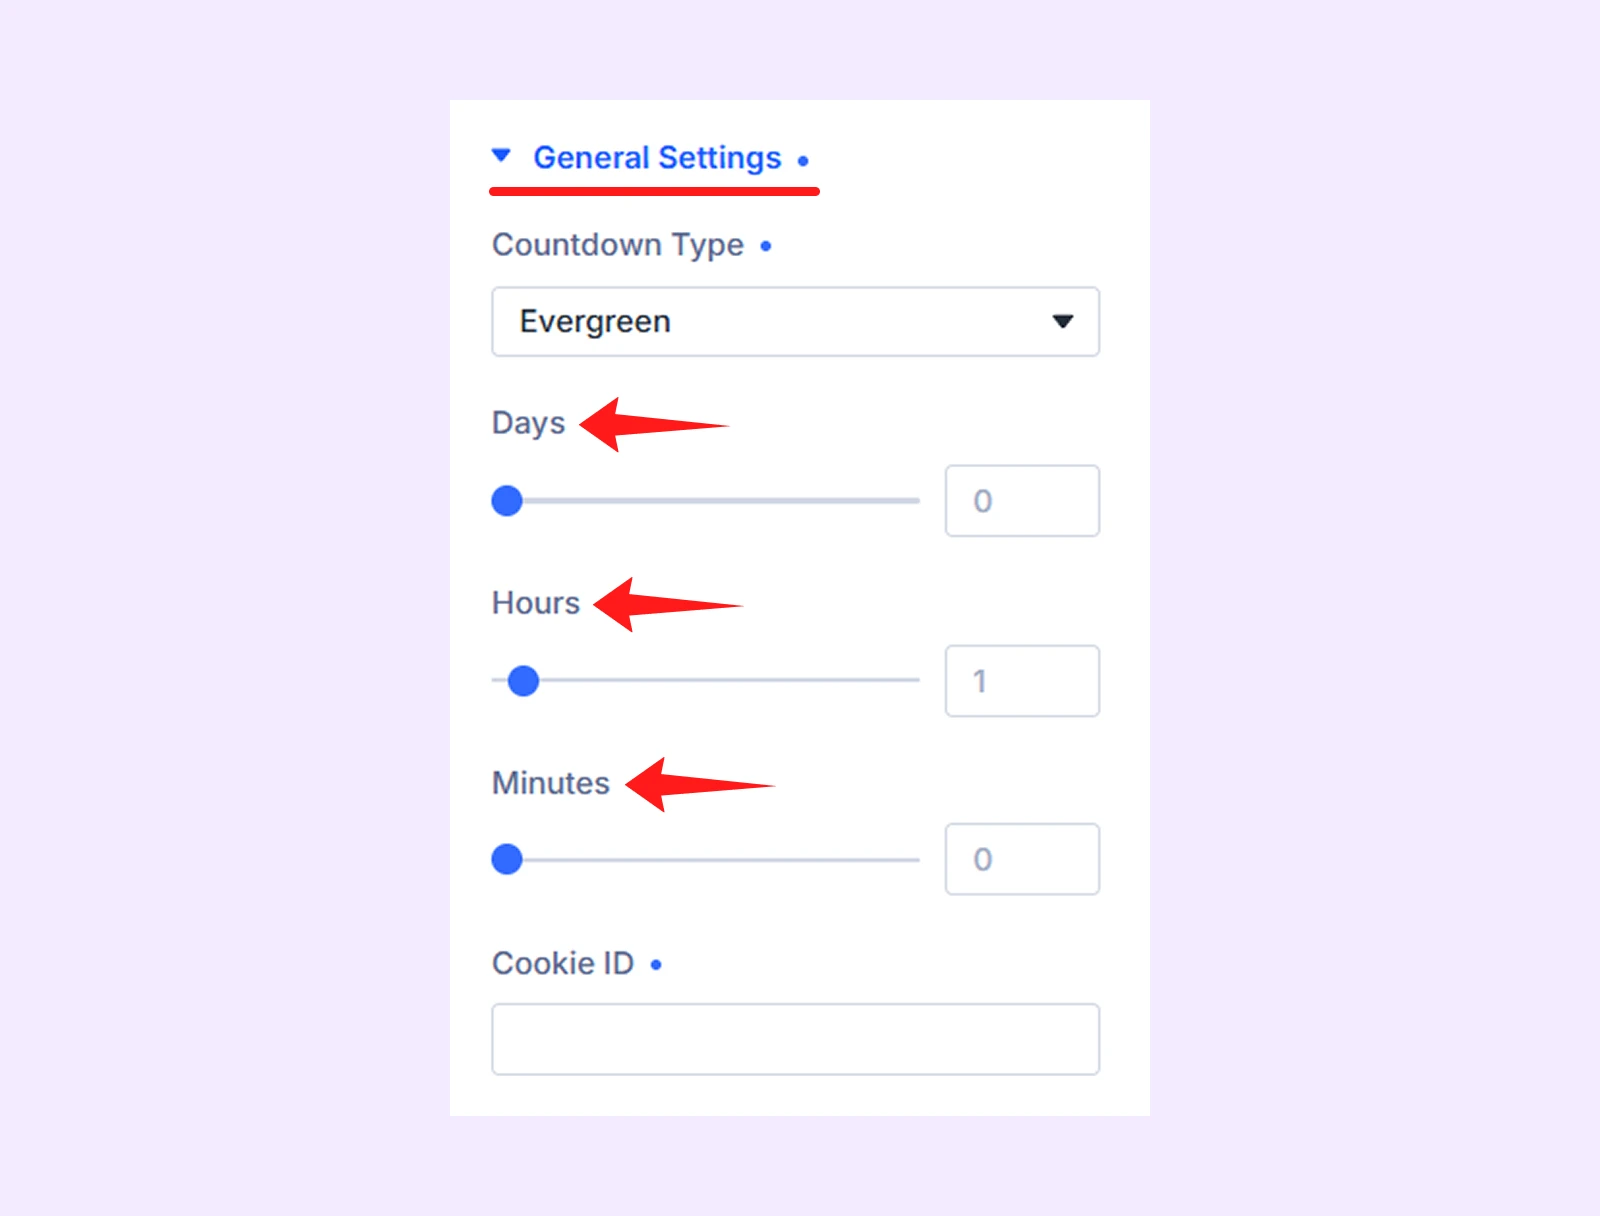
- Days
- Hours
- Minutes
You can use one or combine multiple values depending on your campaign.
Step 4: Set the Cookie ID
The Cookie ID remembers each visitor’s countdown progress, so the timer does not restart when they revisit.
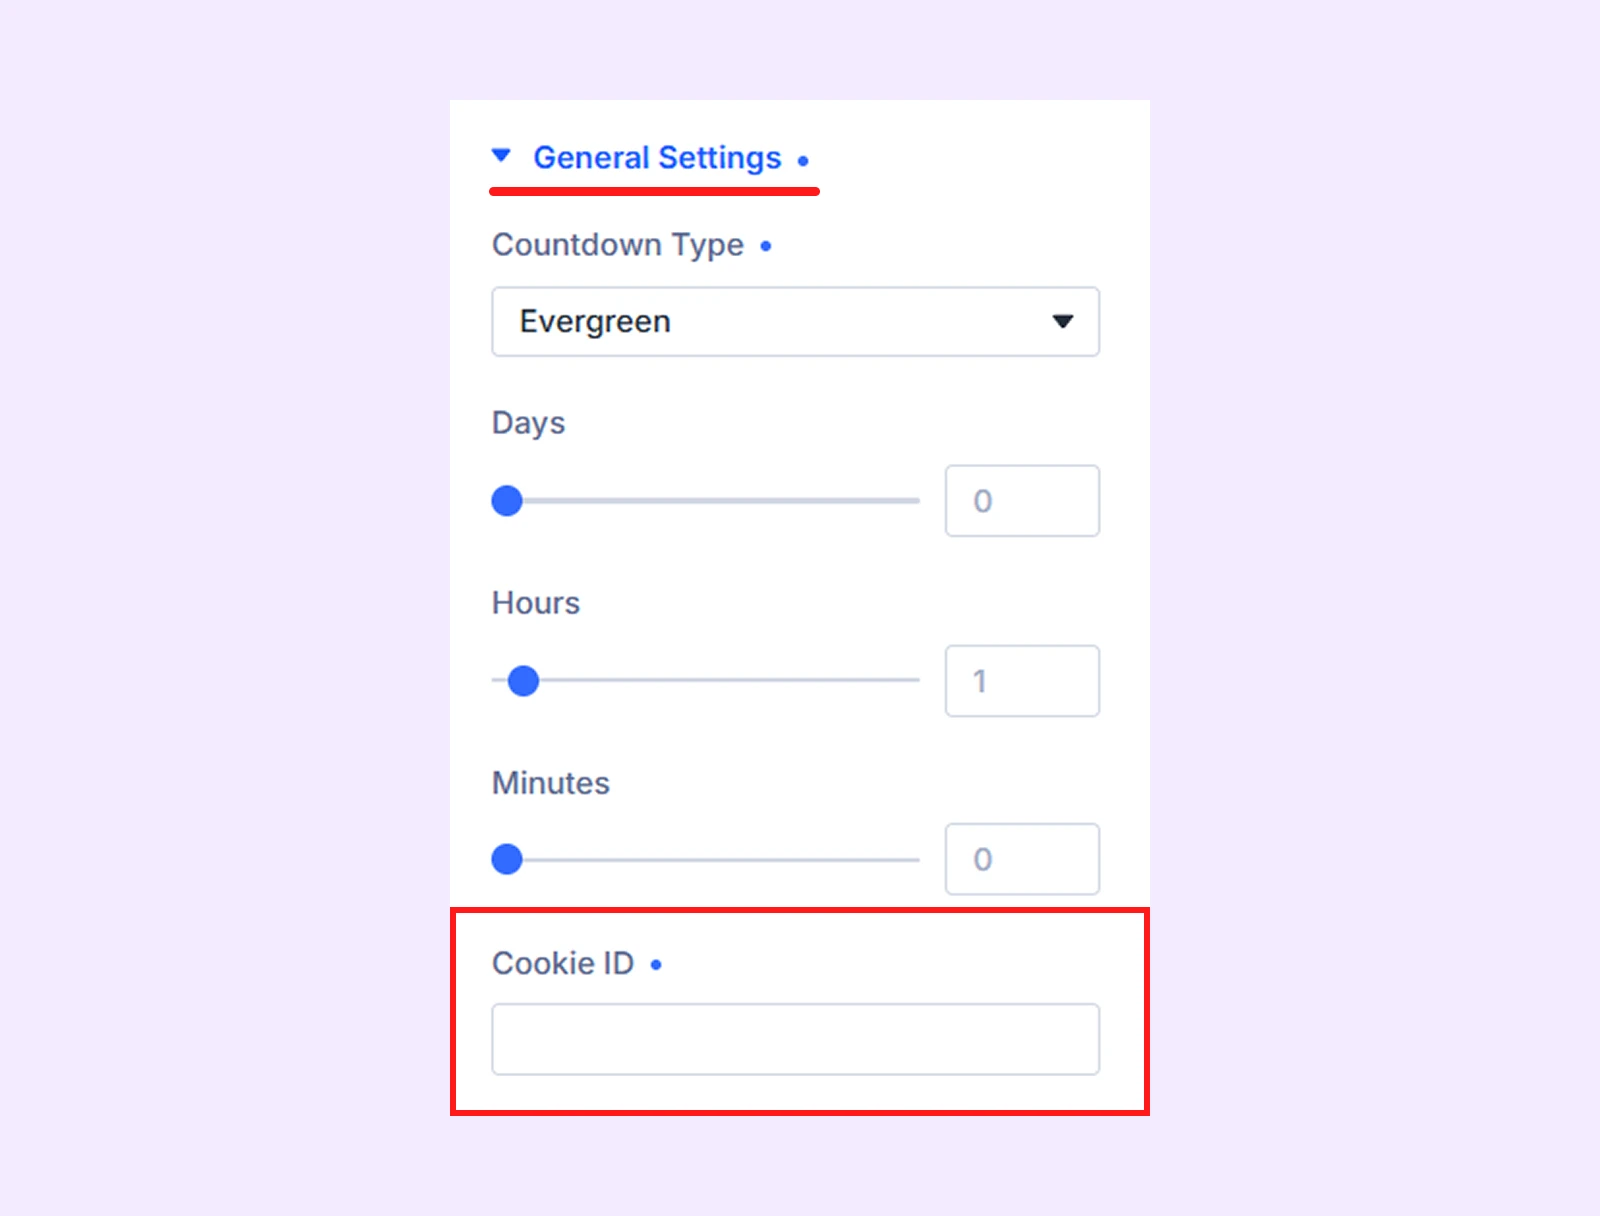
You can either:
- Leave it blank: The module will automatically create a unique timer for each instance.
- Add a custom Cookie: You can assign a custom cookie name for the timer.
Step 5: Choose Which Time Units to Display
Next, go to the Display Units settings and select the time units you want to display. And the available options are:
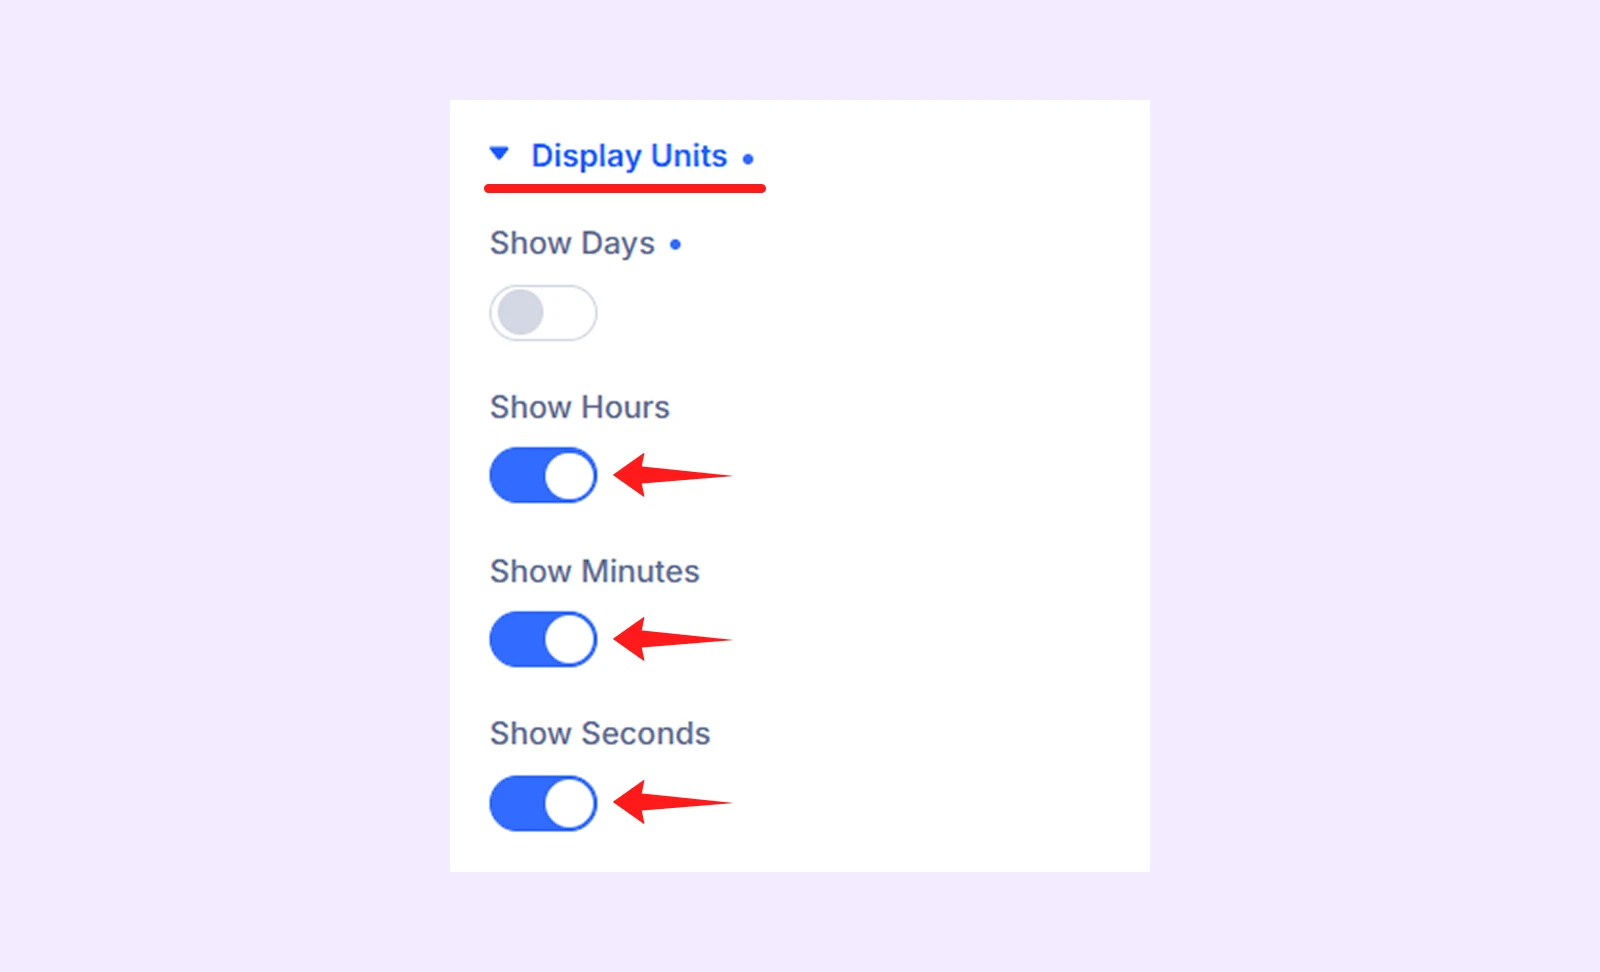
- Days
- Hours
- Minutes
- Seconds
Note: To meet our demo design, we are using hours, minutes and seconds.
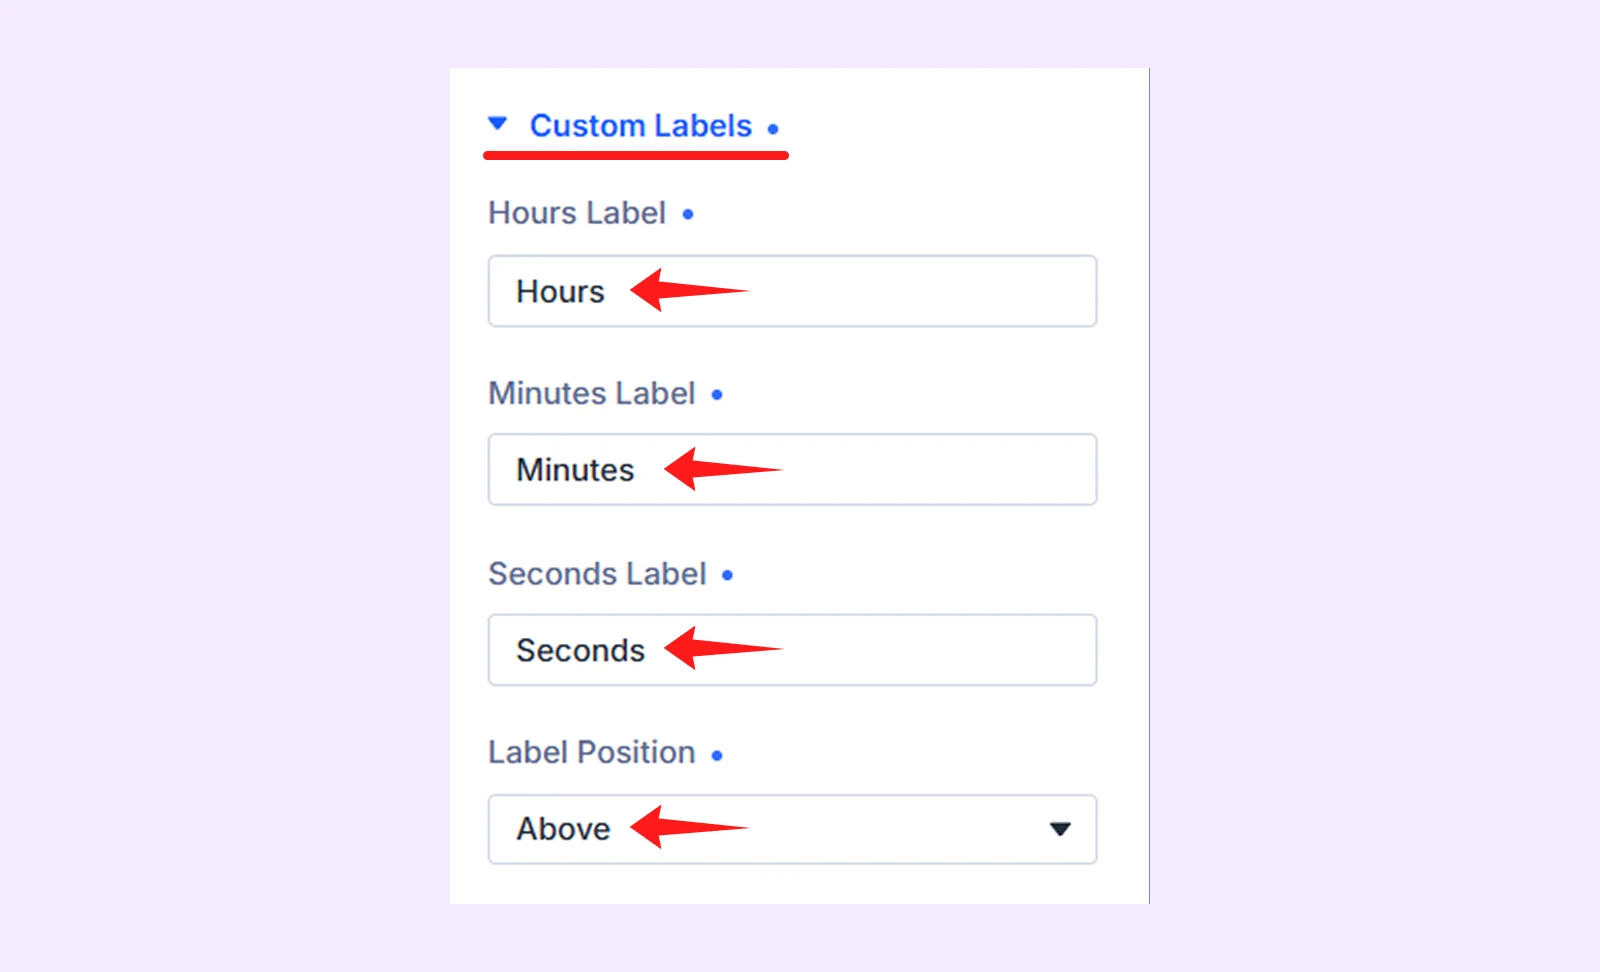
Step 6: Customize the Countdown Labels
Click on Custom Labels and change the text for each time unit.
- Label Position: This lets you set where the labels appear on the countdown timer.
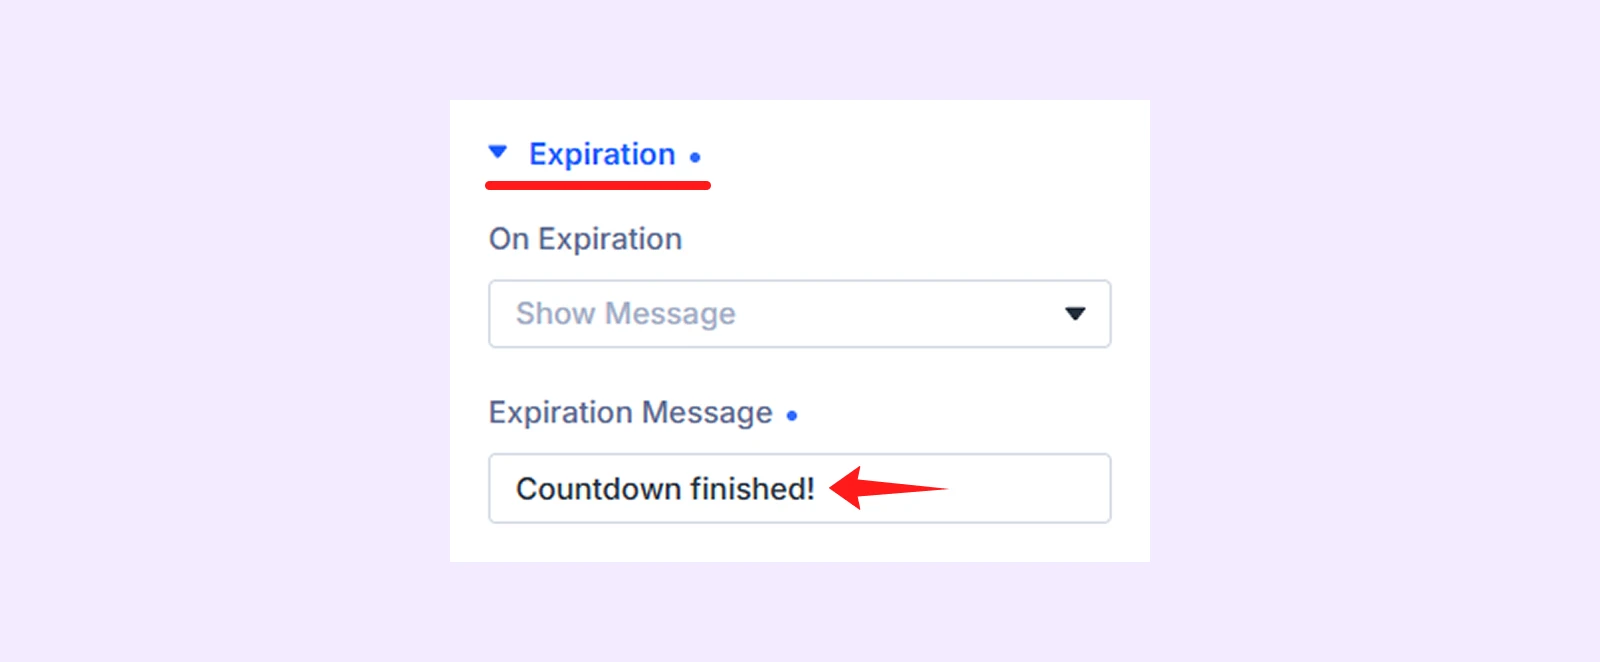
Step 7: Choose What Happens When the Timer Expires
Choose what should happen when the countdown reaches zero. Available options:
- Show Message: Display a custom message.
- Redirect: Send visitors to another page.
- Hide Timer: Remove the timer from view.
- Reset: Restart the countdown automatically.
To meet our demo design, we selected “show message"
Step 8: Customize the Timer’s Appearance
Advanced Countdown Timer comes with tons of design and styling options in module settings’ Design tab. To match our demo design, we will apply the following styling settings.
8.1: Set Countdown Style
To set countdown timer’s style, click on Countdown Style and adjust the following settings:
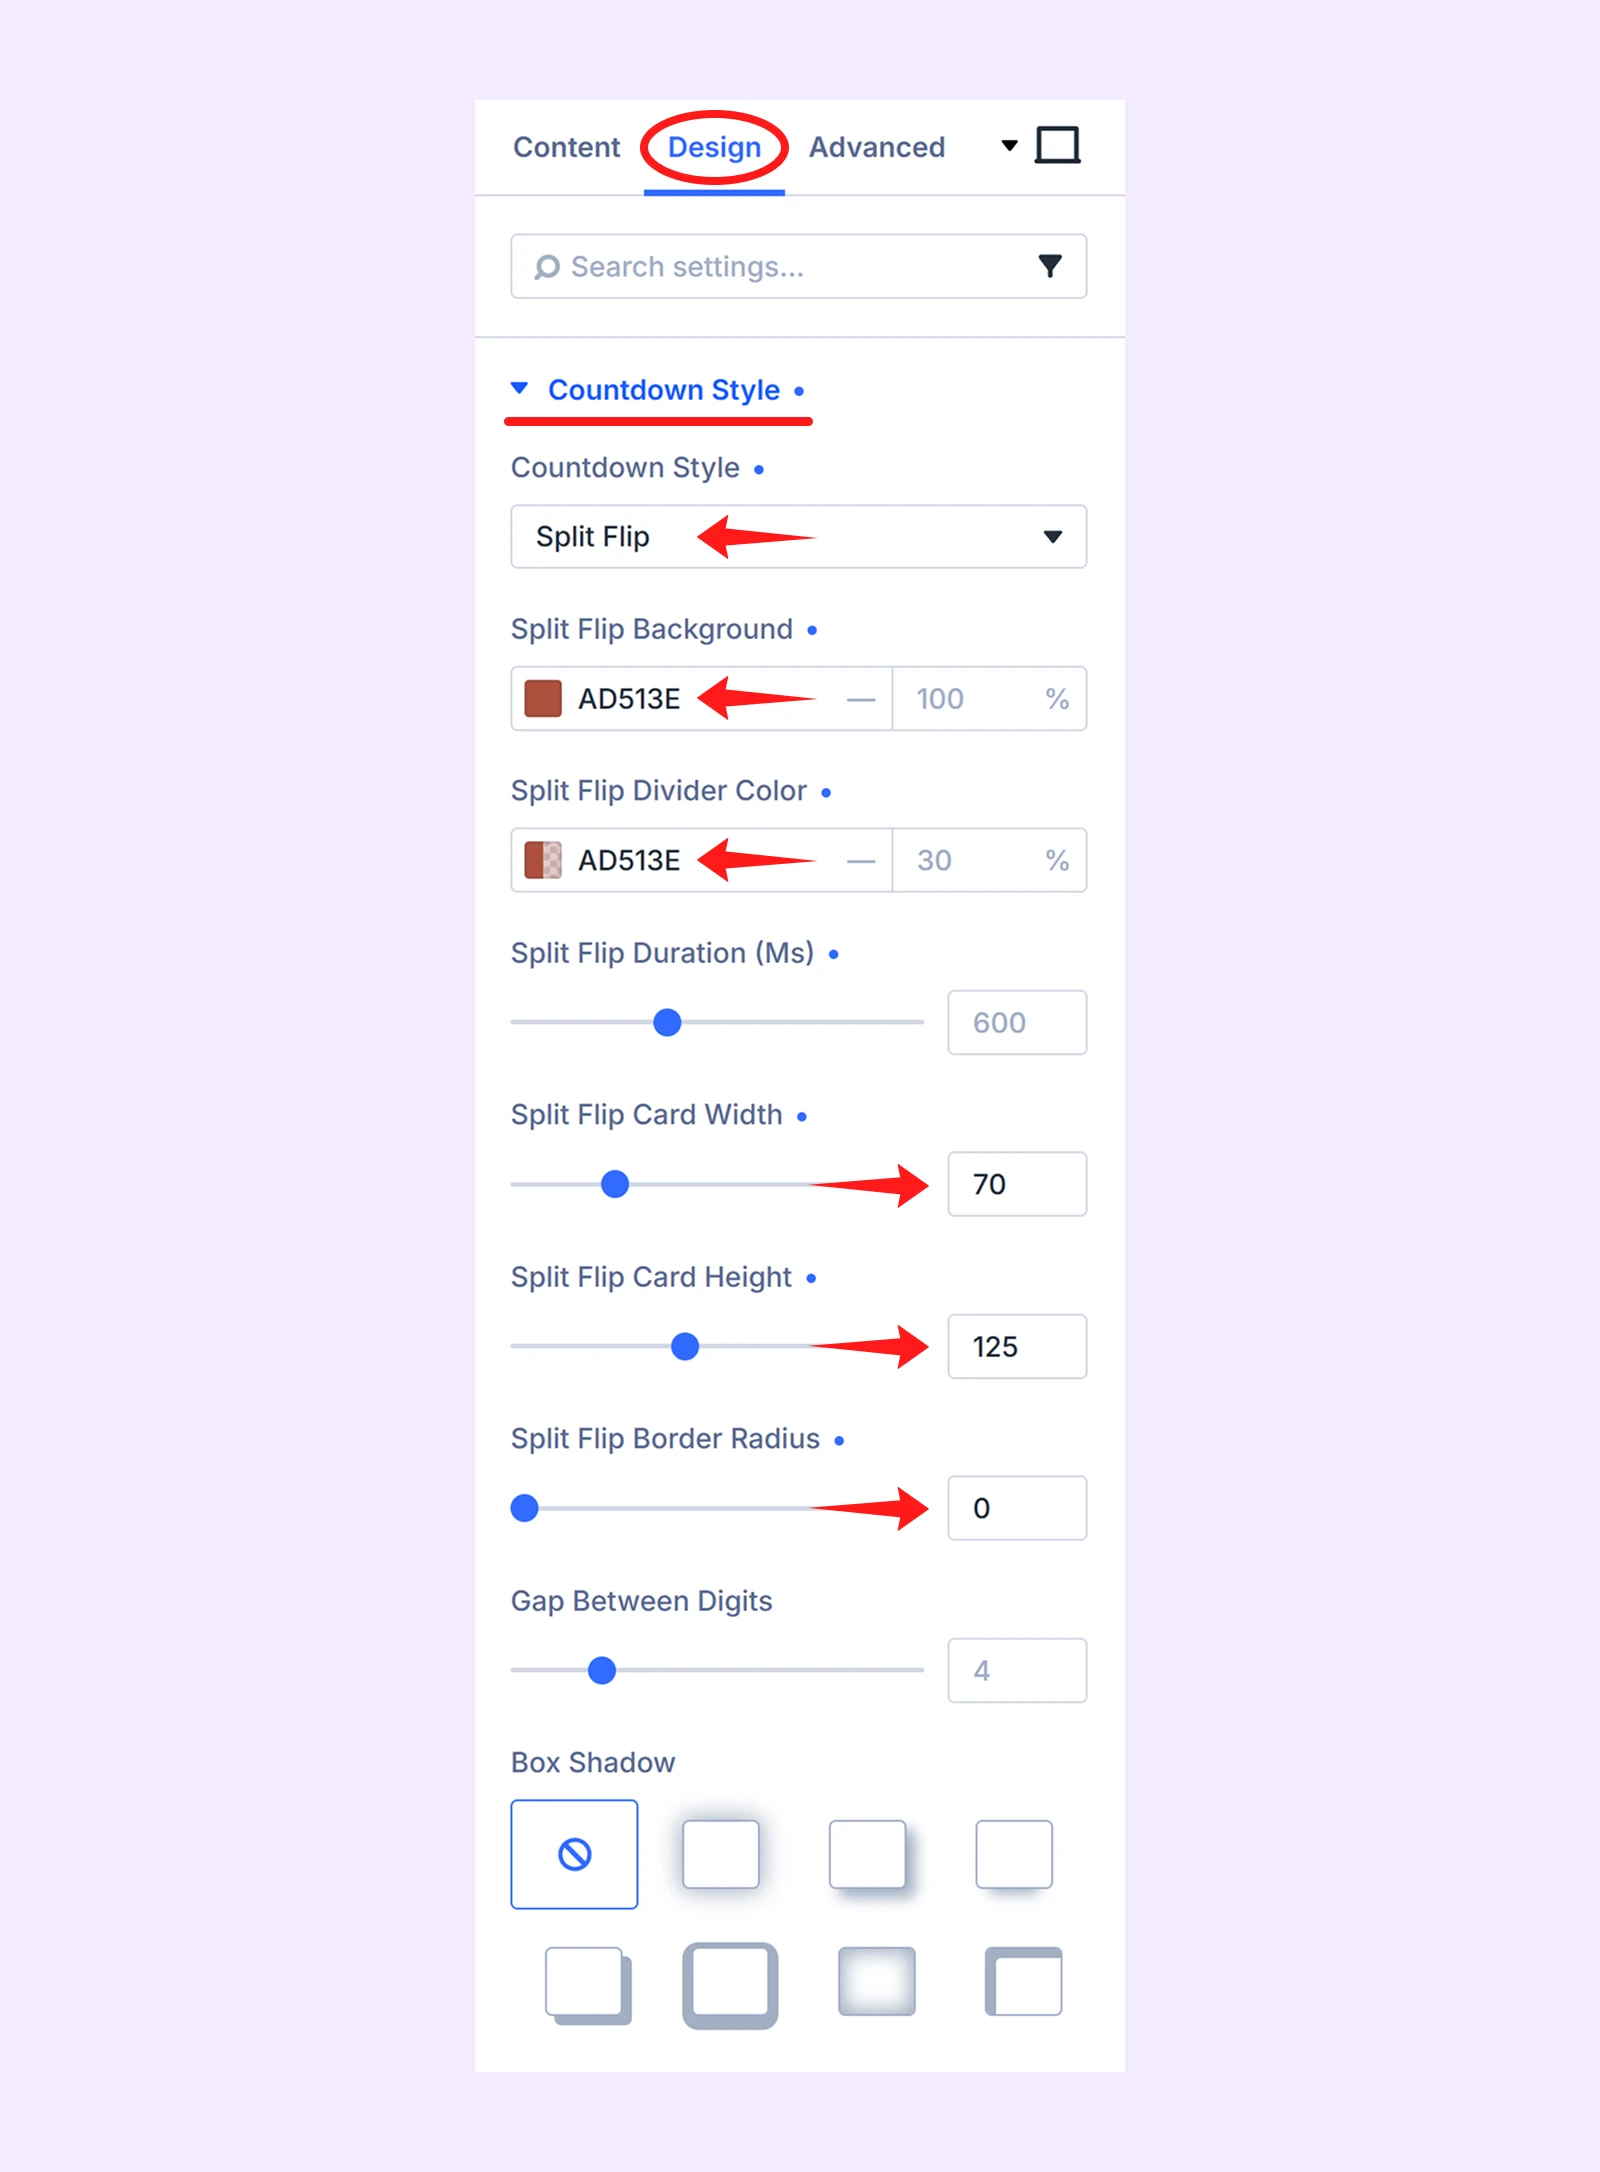
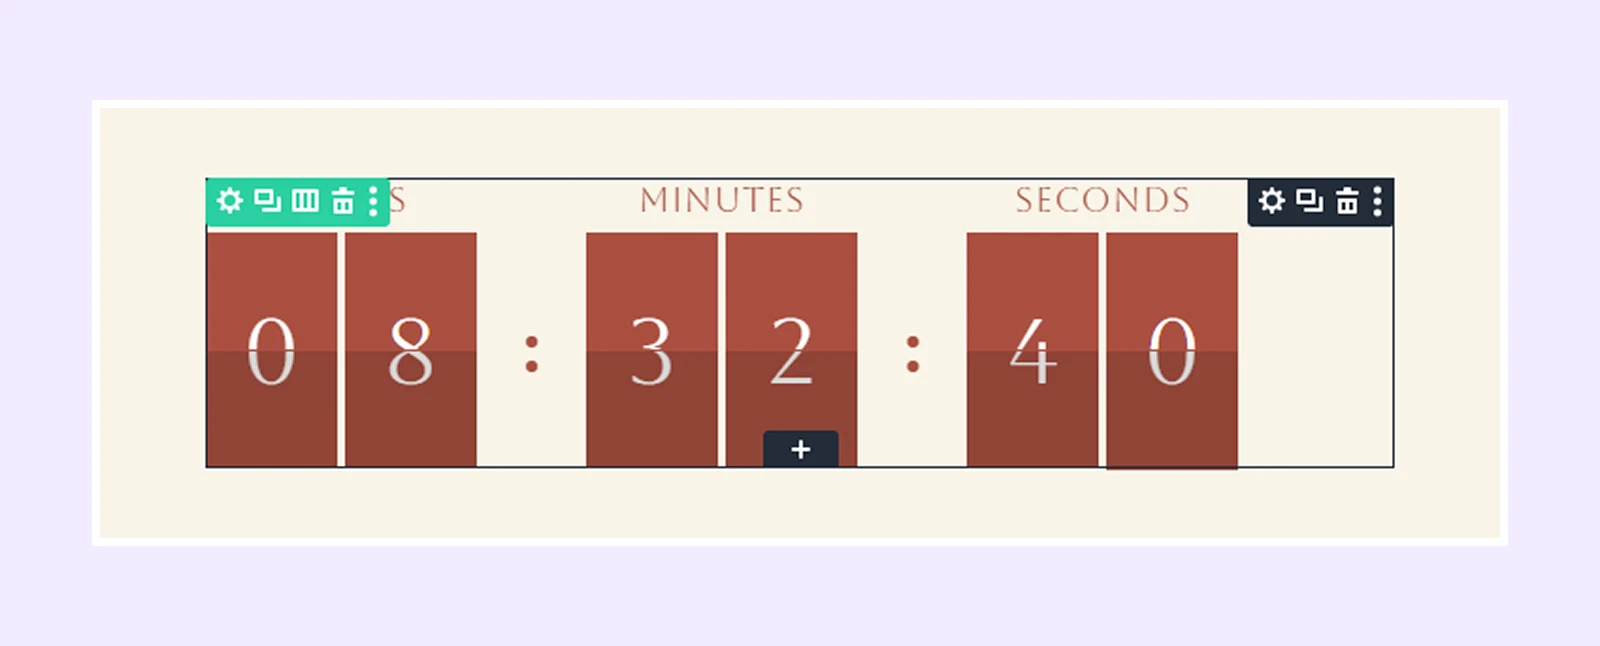
- Countdown Style: Split Flip (there are 4 other styles to choose from)
- Split Flip Background: ad513e
- Split Flip Divider Color: ad513e
- Split Flip Card Width: 70
- Split Flip Card Height: 125
- Split Flip Border Radius: 0
8.2: Adjust Layout Style
Click on “Layout” and make these changes:
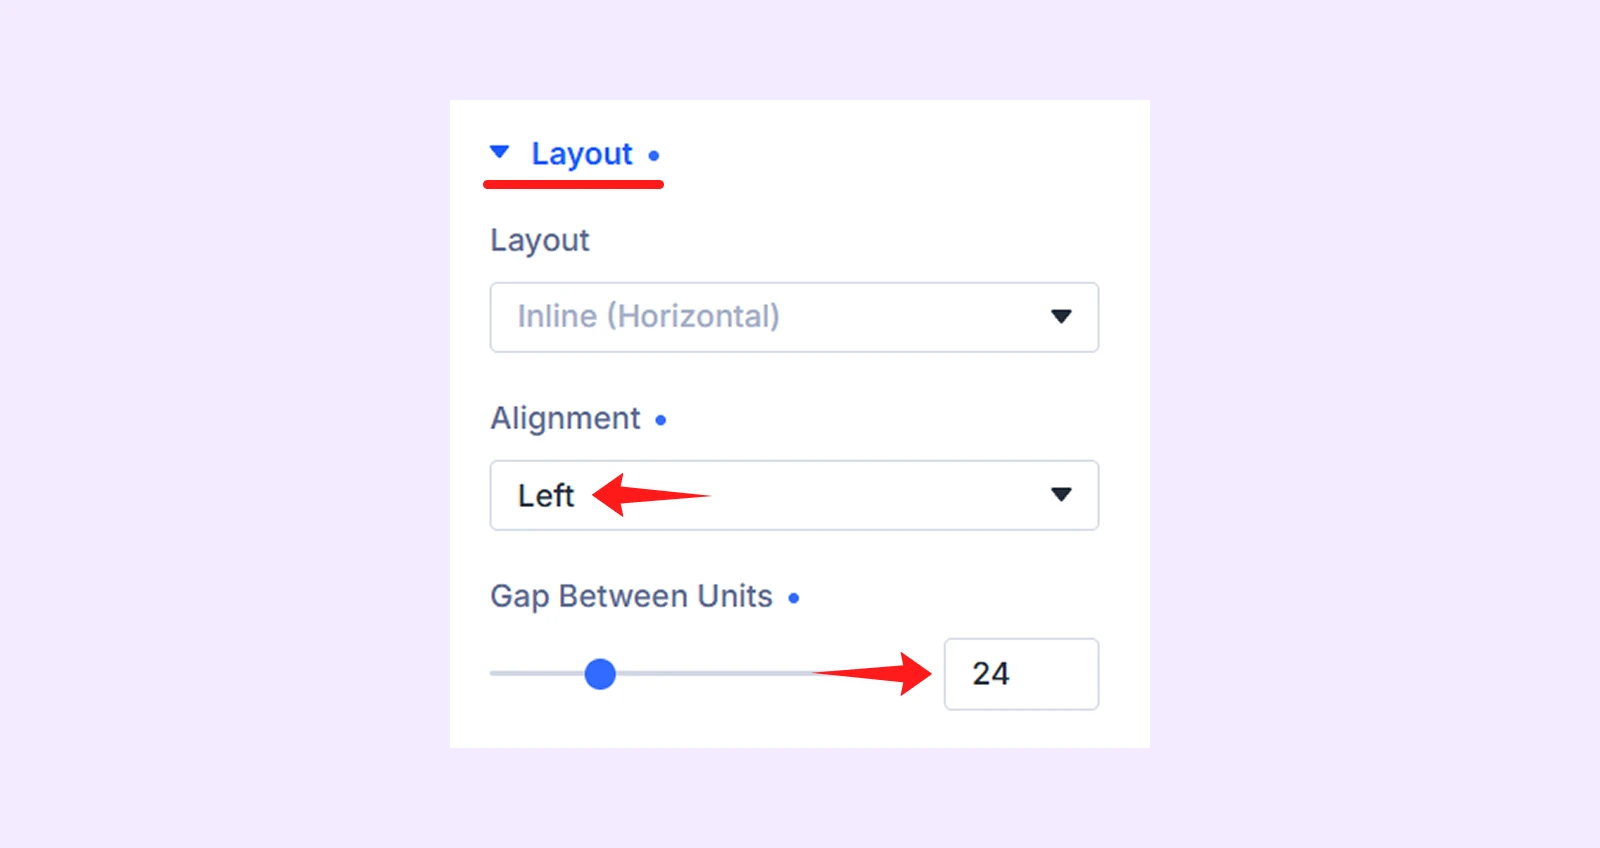
- Alignment: Left
- Gap Between Lines: 24
8.3: Adjust Typhography
Click on “Typhography” in the Design tab and make the following changes:
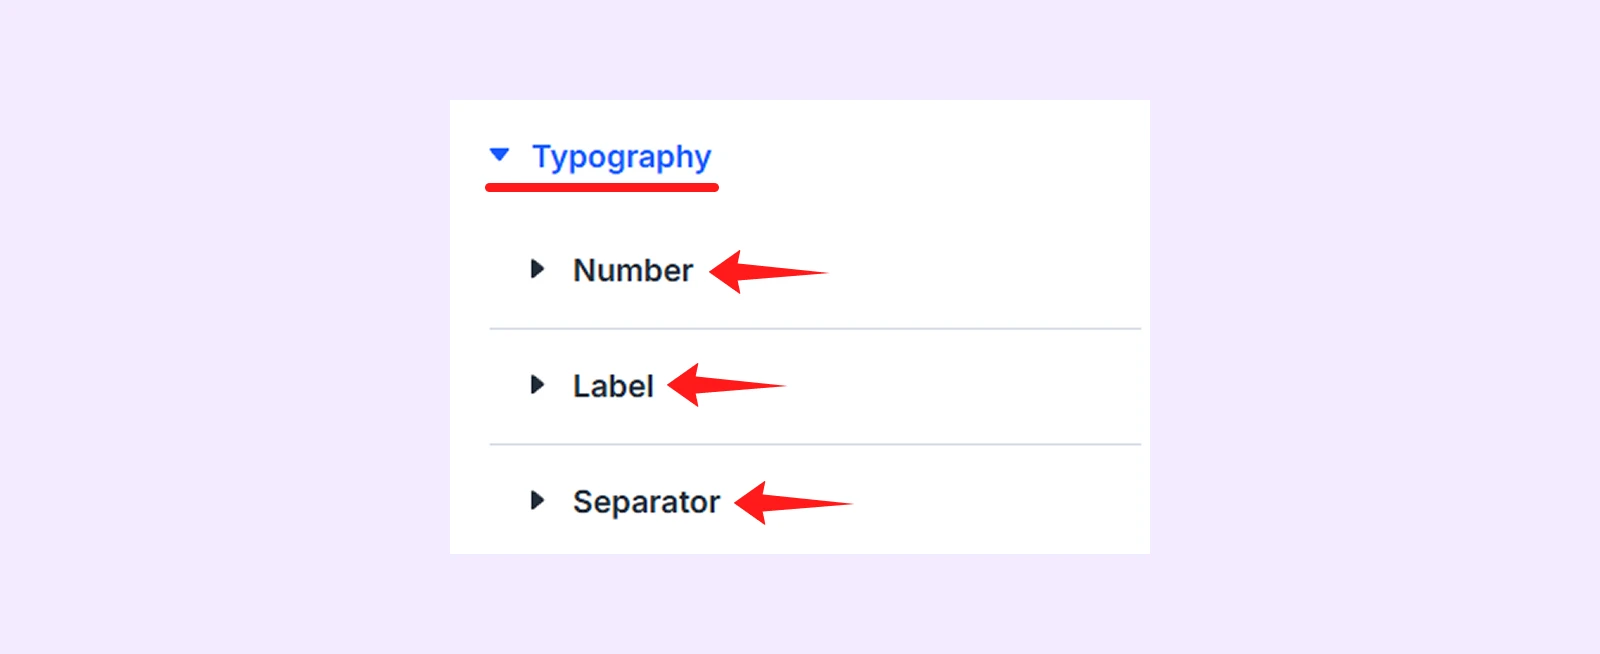
- Number: Font (ABORETO), Text Color (FFFFFF), Text Size (48 px), Line Height (100%)
- Label: Font (ABORETO), Text Color (ad513e), Text Size (18 px), Line Height (130%)
- Separator: Text Color (ad513e)
8.4: Style the Separator
Click on “Separator” and make the following changes:
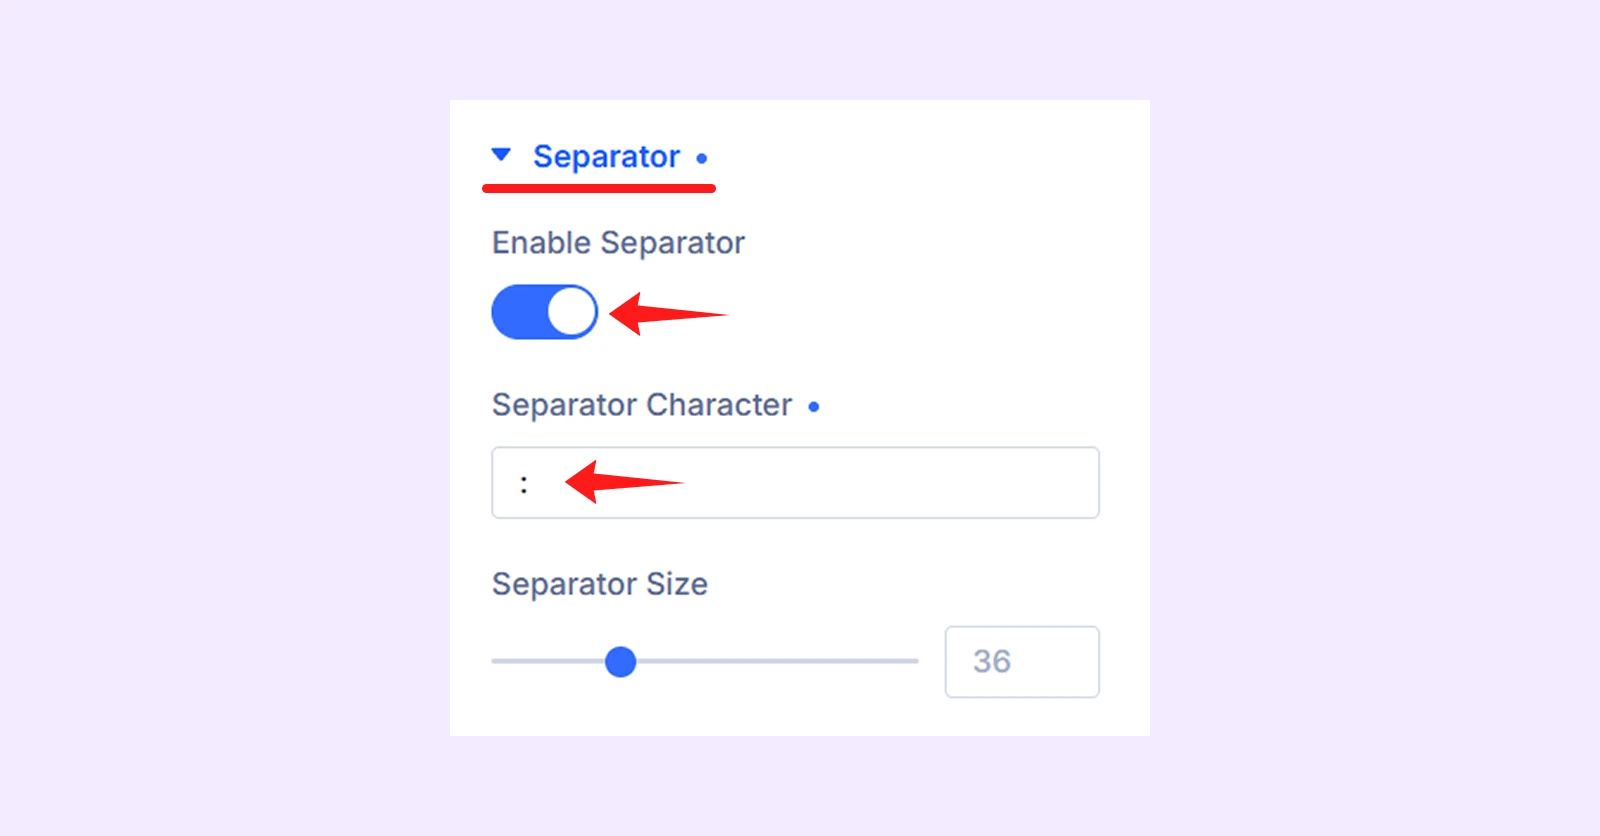
- Enable Separator: Toggle on
- Separator Character: “:”
8.5: Adjust Spacing
In the Design tab, click on “Spacing” and make these changes:
- Margin: 60 (Bottom)
That’s it. Now you should see the fully styled evergreen countdown timer matching the demo design. Something like:
Step 9: Save & Publish
Once you are satisfied with all the settings and styling, click the Save button in the Divi Builder and then Publish or Update the page.
Evergreen vs Fixed Countdown Timer
We included this section to help you understand the difference between evergreen and fixed countdown timers.
| Factor | Fixed Countdown Timer | Evergreen Countdown Timer |
| Deadline Type | Same deadline for all visitors | Separate deadline for each visitor |
| How It Starts | Based on a selected date and time | Based on the visitor’s first visit or action |
| Visitor Experience | Everyone sees the same remaining time | Each visitor sees their own remaining time |
| Tracking | Does not need cookies | Uses cookies to remember the visitor’s deadline |
| Best For | Public sales, event launches, ticket releases, seasonal campaigns | Personal offers, lead funnels, webinar replays, cart recovery, limited-time bonuses |
FAQ
- Does the evergreen timer reset if a visitor clears their cookies?
Yes. If a visitor clears their cookies, the evergreen timer can reset because cookies are used to remember that visitor’s countdown deadline.
- What happens when the countdown reaches zero?
When the countdown reaches zero, you can choose an expiry action. You can show a message, redirect visitors to another page, hide the timer, or reset the countdown.
- Does the evergreen timer work with Divi 5?
Yes. DiviFlash’s Advanced Countdown Timer works with Divi 5 (doesn’t support Divi 4). Make sure you are using the latest version of Divi and DiviFlash.
- Can I use multiple evergreen timers on the same page?
Yes. You can use multiple evergreen timers on the same page. Leave the Cookie ID blank to let each timer work separately, or use the same Cookie ID if you want multiple timers to share the same countdown.
Final Thoughts
Now you know how to create evergreen countdown timer in Divi using DiviFlash’s Advanced Countdown Timer. We used the plugin as it provides evergreen countdown functionality that Divi’s default module doesn’t offer.
Just get the plugin and then start creating your countdown timer. By using the same module, you can also create fixed date, recurring and even count up (time since) time as well.
It’s like a complete module that will serve almost all the countdown timer related needs. You can also room around the module’s demo design page to see the possibilities.
If you're looking to add more dynamic, attention-grabbing elements to your page alongside the timer, check out our guide on how to add animated number counter in Divi. It's another great way to highlight stats or milestones right next to your countdown.


0 Comments