
DiviFlash Gravity Forms Styler module lets you customize the appearance of your Gravity Forms directly inside the Divi Builder.
Activation Required: This module is disabled by default. To use it, you need to enable it manually. Refer to our guide for step-by-step instructions.
Let’s see the settings in brief and how to make better use of it —
Note: Before using this module, you must install and activate the Gravity Forms plugin.
Content Tab
This tab contains the settings for selecting and configuring the form.
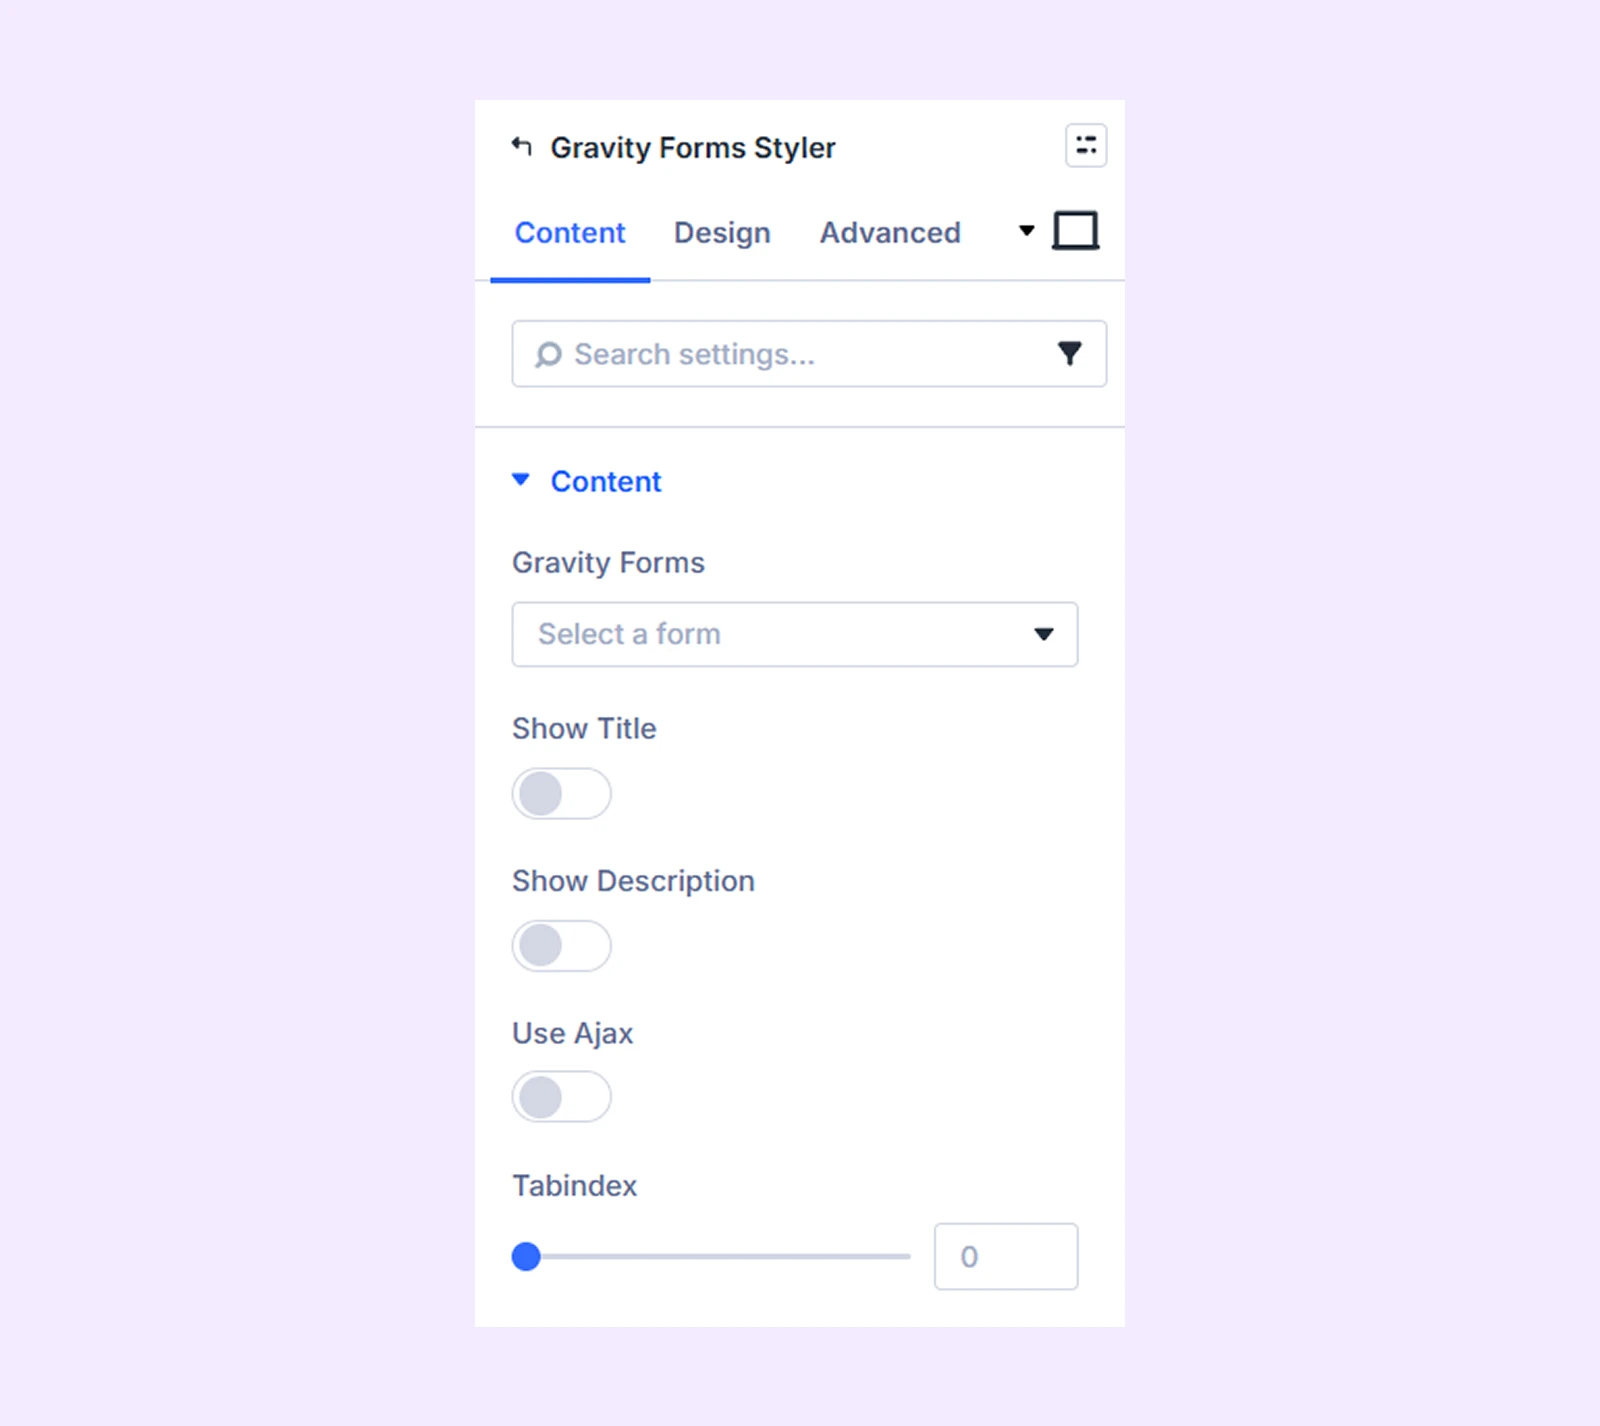
Content
- Gravity Forms: Select the form you want to style. If no forms are available, you must first create one using the Gravity Forms plugin.
- Show Title: Enable this option to display the form title.
- Show Description: Enable this option to display the form description.
- Use Ajax: Enable AJAX form submission so the form submits without reloading the page and shows the confirmation message instantly.
- Tabindex: Define the tabindex value to control the tab order of form fields.
Link: Use this default Divi setting to add a link to the entire module.
Background: Add a background color, gradient, image, video, pattern, or mask to the module.
Element Label: Rename the module to organize it more easily in the Divi Builder. (Only you can see this label.)
Design Tab
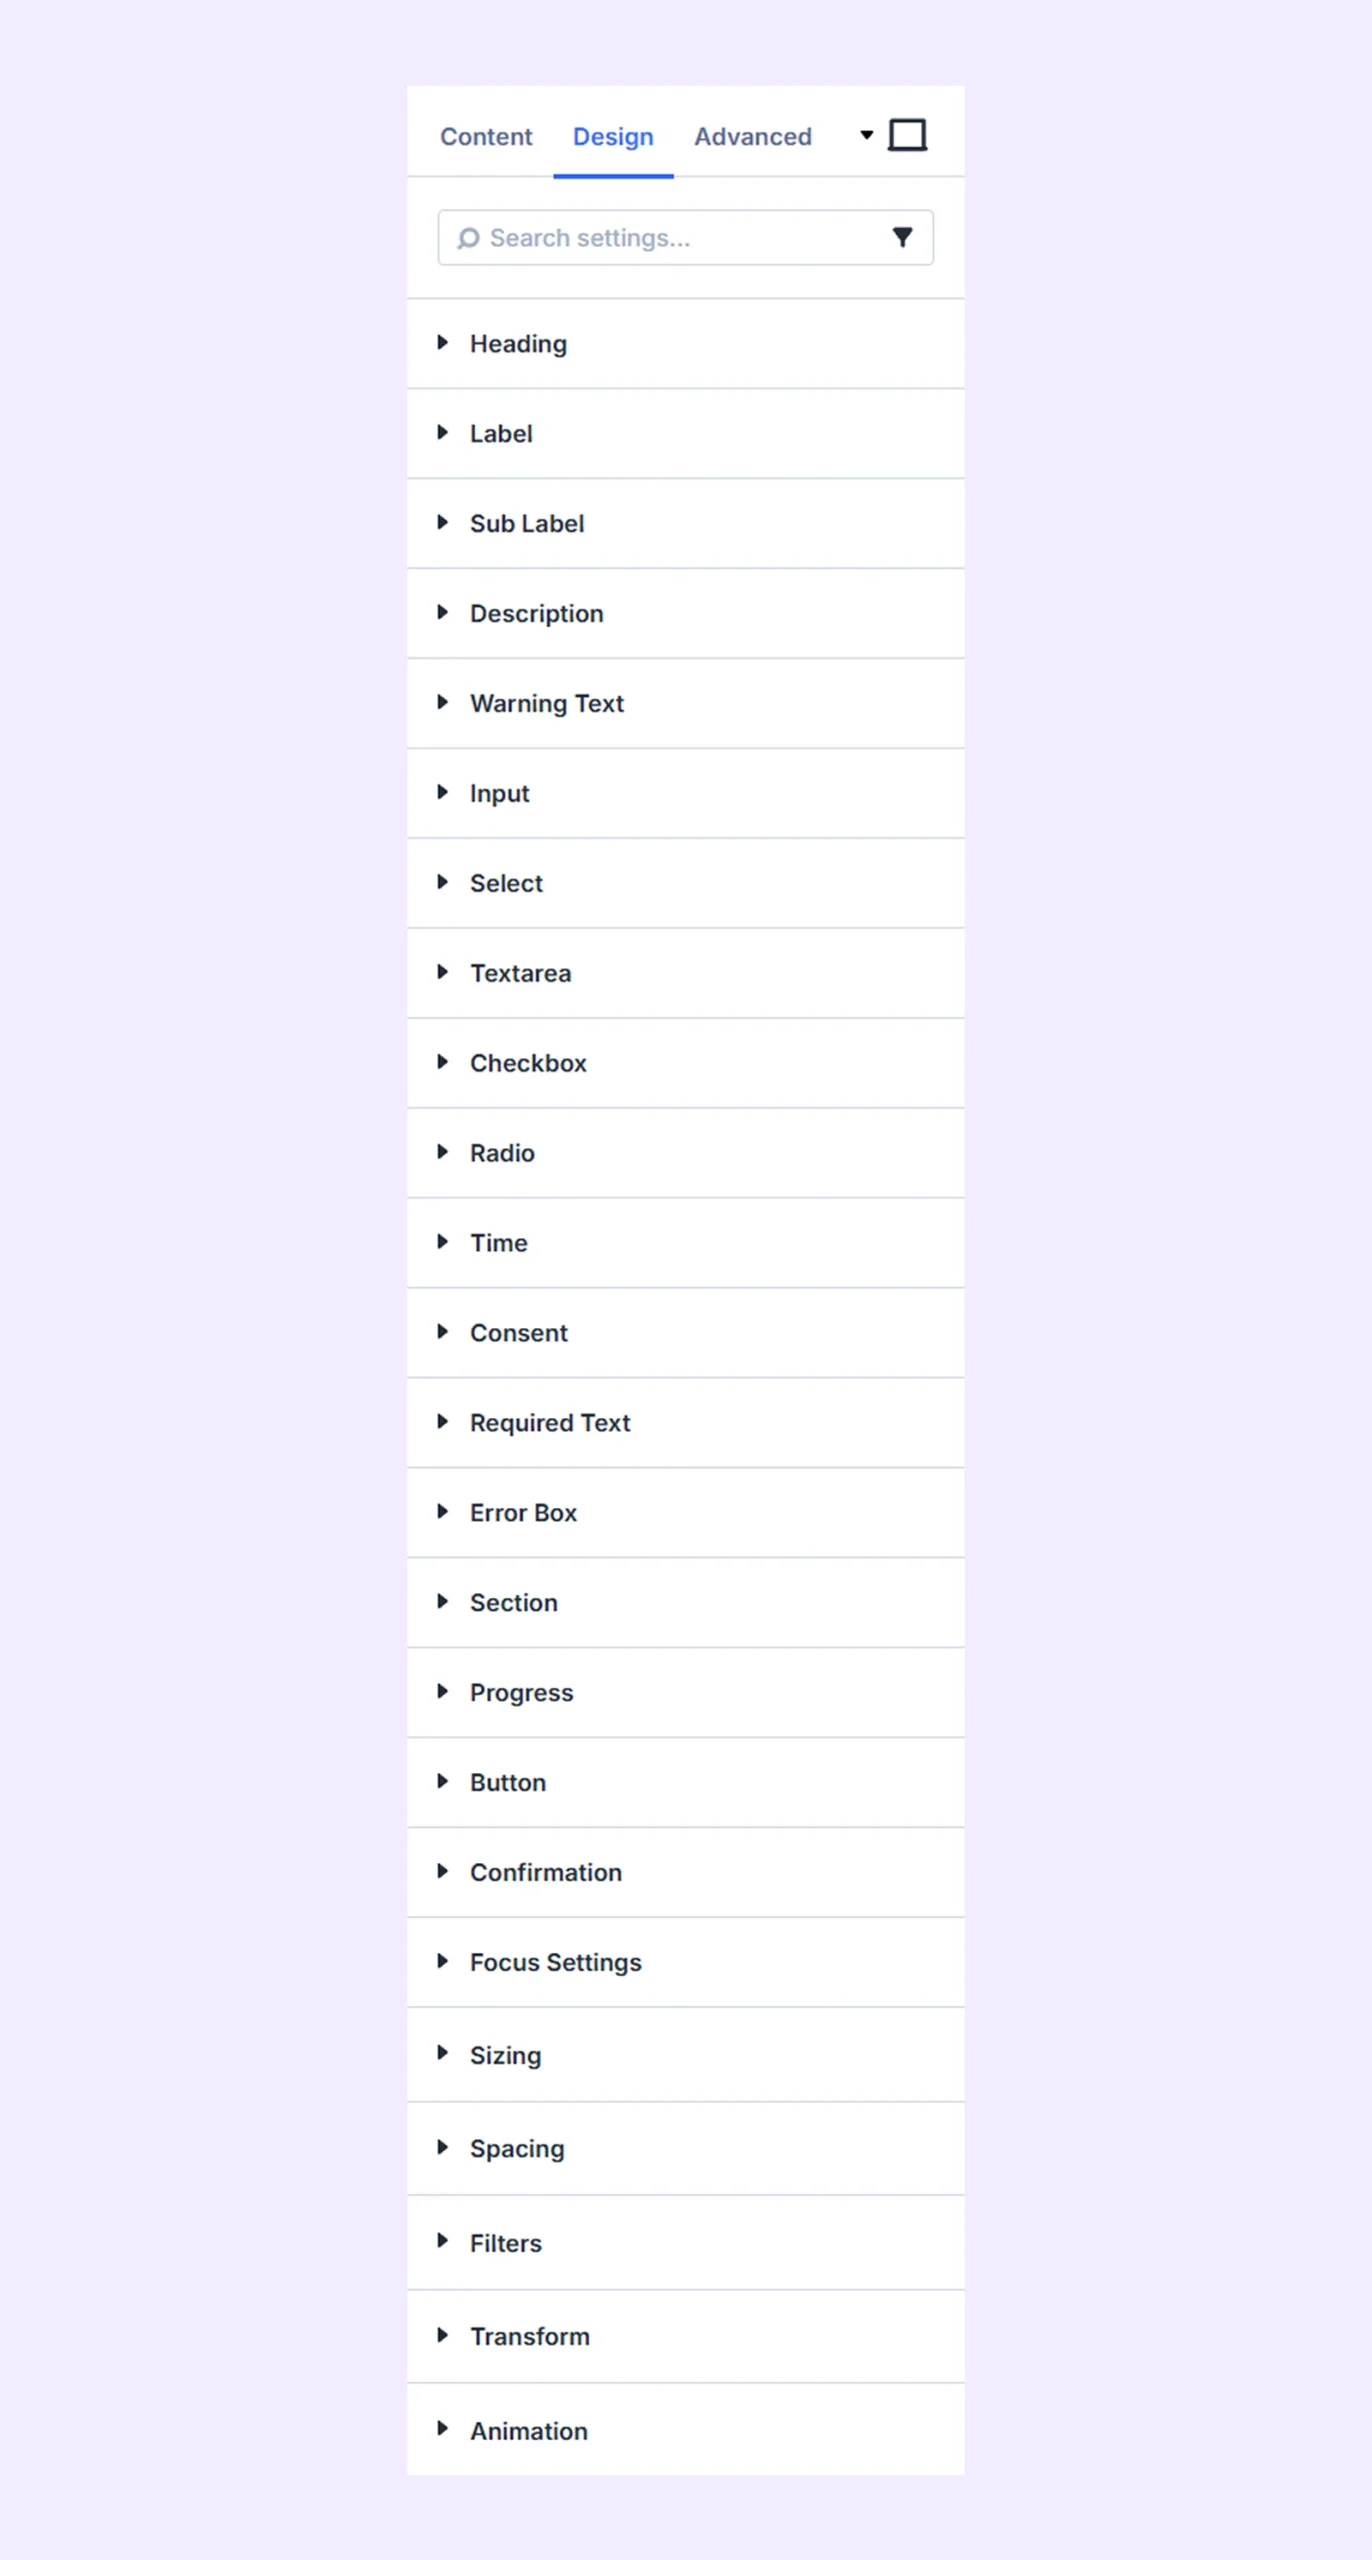
Use this tab to customize the appearance of different form elements.
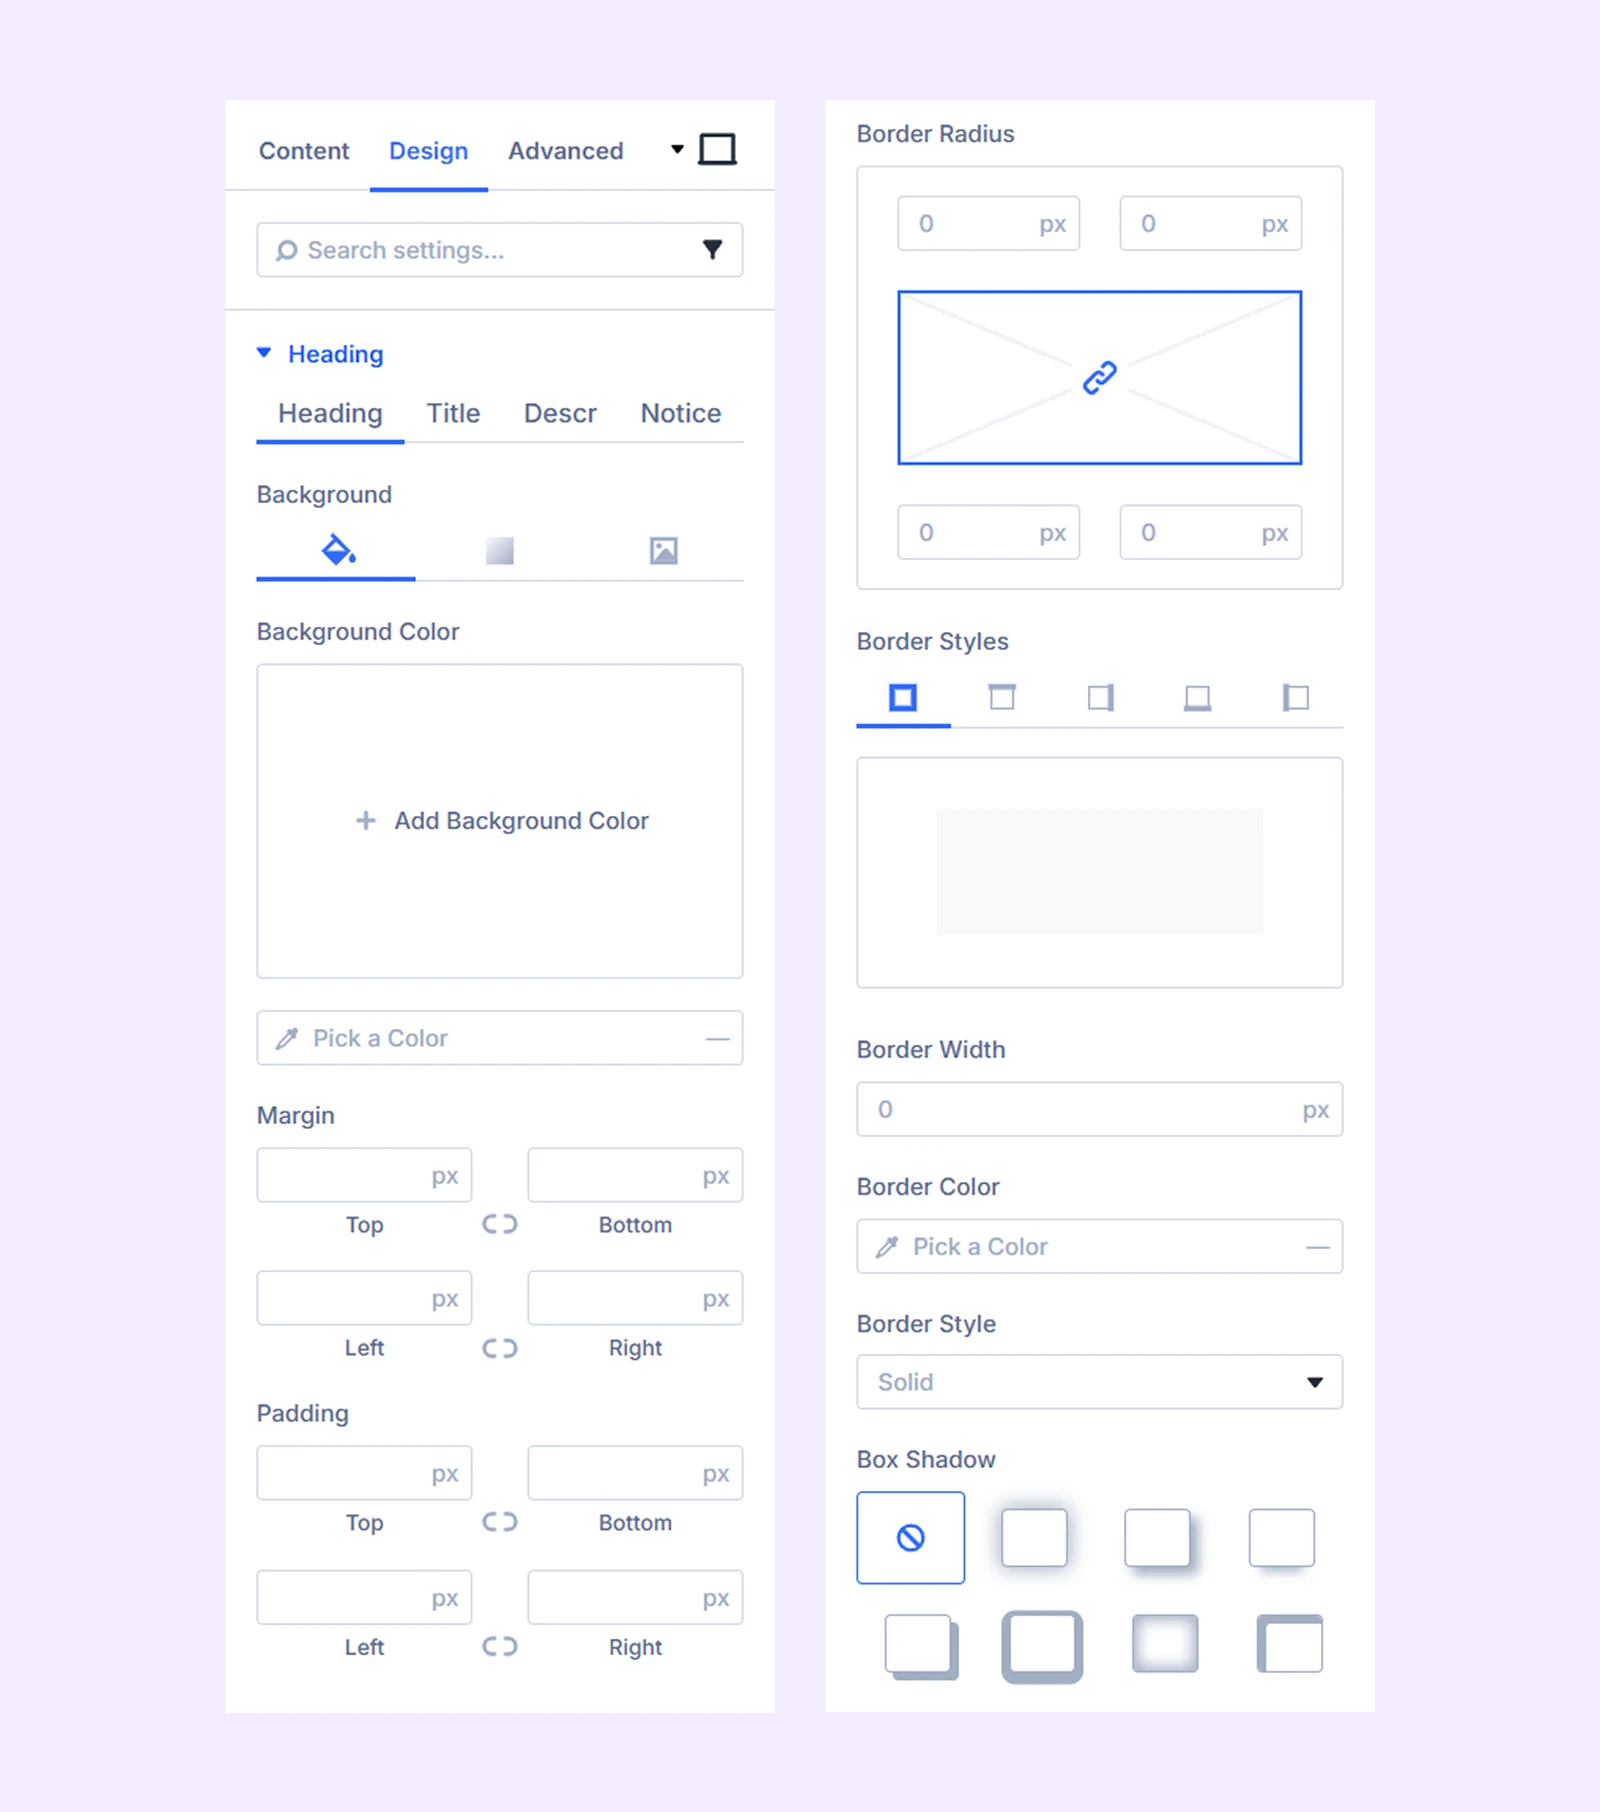
Heading
- Heading: Customize the background and border of the form title container.
- Title: Customize the typography of the form title.
- Descr: Customize the typography of the form description.
- Notice: Customize the appearance of form notices and messages.
Label: Customize the typography of form field labels.
Sub Label: Customize the typography of field sub-labels.
Description: Customize the typography of form field descriptions.
Warning Text: Customize the typography of warning or validation messages.
Input: Customize the color, spacing, typography, and border of text input fields.
Select: Customize the appearance of dropdown fields.
Textarea: Customize the appearance of textarea fields.
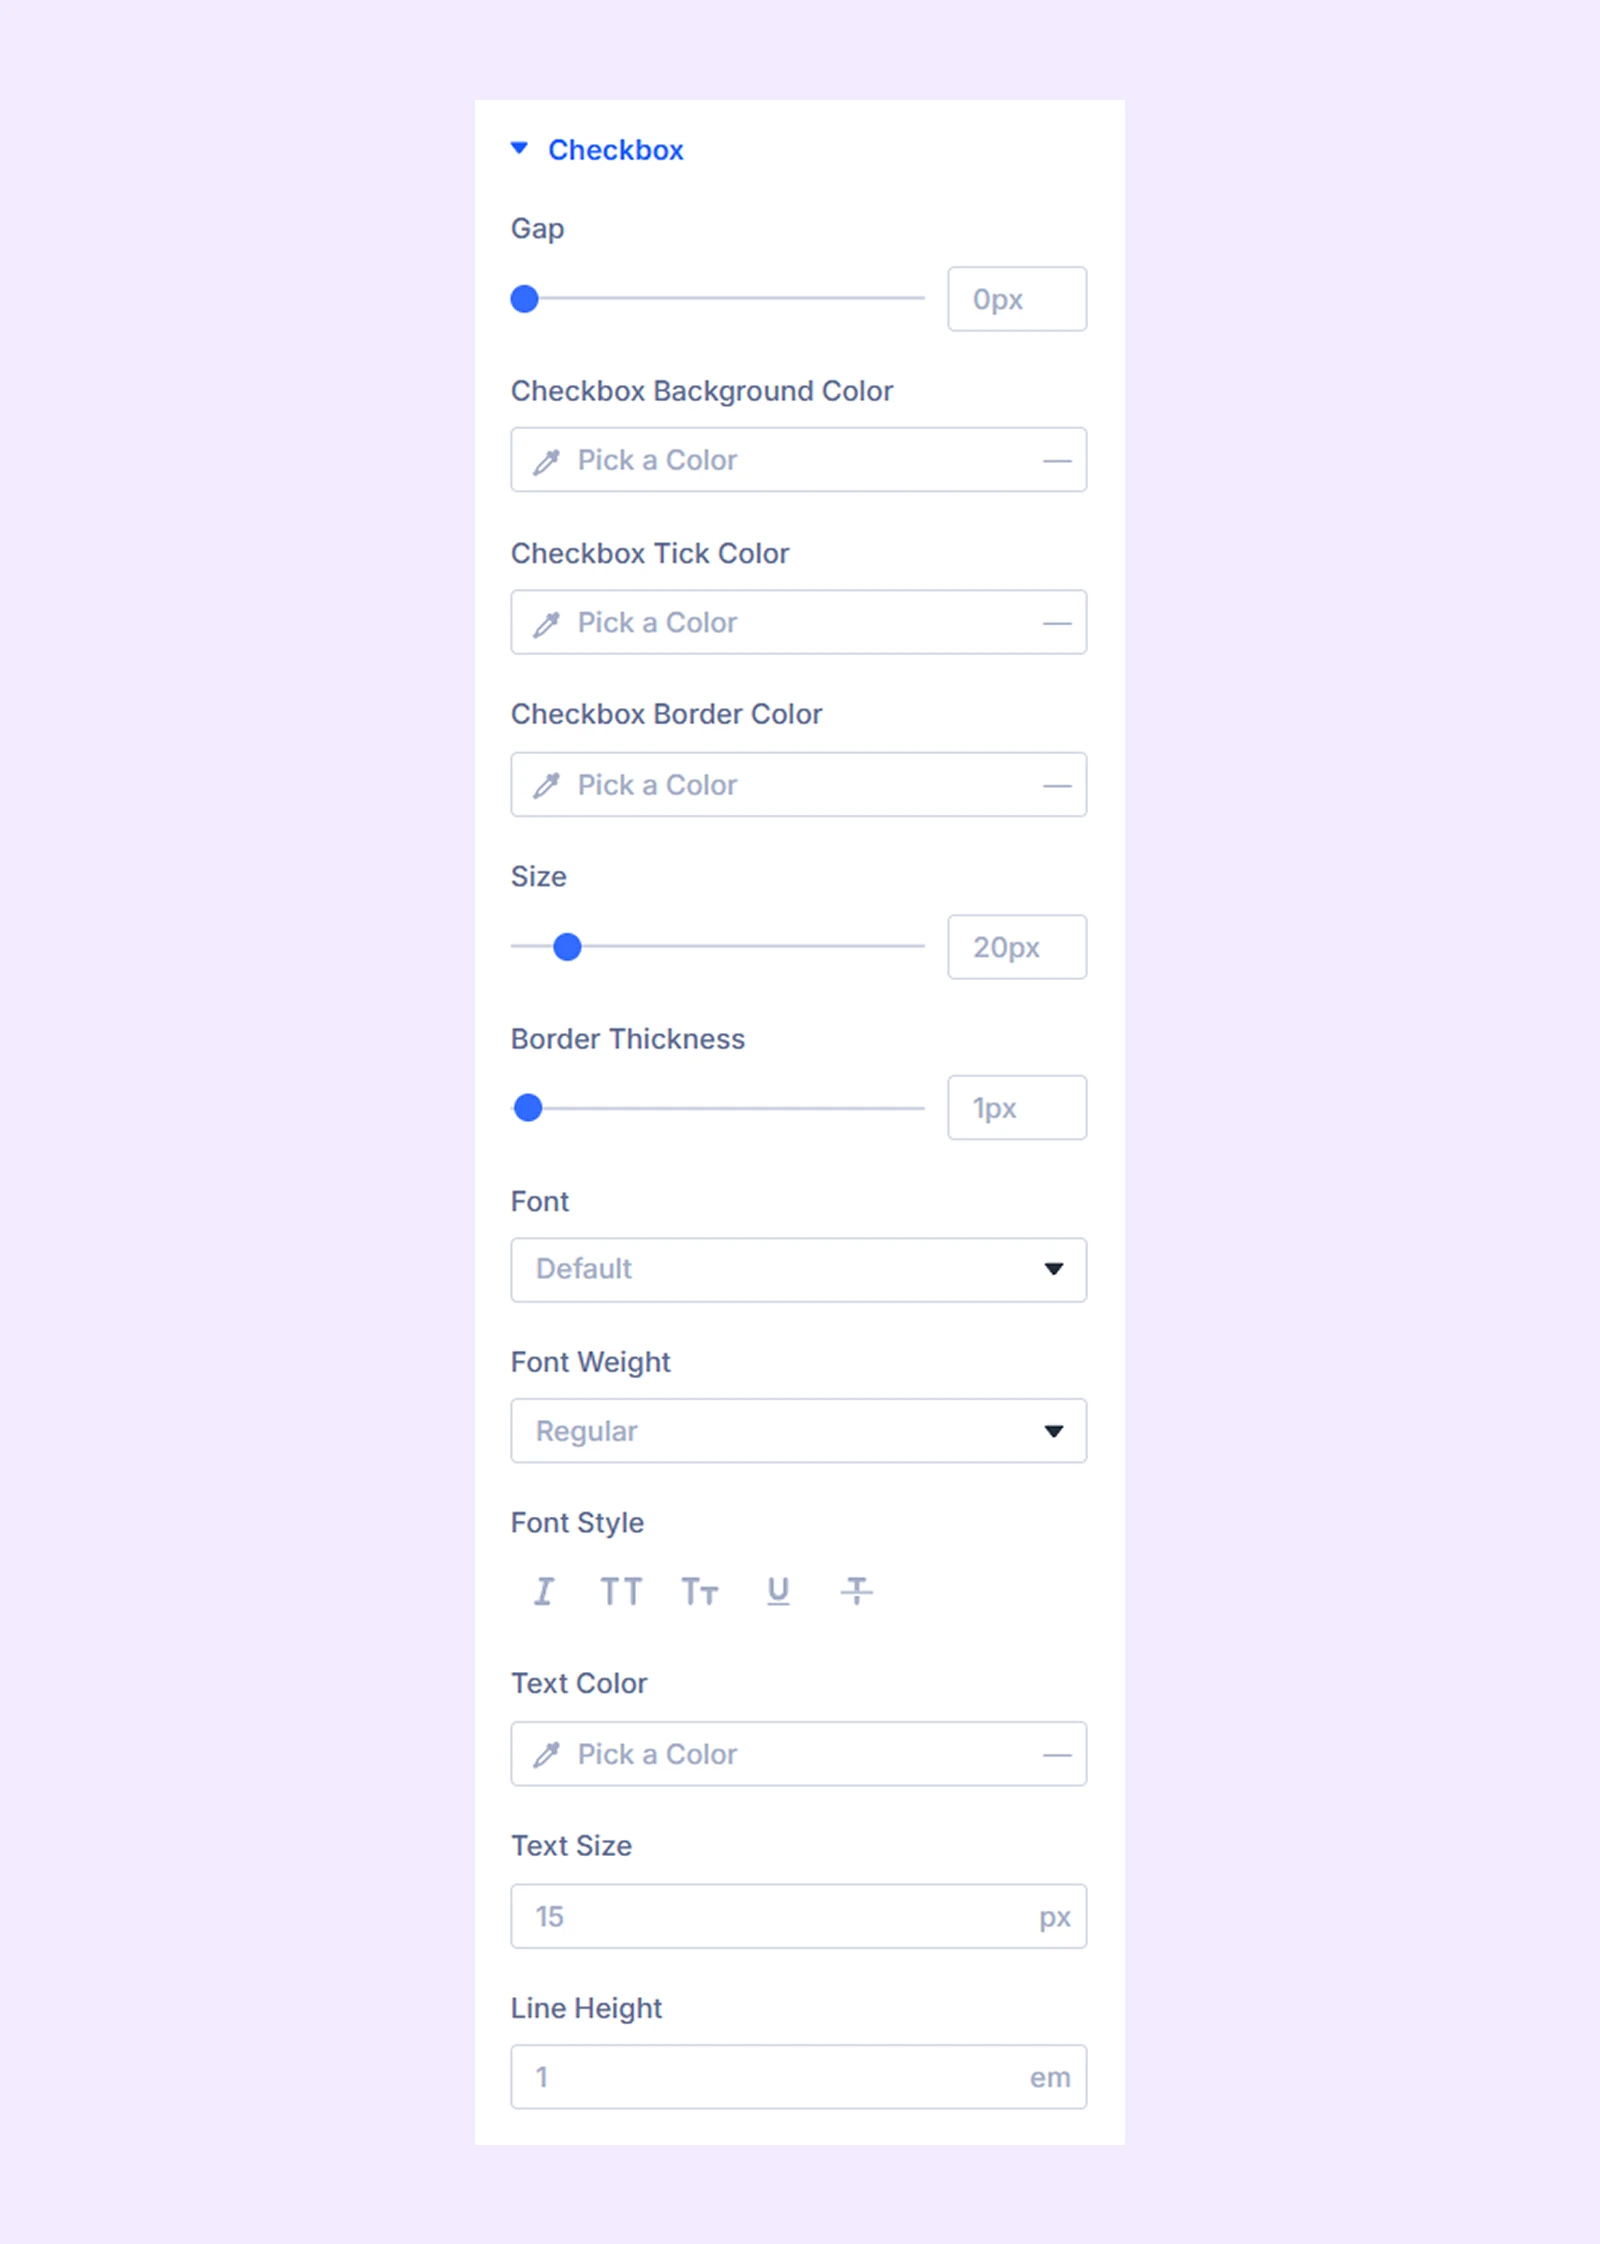
Checkbox
- Gap: Adjust the spacing between checkboxes.
- Checkbox Background Color: Choose the background color of checkboxes.
- Checkbox Tick Color: Choose the color of the check mark.
- Checkbox Border Color: Choose the border color of checkboxes.
- Size: Adjust the size of the checkboxes.
- Border Thickness: Adjust the border thickness.
Additional settings allow you to customize the typography of checkbox labels.
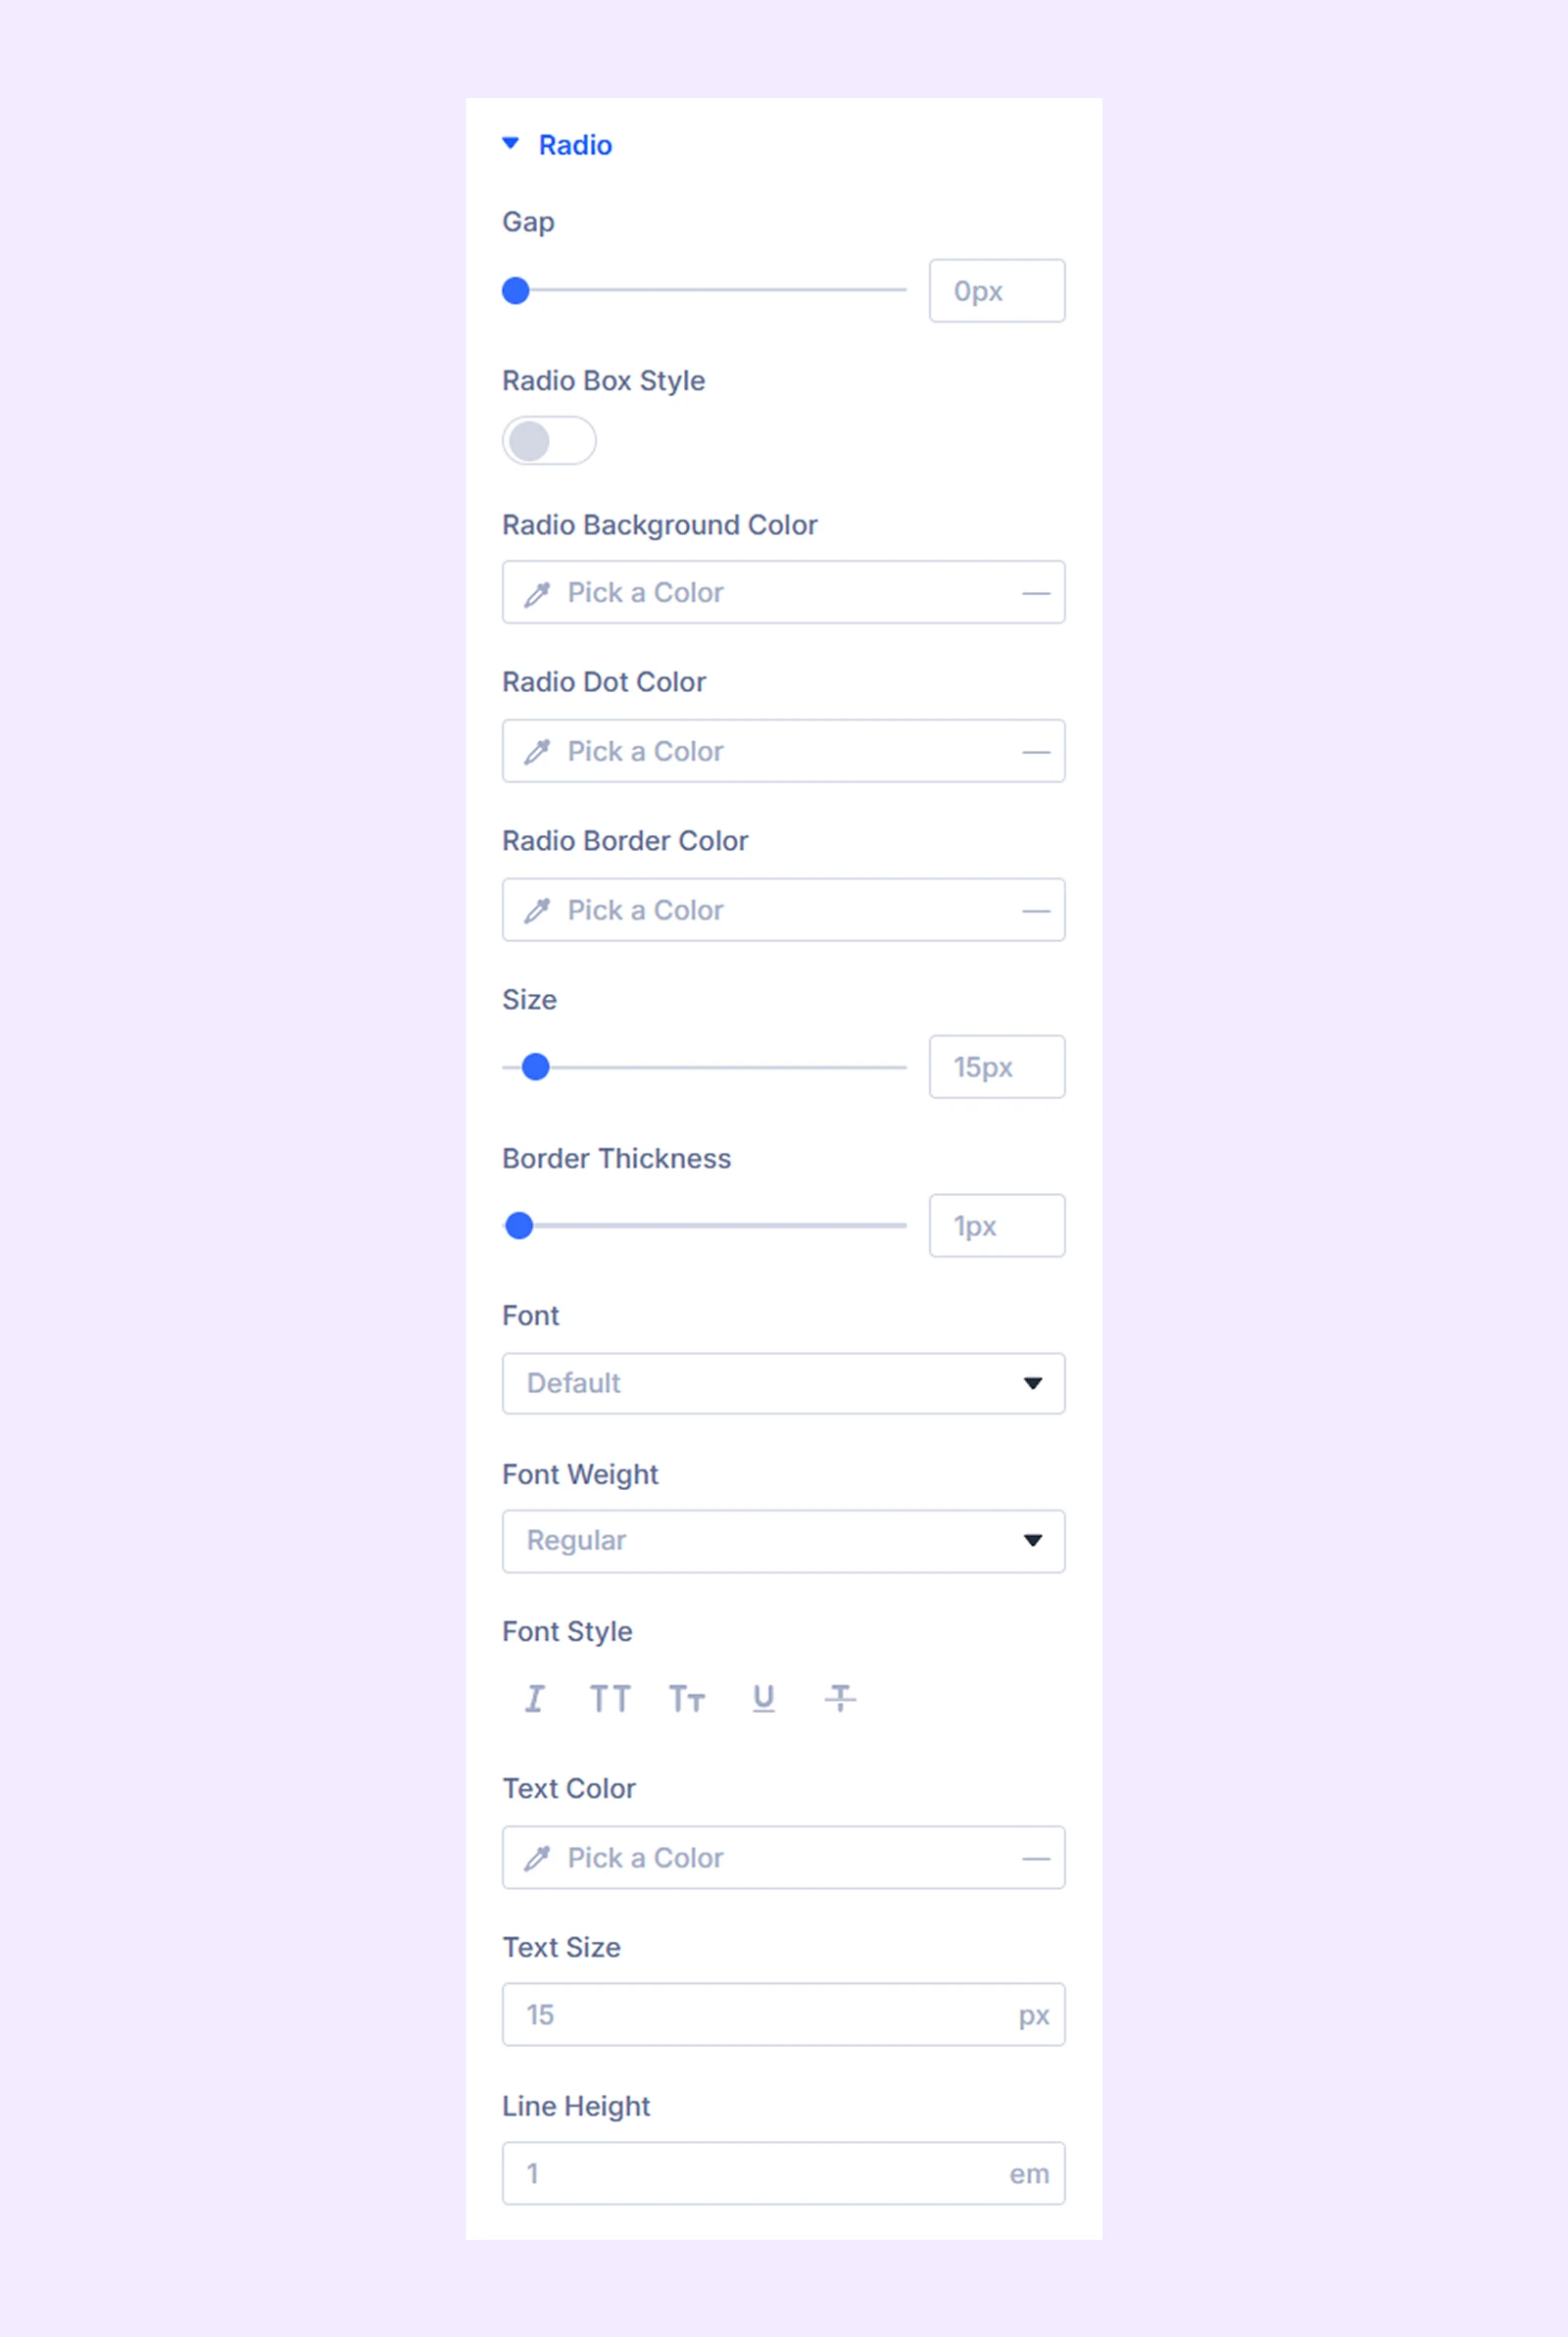
Radio
- Gap: Adjust the spacing between radio buttons.
- Radio Box Style: Enable this option to use square radio boxes instead of circular ones.
- Radio Background Color: Choose the background color of radio buttons.
- Radio Dot Color: Choose the color of the inner dot.
- Radio Border Color: Choose the border color.
- Size: Adjust the size of radio buttons.
- Border Thickness: Adjust the border thickness.
Additional settings allow you to customize the typography of radio button labels
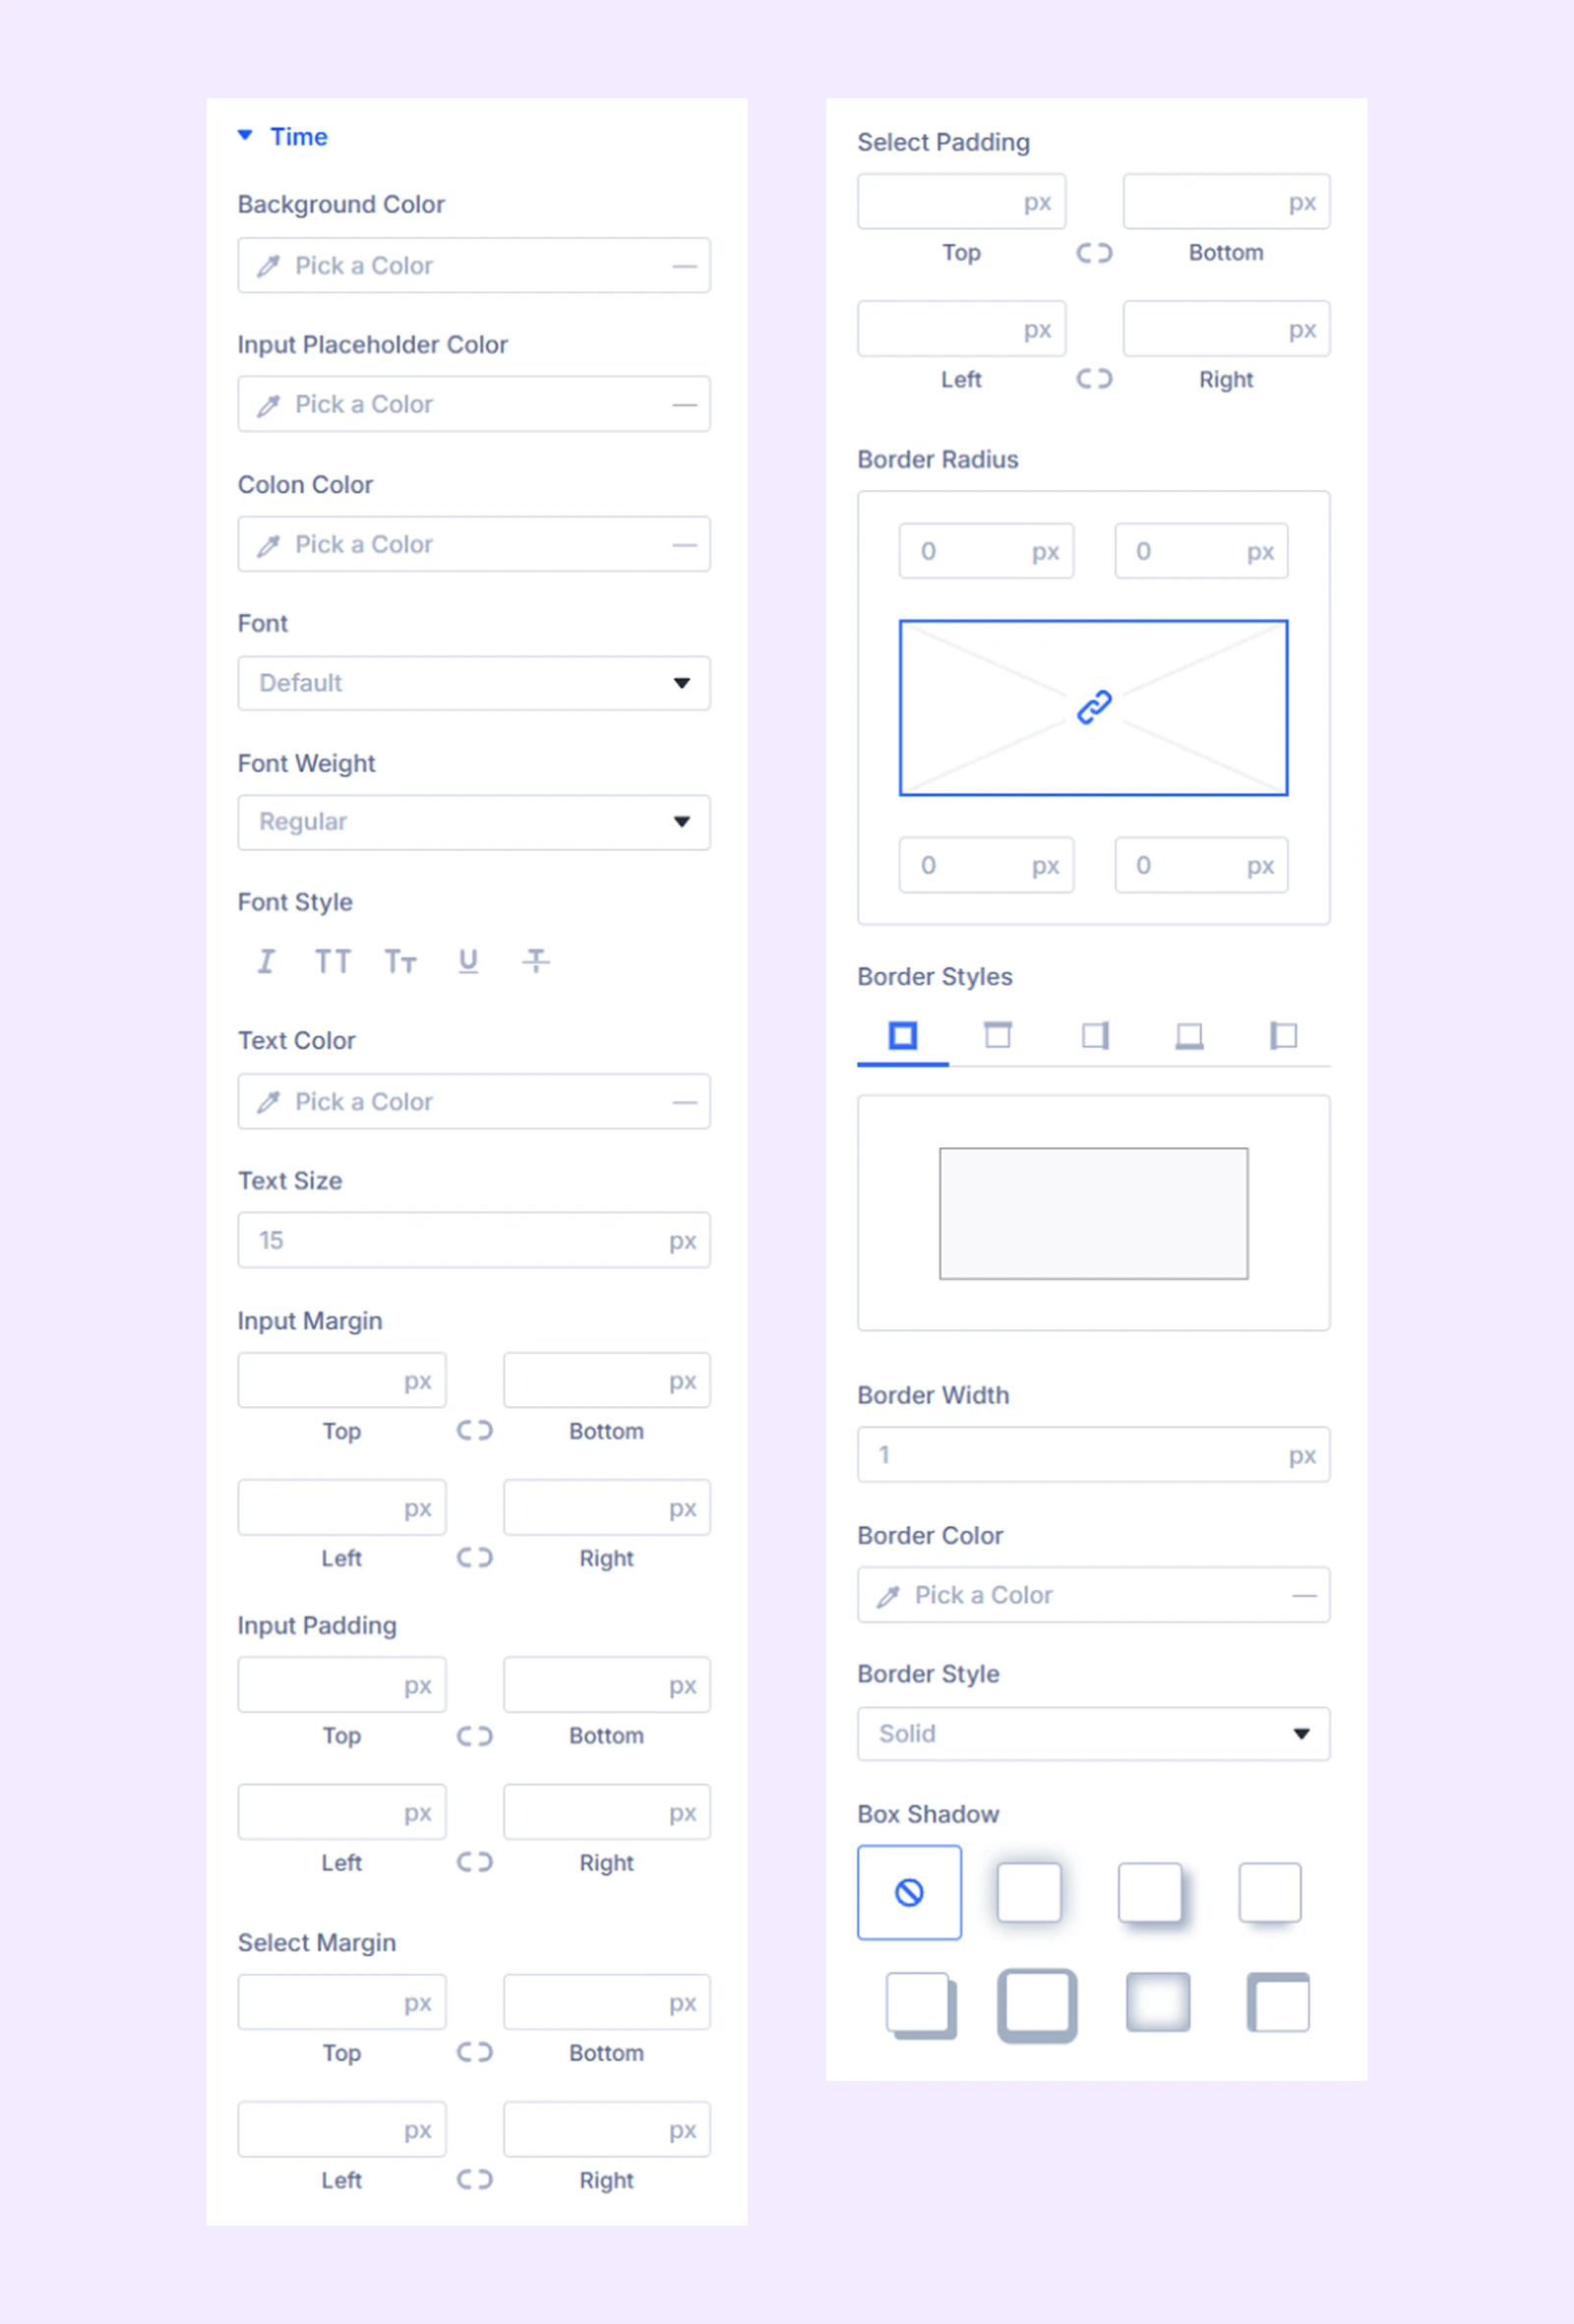
Time
- Background Color: Choose the background color of time fields.
- Spacing: Adjust margin and padding for time fields.
- Input Placeholder Color: Choose the placeholder text color.
- Colon Color: Change the color of the colon separator.
Additional settings allow you to customize typography and borders.
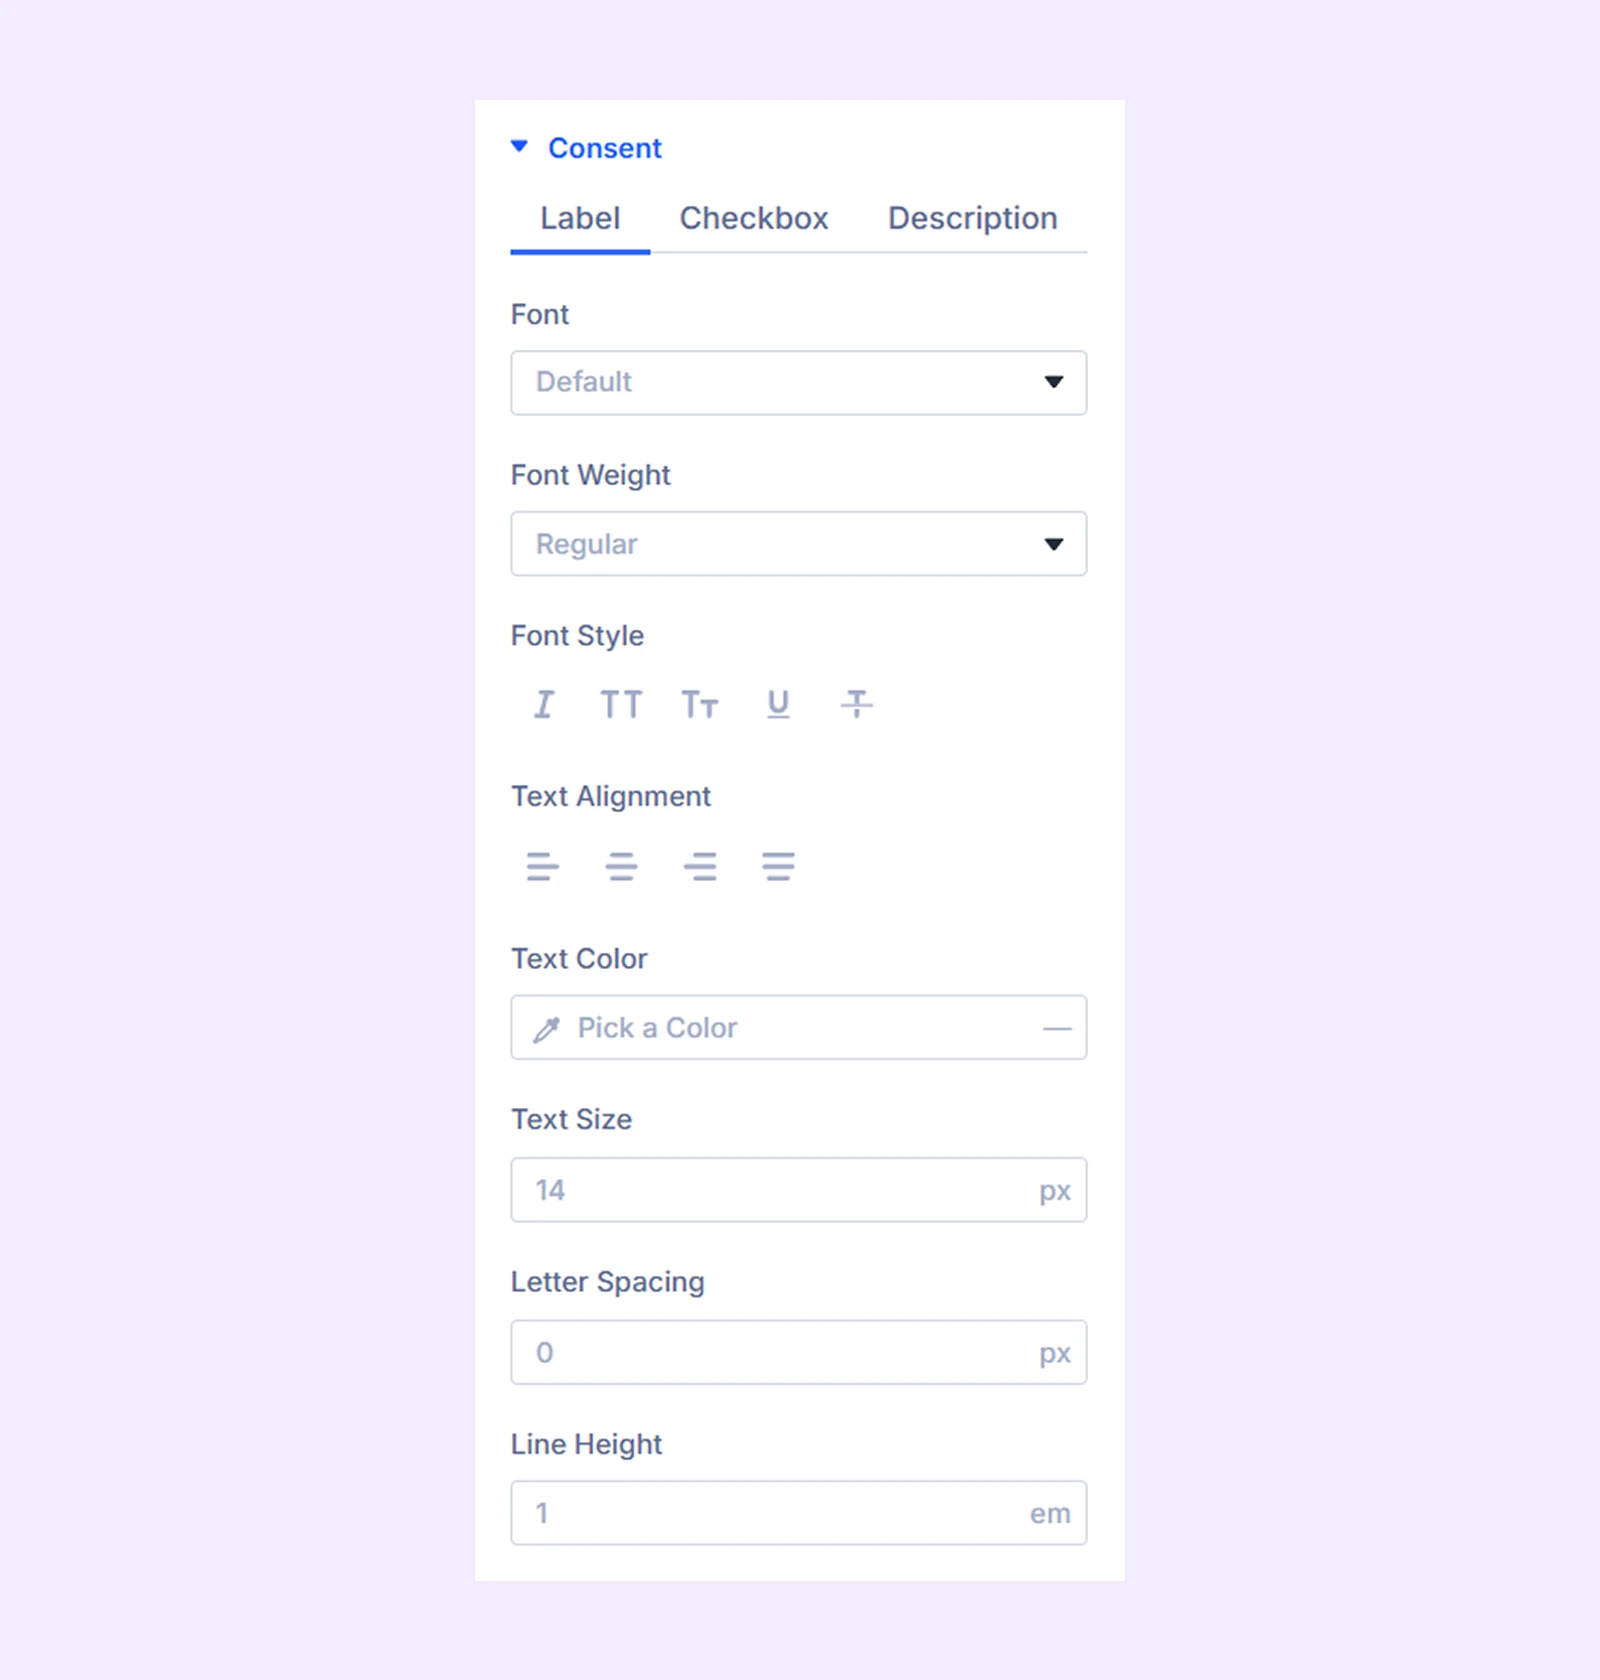
Consent
- Label: Typography options for the consent field label.
- Checkbox: Checkbox styling options for the consent field. Same as the “Checkbox” field.
- Description: Customize the background, typography, and border of the consent description.
Required Text: Customize the typography of the required field indicator.
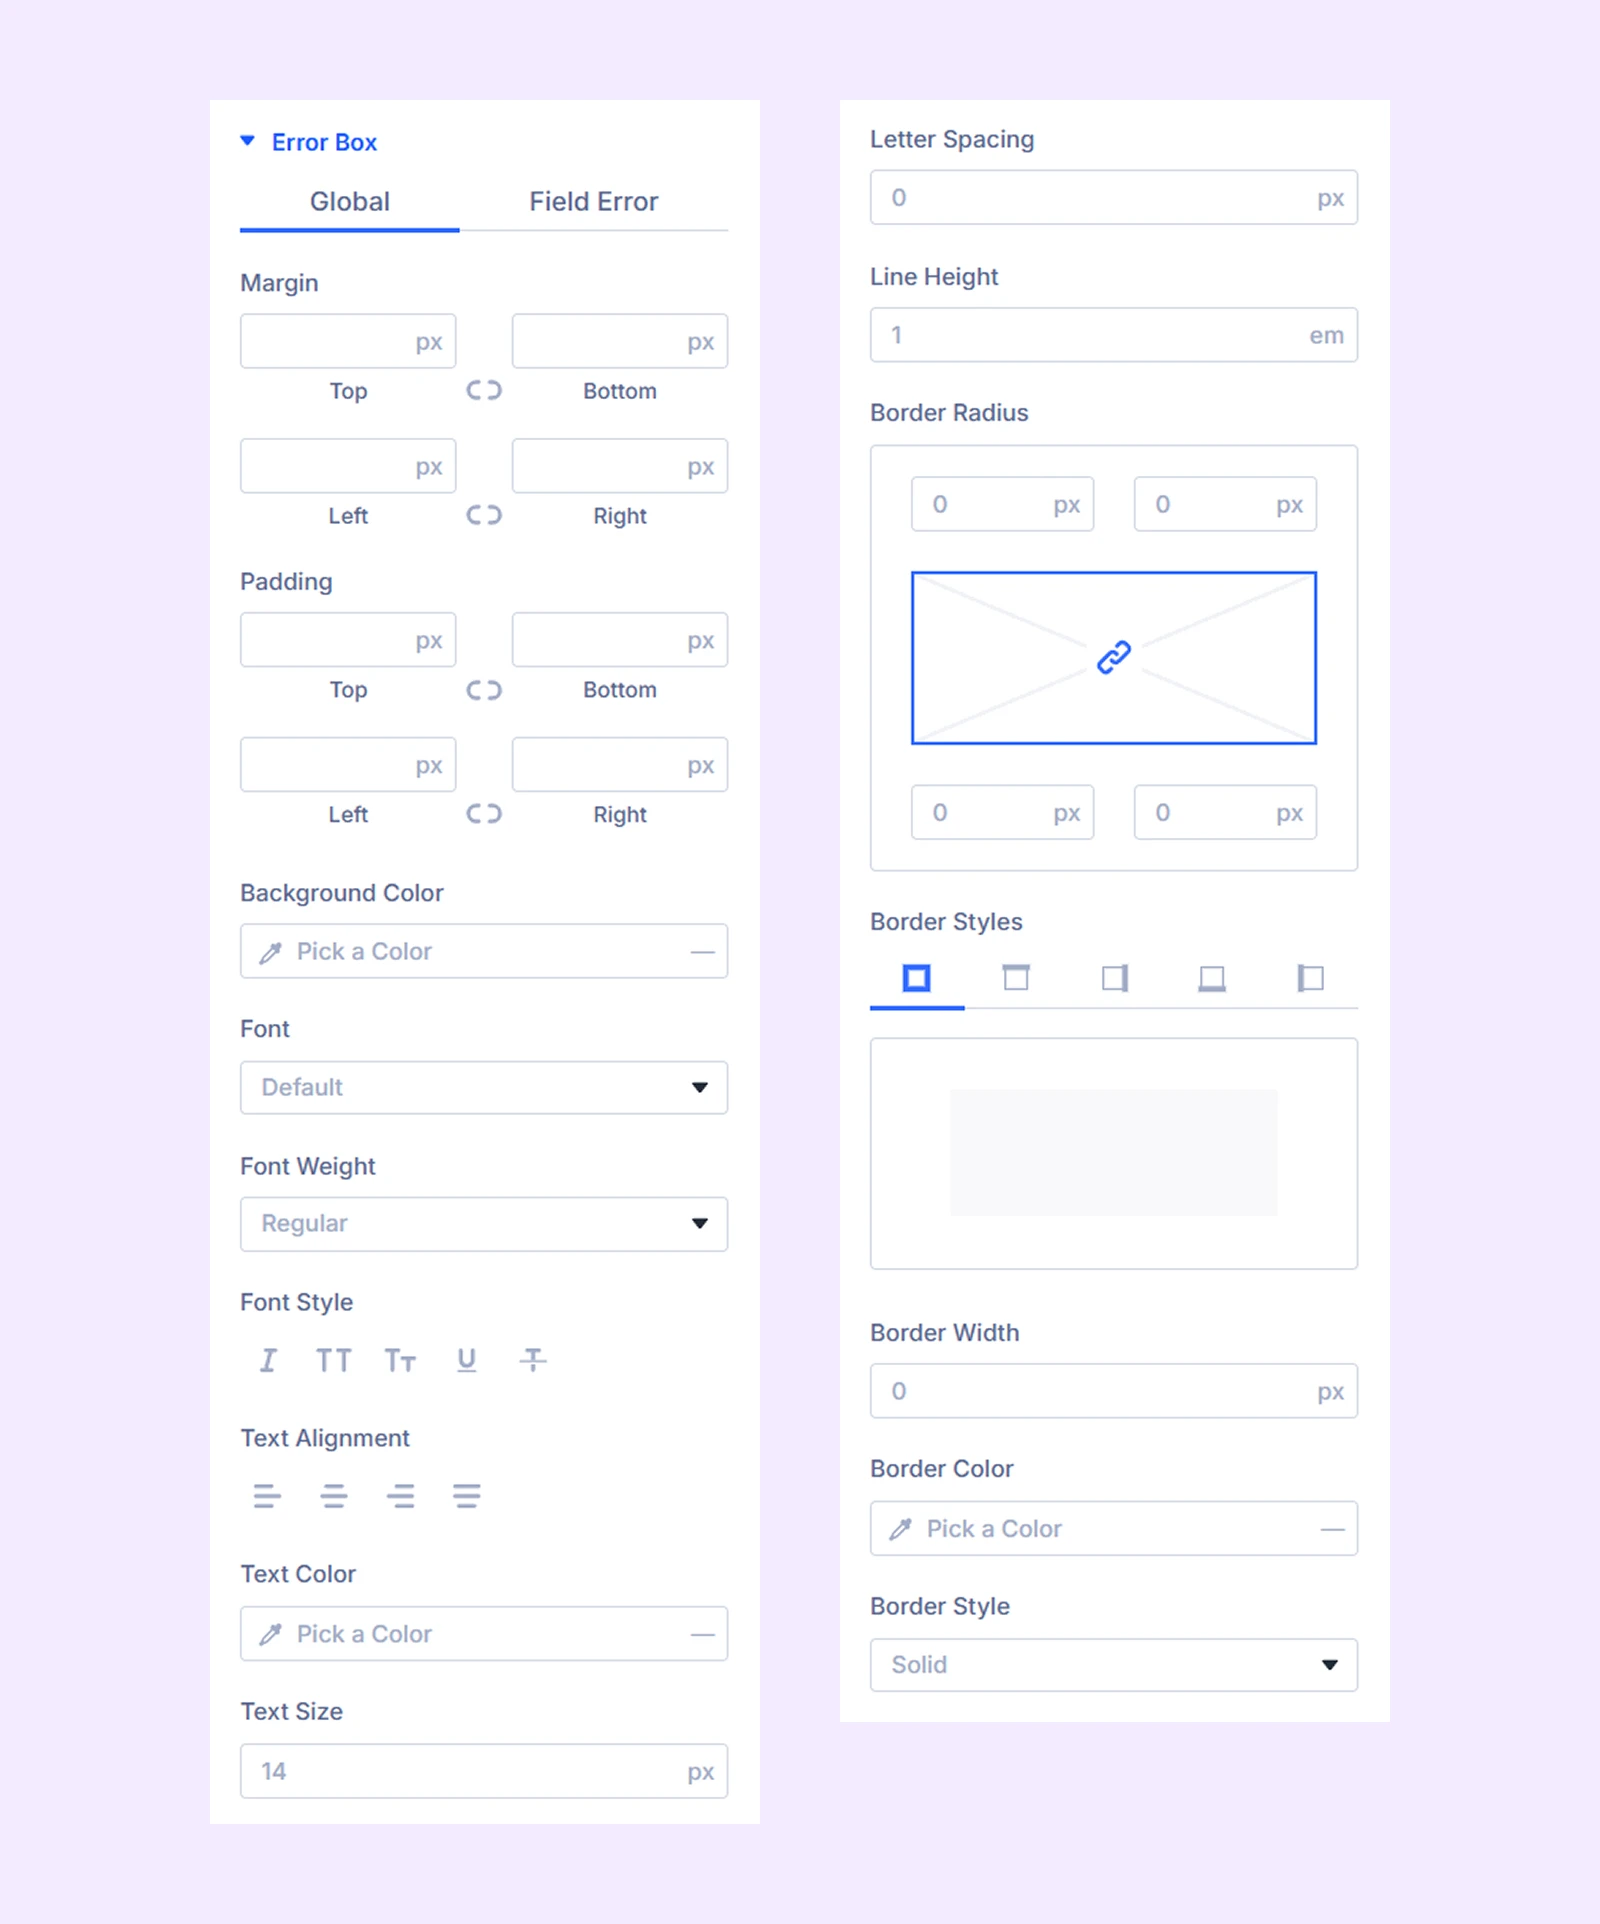
Error Box
- Global: Style the global error message displayed above the form.
- Field Error: Style the error messages shown for individual fields.
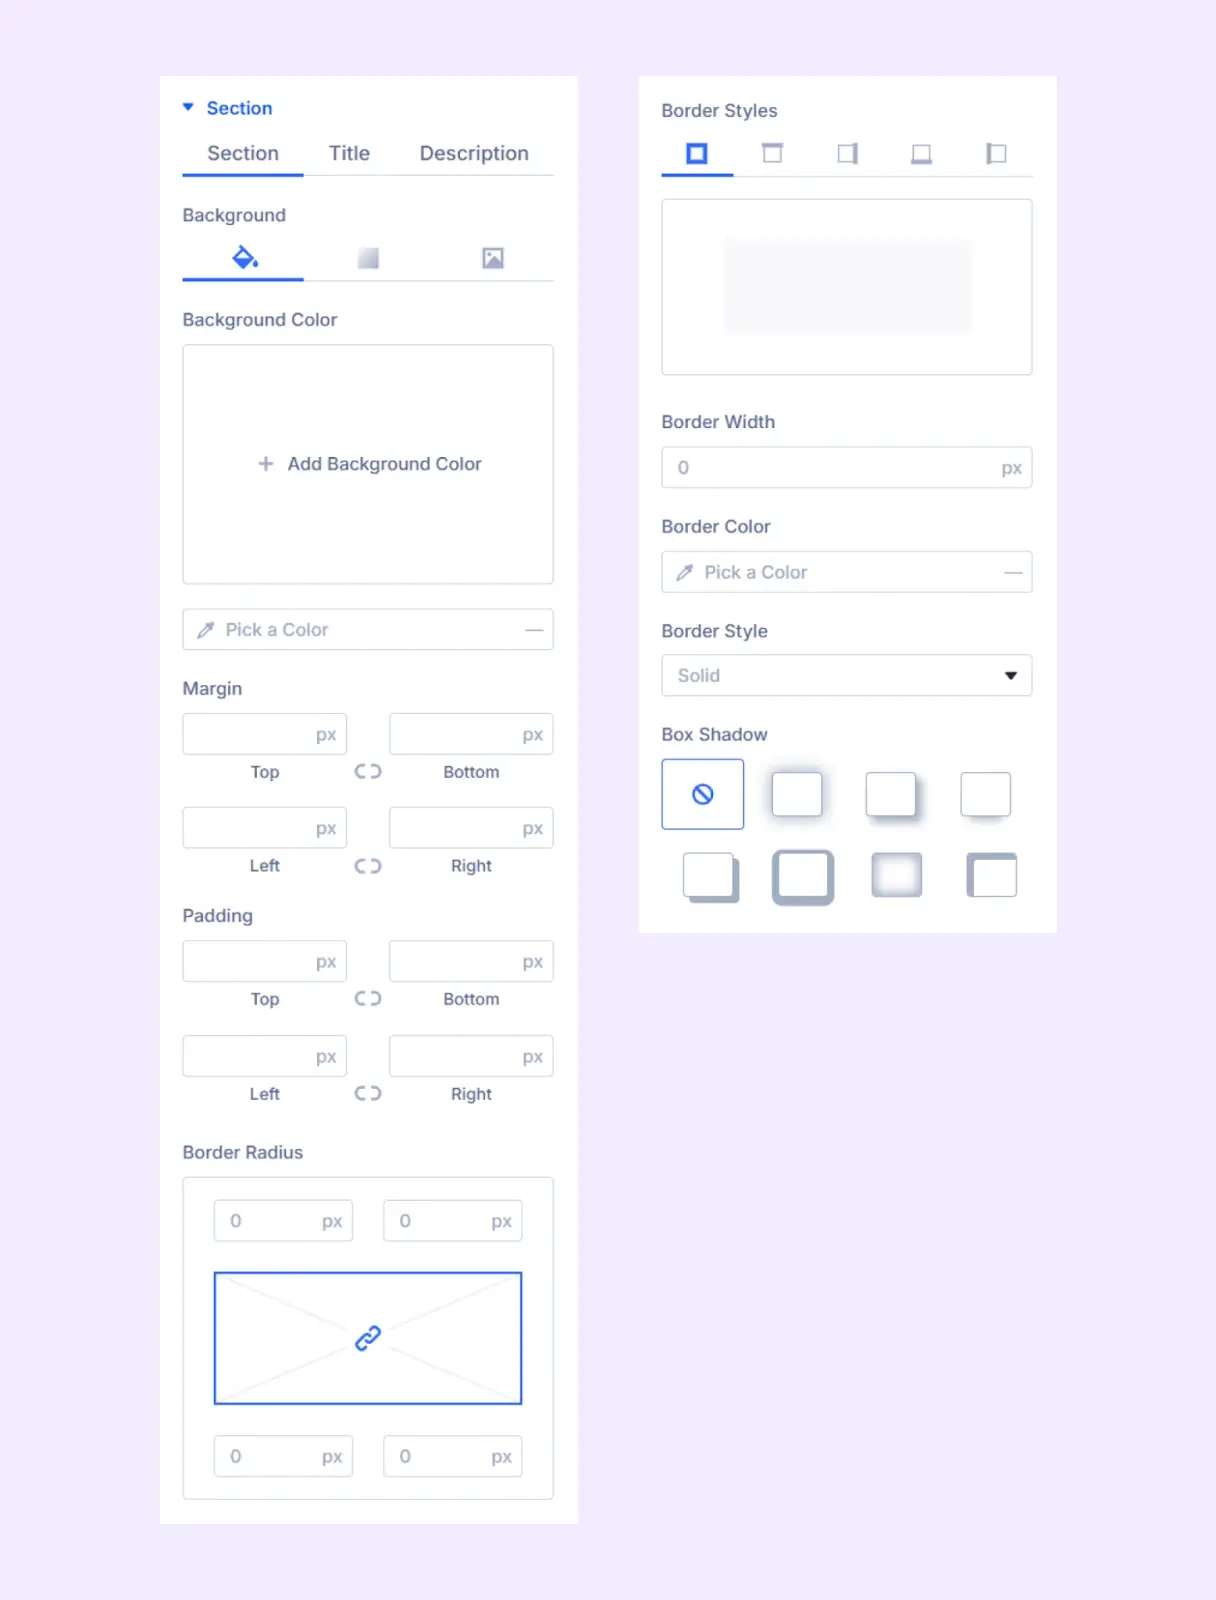
Section
- Section: Customize the background, spacing, and border of form sections.
- Title: Customize the spacing and typography of section titles.
- Description: Customize the spacing and typography of section descriptions.
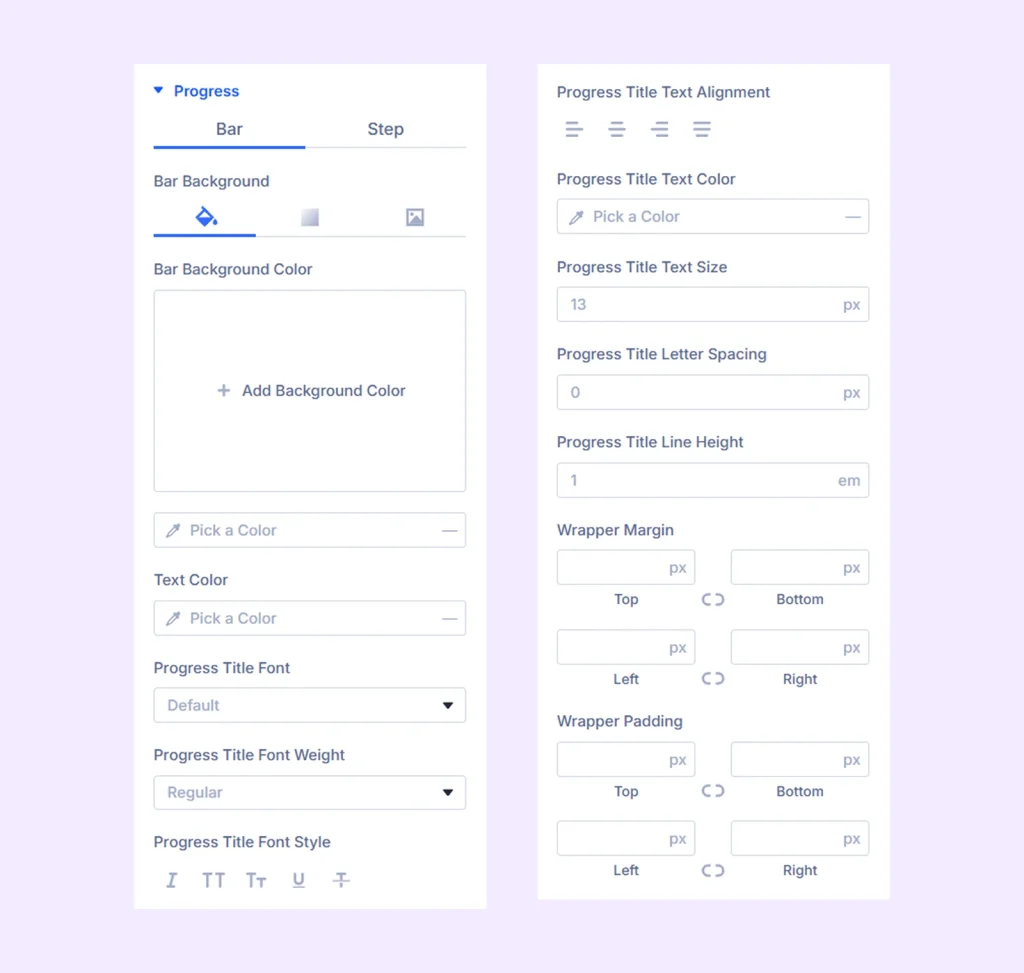
Progress
- Bar: Customize the appearance of the progress bar.
- Step: Customize the alignment, color, and typography of progress steps.
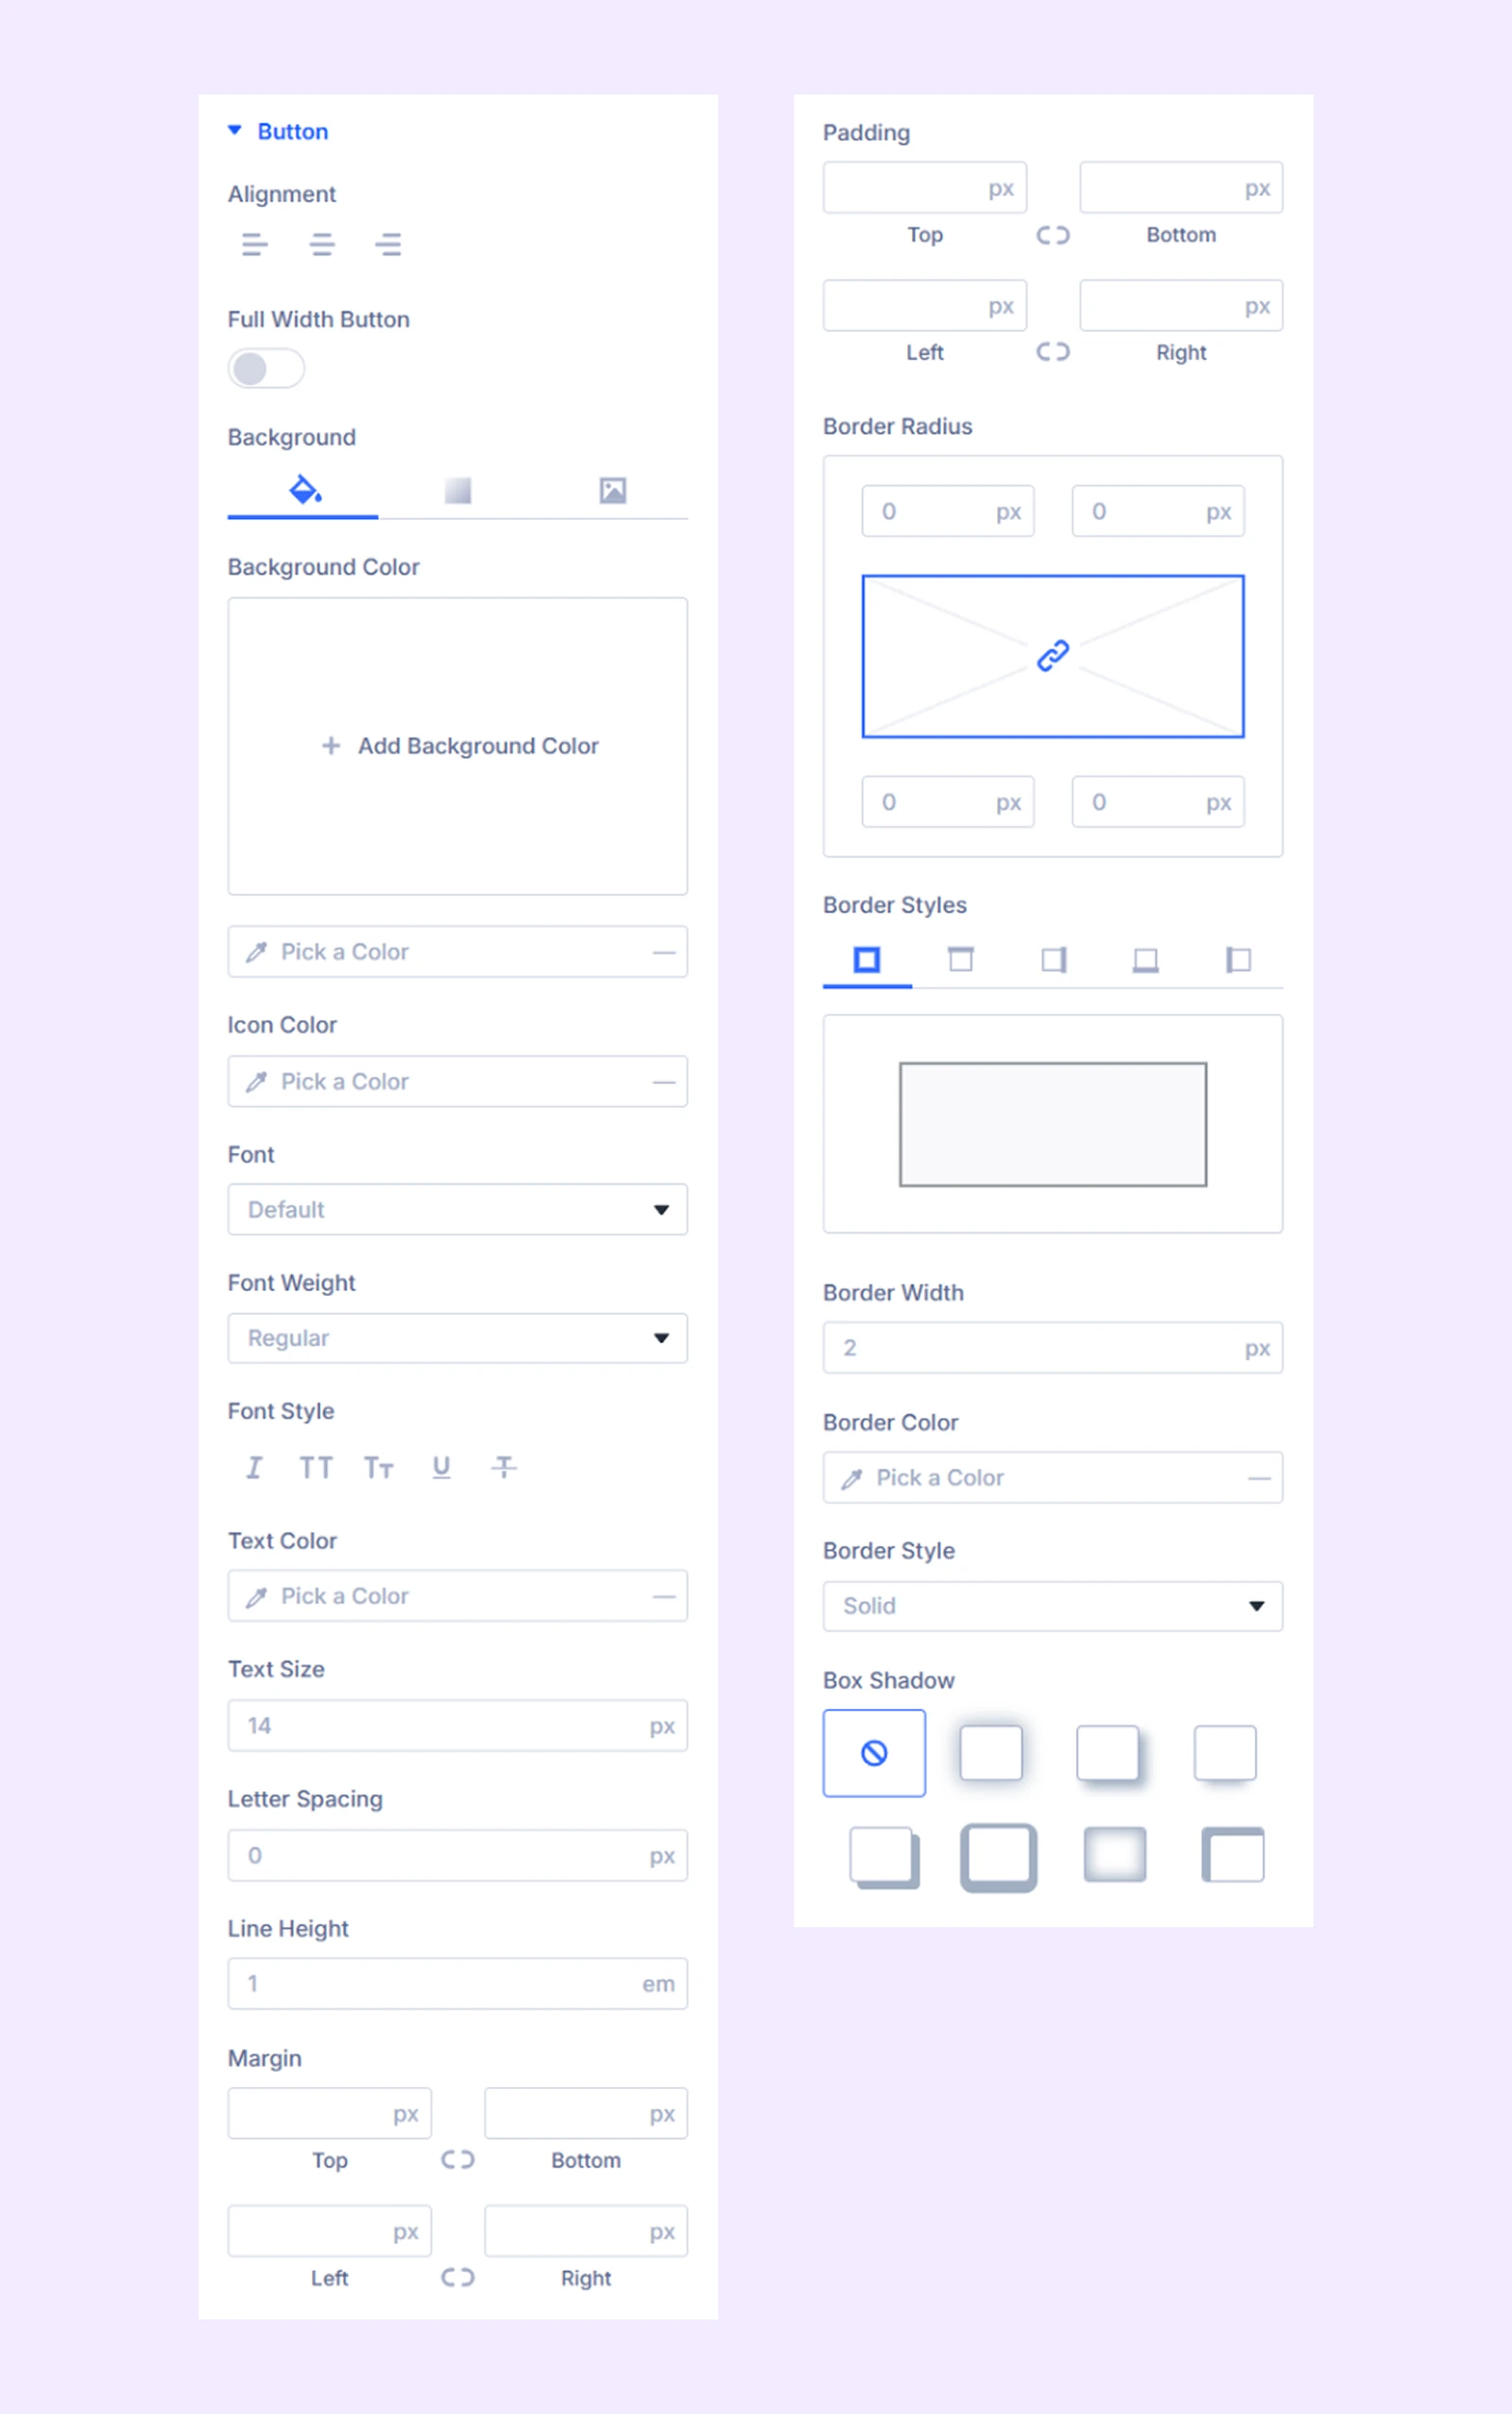
Button
- Align: Adjust the horizontal alignment of the submit button.
- Full Width Button: Make the submit button span the full width of the form container.
Additional settings allow you to customize the button color, spacing, typography, and border.
Confirmation: Customize the background, spacing, and typography of the confirmation message displayed after form submission.
Focus Settings: Control how form fields appear when they are selected or focused.
Sizing: Adjust the width, height, and alignment of the module.
Spacing: Add custom margin and padding to the module’s container.
Filters: Apply color filters to enhance the appearance.
Transform: Scale, rotate, move, or skew the module.
Animation: Apply reveal animation effects and customize delay, duration, repeat settings, and animation type.
Advanced Tab
This tab provides additional settings for advanced users who want greater control over the module with custom code, conditions, and more.
Need Help?
If you have any questions or need assistance, contact our support team: [email protected]