Install the DiviFlash plugin precisely as any other WordPress plugin.
You can install the plugin by using the “WordPress admin plugin upload” or “manually using FTP client.”
Here is the step-by-step guide to installing the plugin through the WordPress admin method.
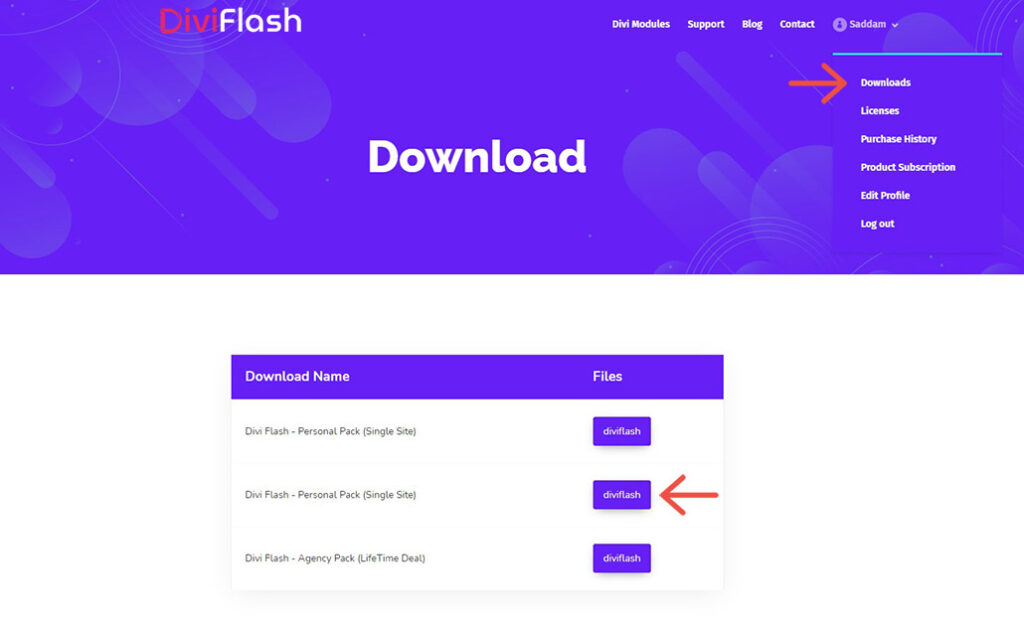
Step 1: Go to your Diviflash Account Hover over to your name from the menu and click download. Then download the file. The file should look like diviflash.zip.
Step 2: Go to your WordPress Dashboard (Where you would like to install the plugin), navigate to wp-admin -> Plugins -> Add New. Then click on the ‘Upload Plugin’ option and Upload the Diviflash plugin that you have downloaded. After successfully uploading, click on the ‘Install Now’ button.

Step 3: After installation is finished, click on the ‘Activate Plugin’ button.

If you purchased the product from Divi Marketplace, you don’t need to do anything else. Your Plugin is ready to use. However, if you purchased the product from our website, please follow along with the next steps.
Step 4: A new navigation is added inside your dashboard menu named “Diviflash” Click on it. Hover over it and click “License“.

Step 5: Go back to your Diviflash account and hover over on your name from the menu and click Licenses. Select and copy the key from here.

Step 6: Go back to your WordPress Dashboard, Paste the license key in the “License Key” field, and click “save changes”. Then click “activate license”.

Done! You are all set to use; start building great sites that stand out.