
You can add the Cleaning layout to your Divi website using one of two methods:
- Method 1: Using the DiviFlash layout importer (recommended).
- Method 2: Manually importing the layout.
In this doc, we will walk you through both methods step by step.
Method 1: Using DiviFlash Layout Importer
Step 1: Install and activate the Divi theme.
Step 2: Install and activate the DiviFlash plugin.
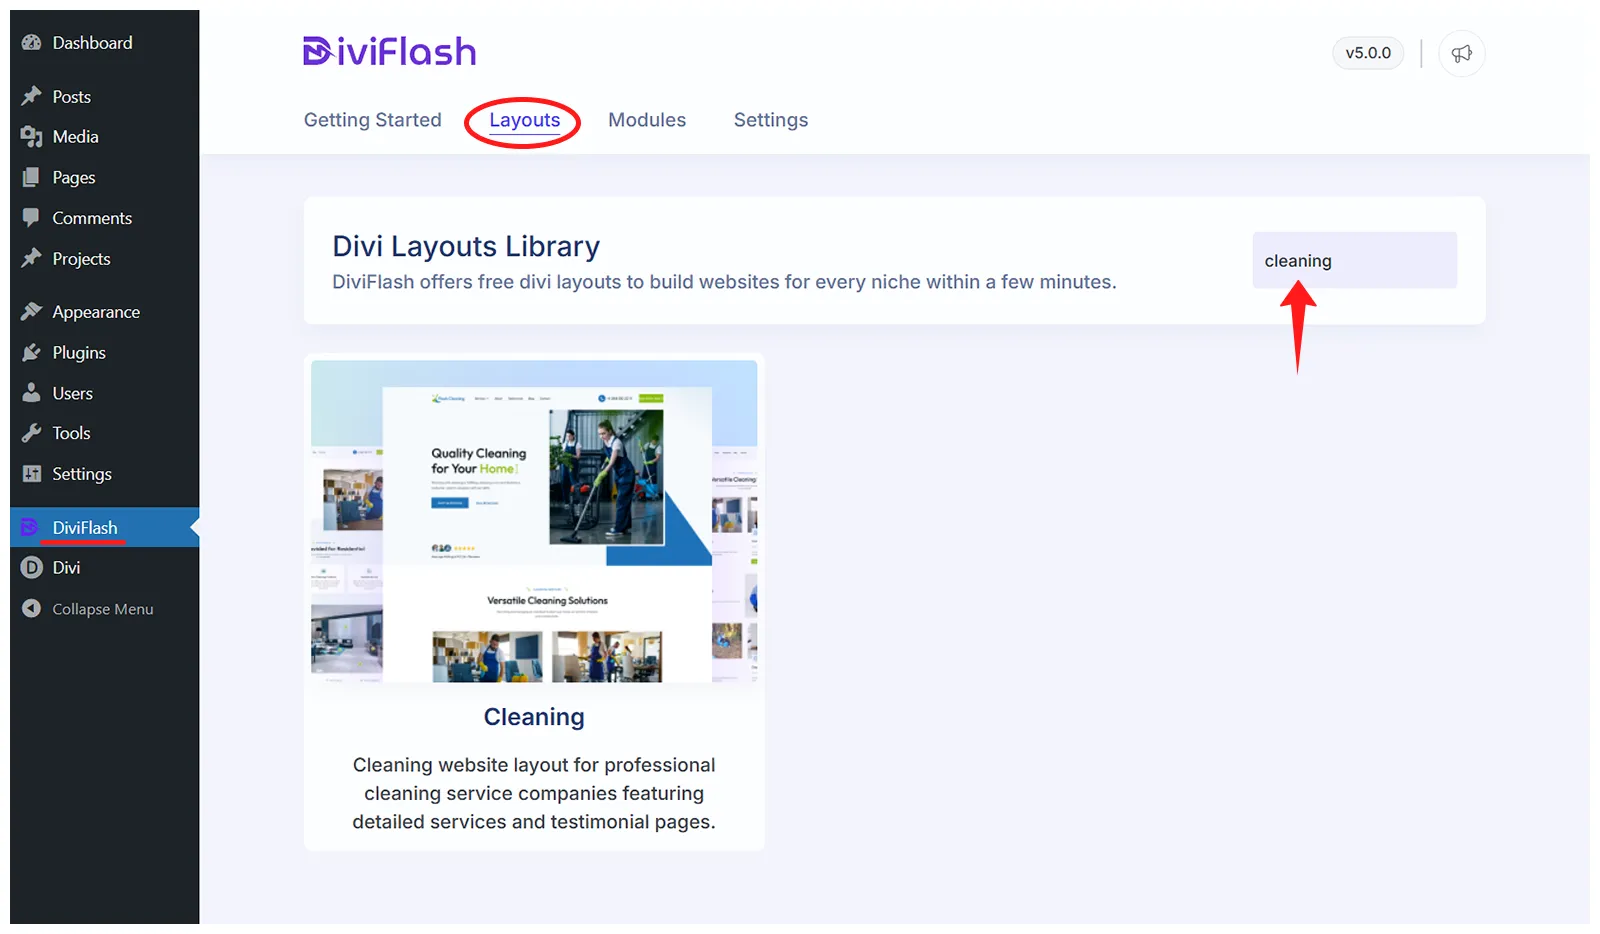
Step 3: In the WordPress dashboard, go to DiviFlash > Layouts and search for the “Cleaning” layout.
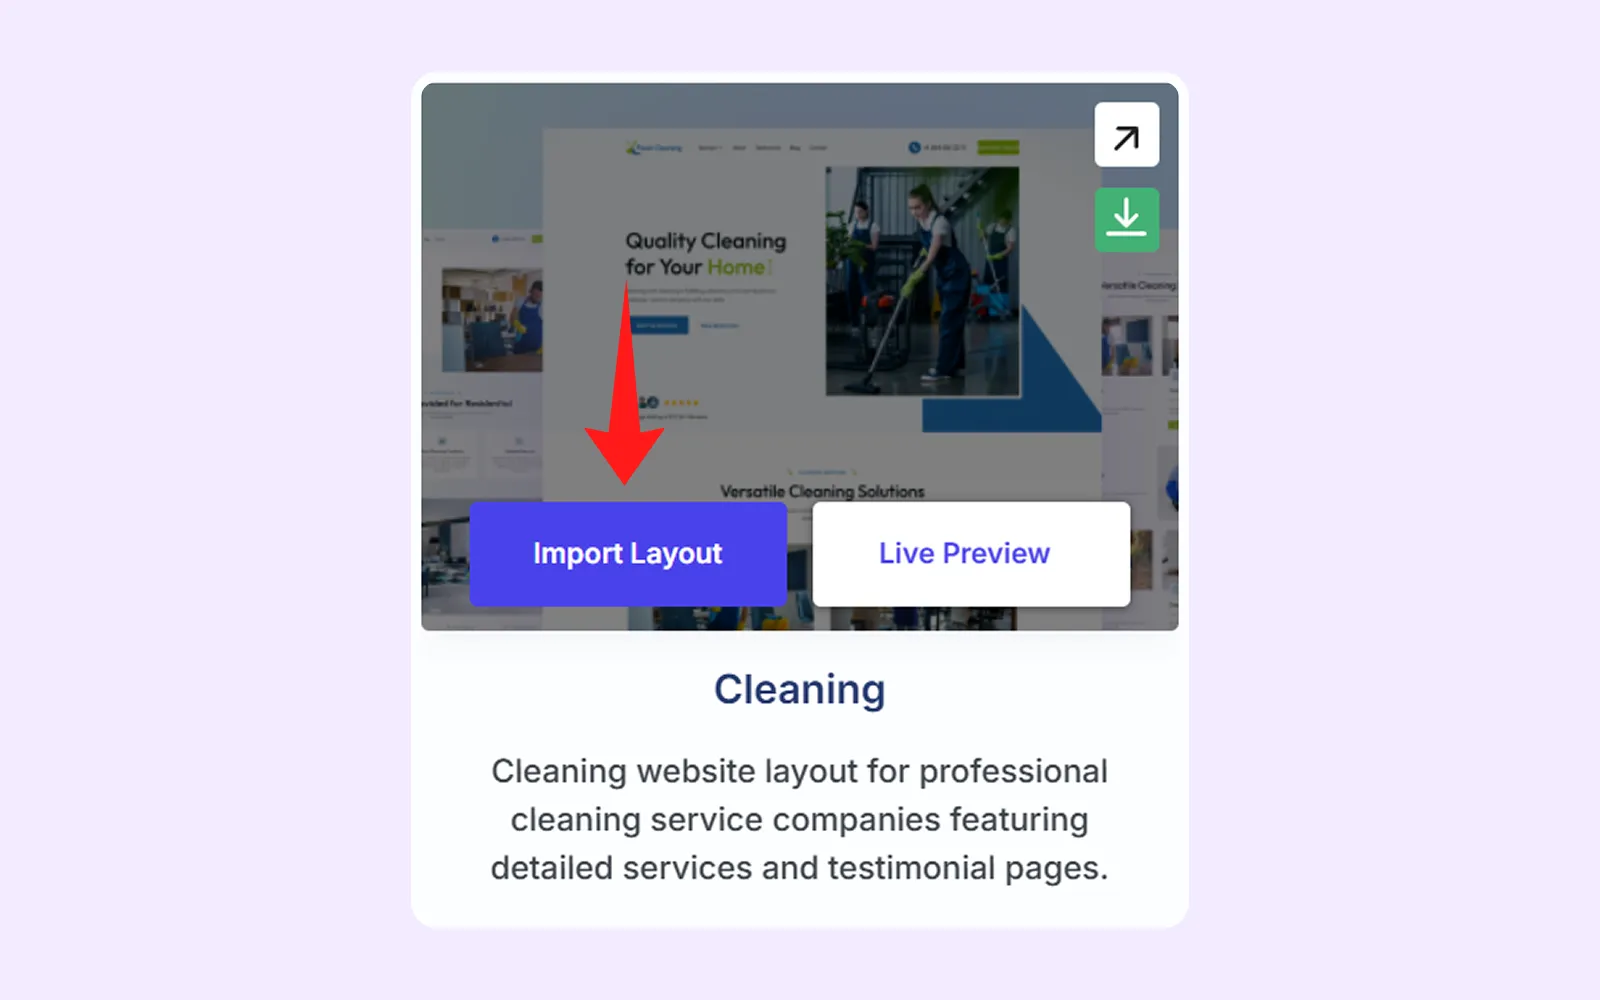
Step 4: Hover over the Cleaning layout and click “Import Layout.”
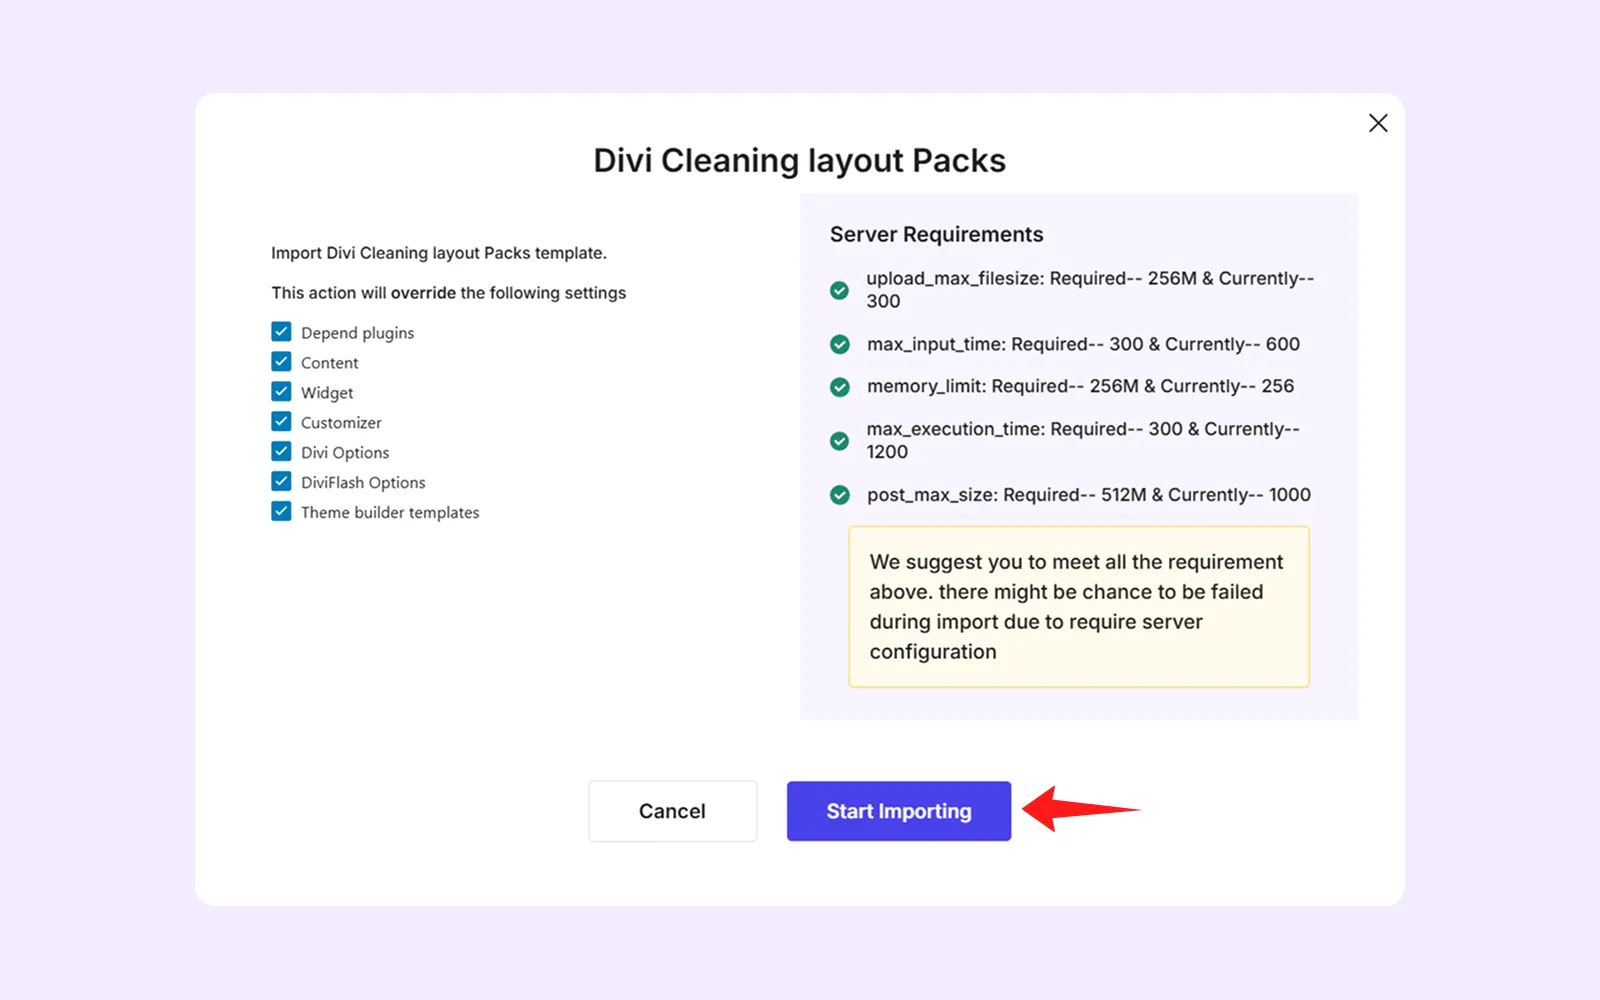
- A popup will appear showing the layout settings and server requirements. Make sure all items show green checkmarks. If you see any red crosses, update your server settings and refresh the page. Once everything turns green, click “Start Importing.”
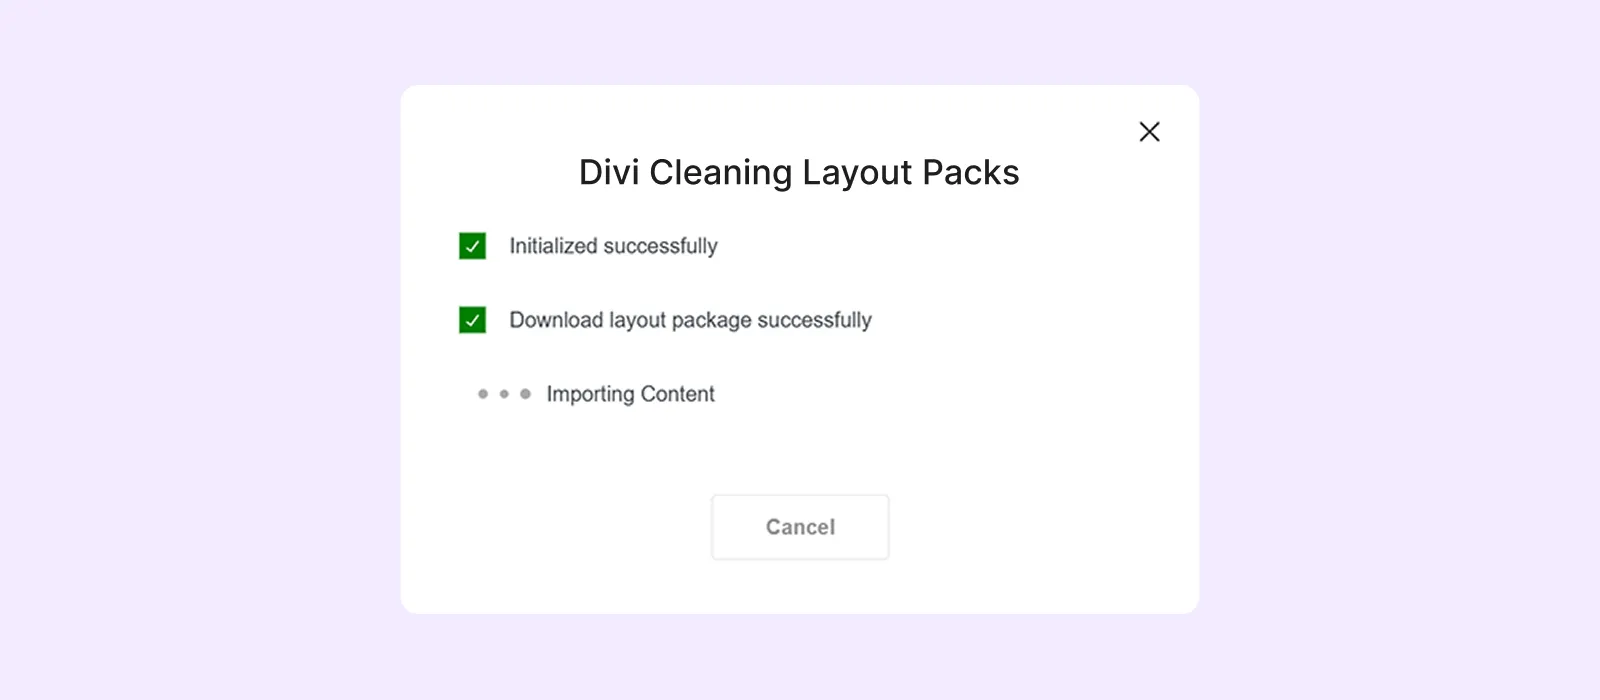
- The import process might take a few moments to finish.
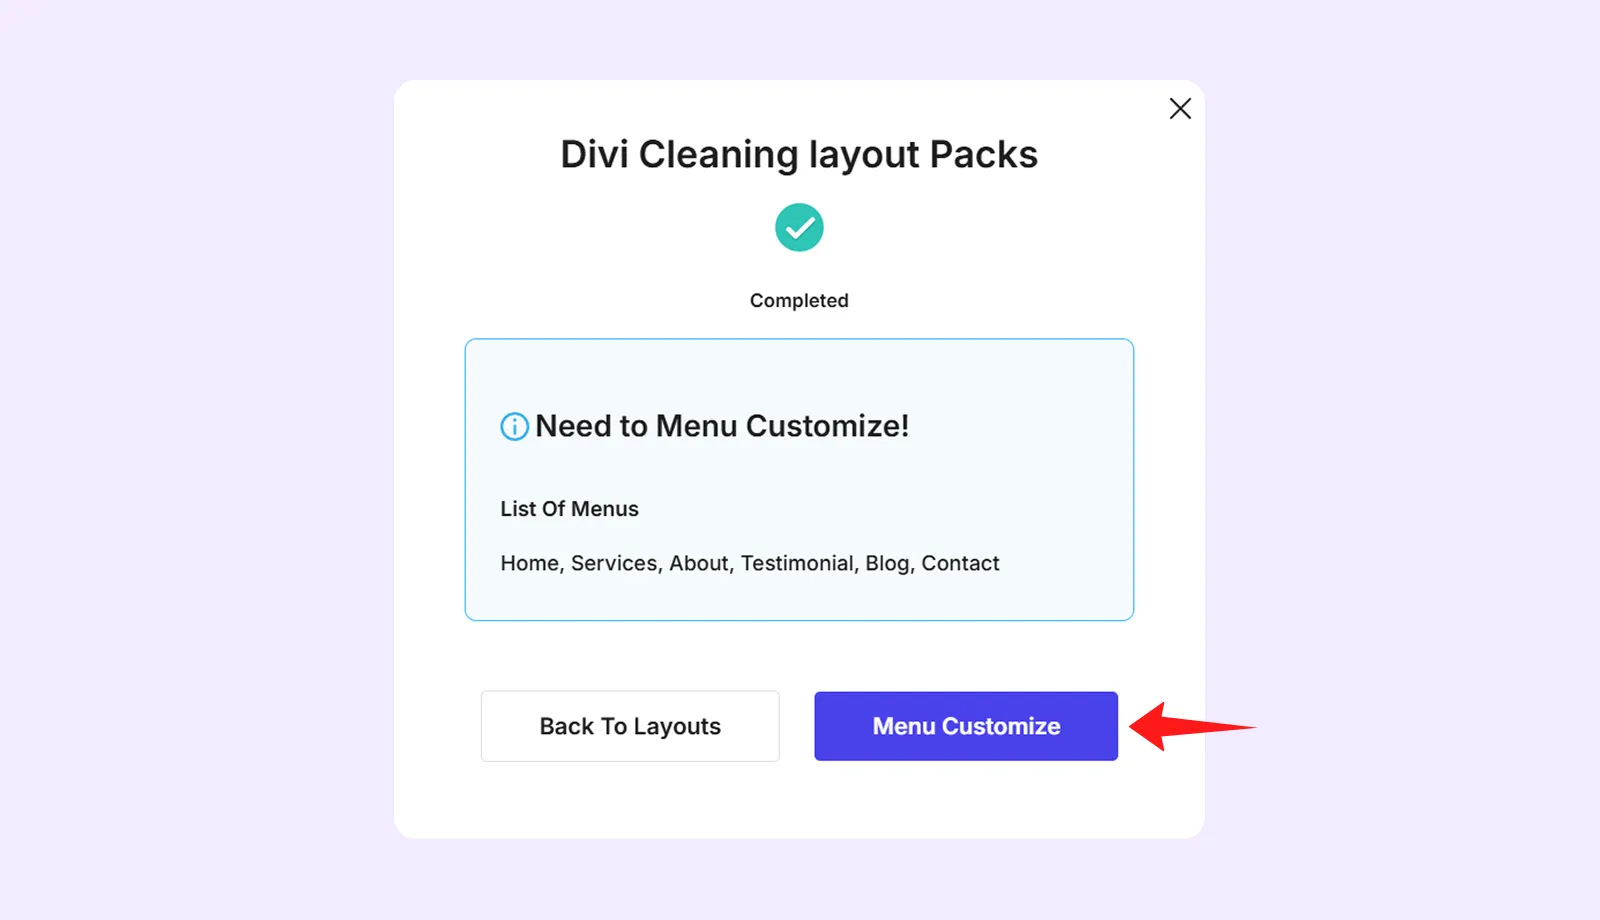
- After the import is finished, go to "Menu Customize" to create a menu for the imported layout. You can follow Divi Layout Menu Customization doc.
Note: Cleaning layout has a mega menu in the menu’s “Service” item that you have to activate manually. For that, follow these steps:
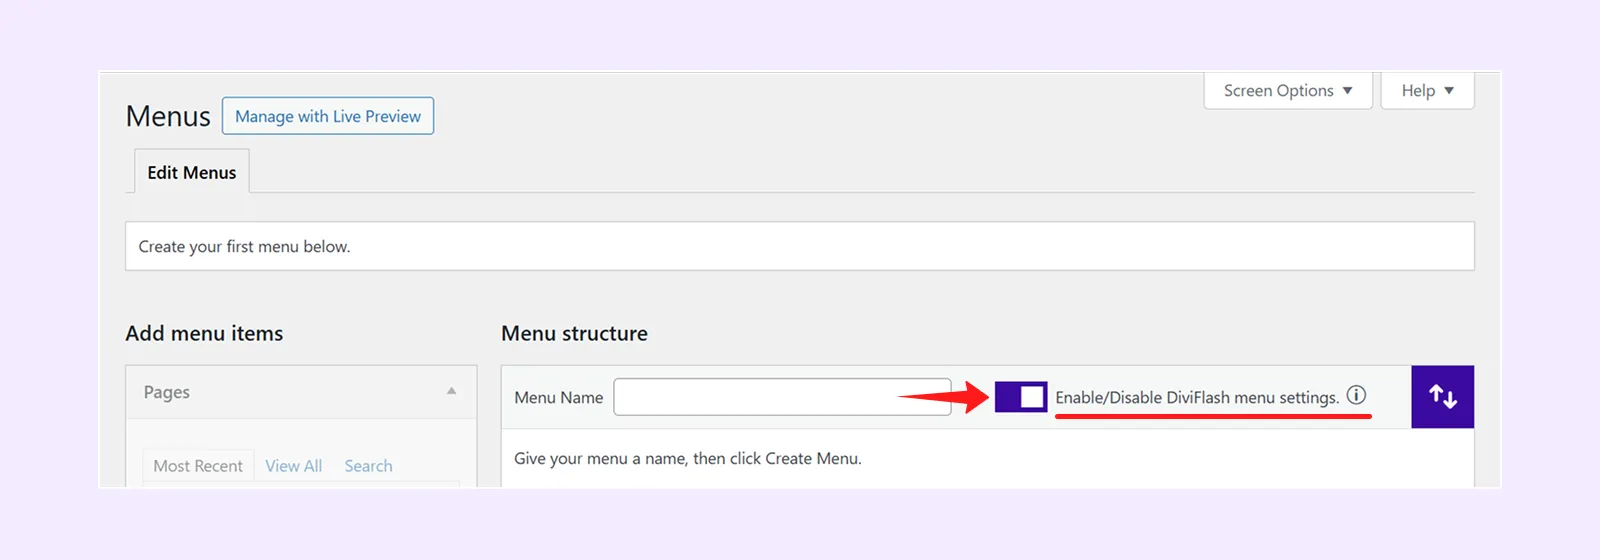
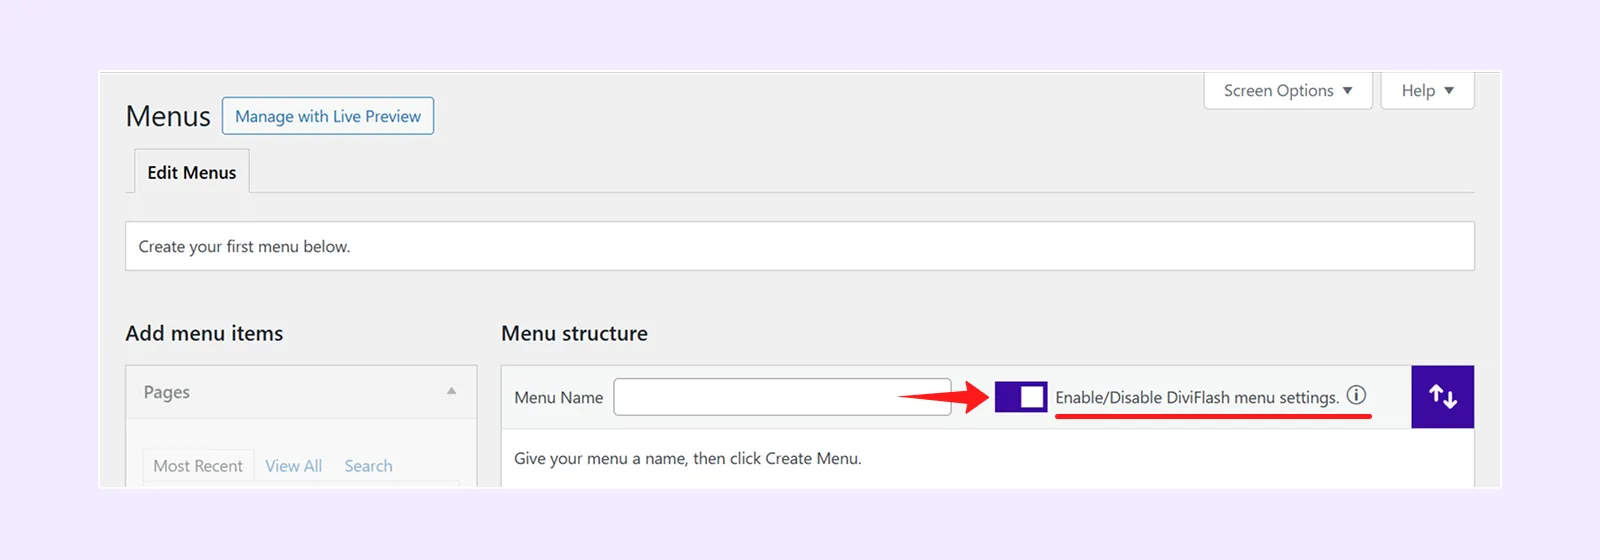
- Go to Appearance > Menus and enable DiviFlash menu settings.
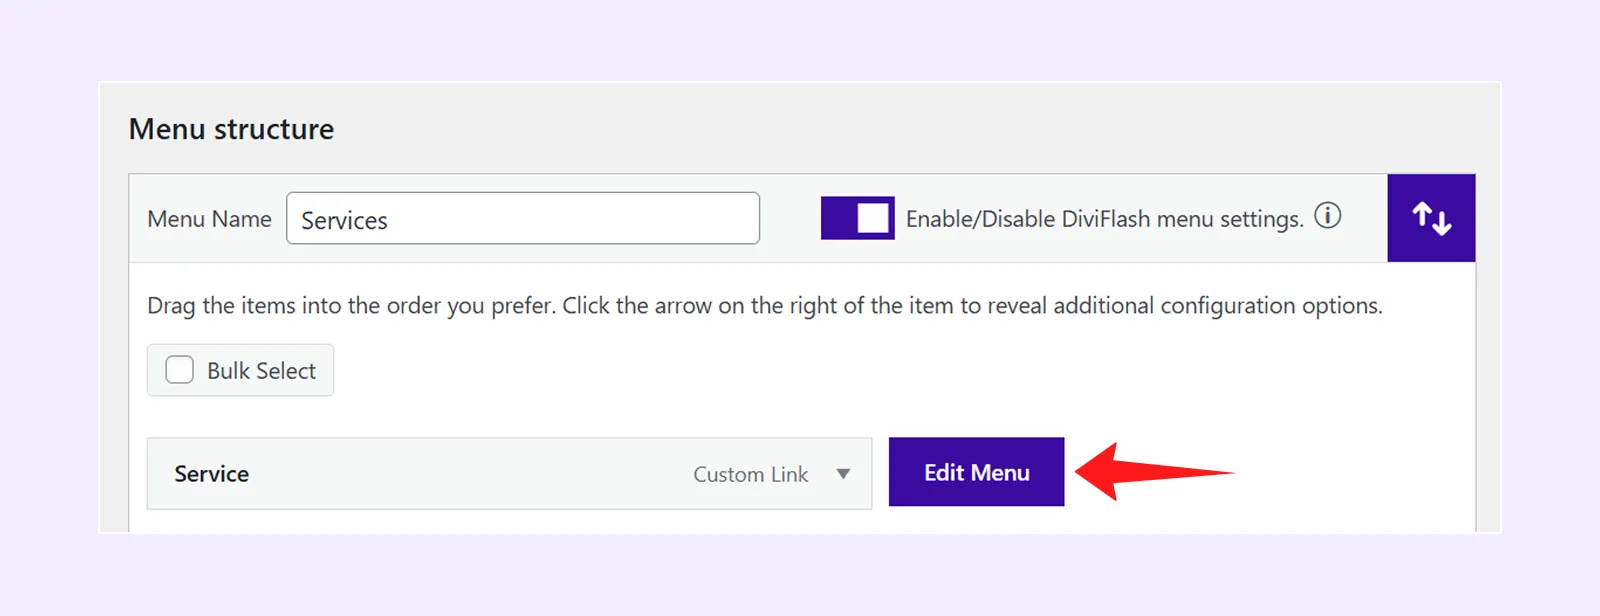
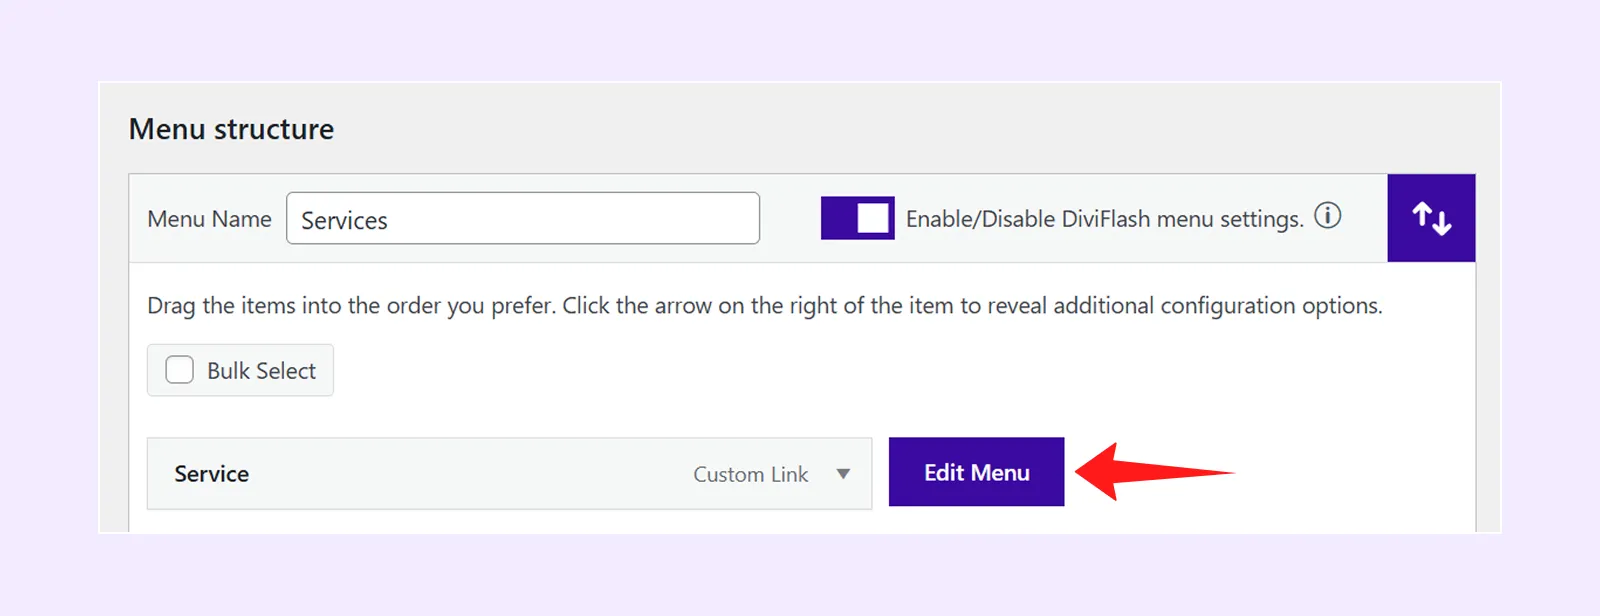
- Select Service menu > Edit Menu, and under “Layout Settings” make these changes:
- Submenu Type: Divi Layout
- Library Item: Mega Menu
- Content Width Type: Custom width
- Custom Width (px): 770
- Click Save & Exit.
Step 5: Set your homepage and blog page.
- Go to WordPress Dashboard > Settings > Reading.
- Below “Your homepage displays,” select “A static page.”
- Choose “Home” from the homepage dropdown menu.
- Choose “Blog” from the post page dropdown menu.
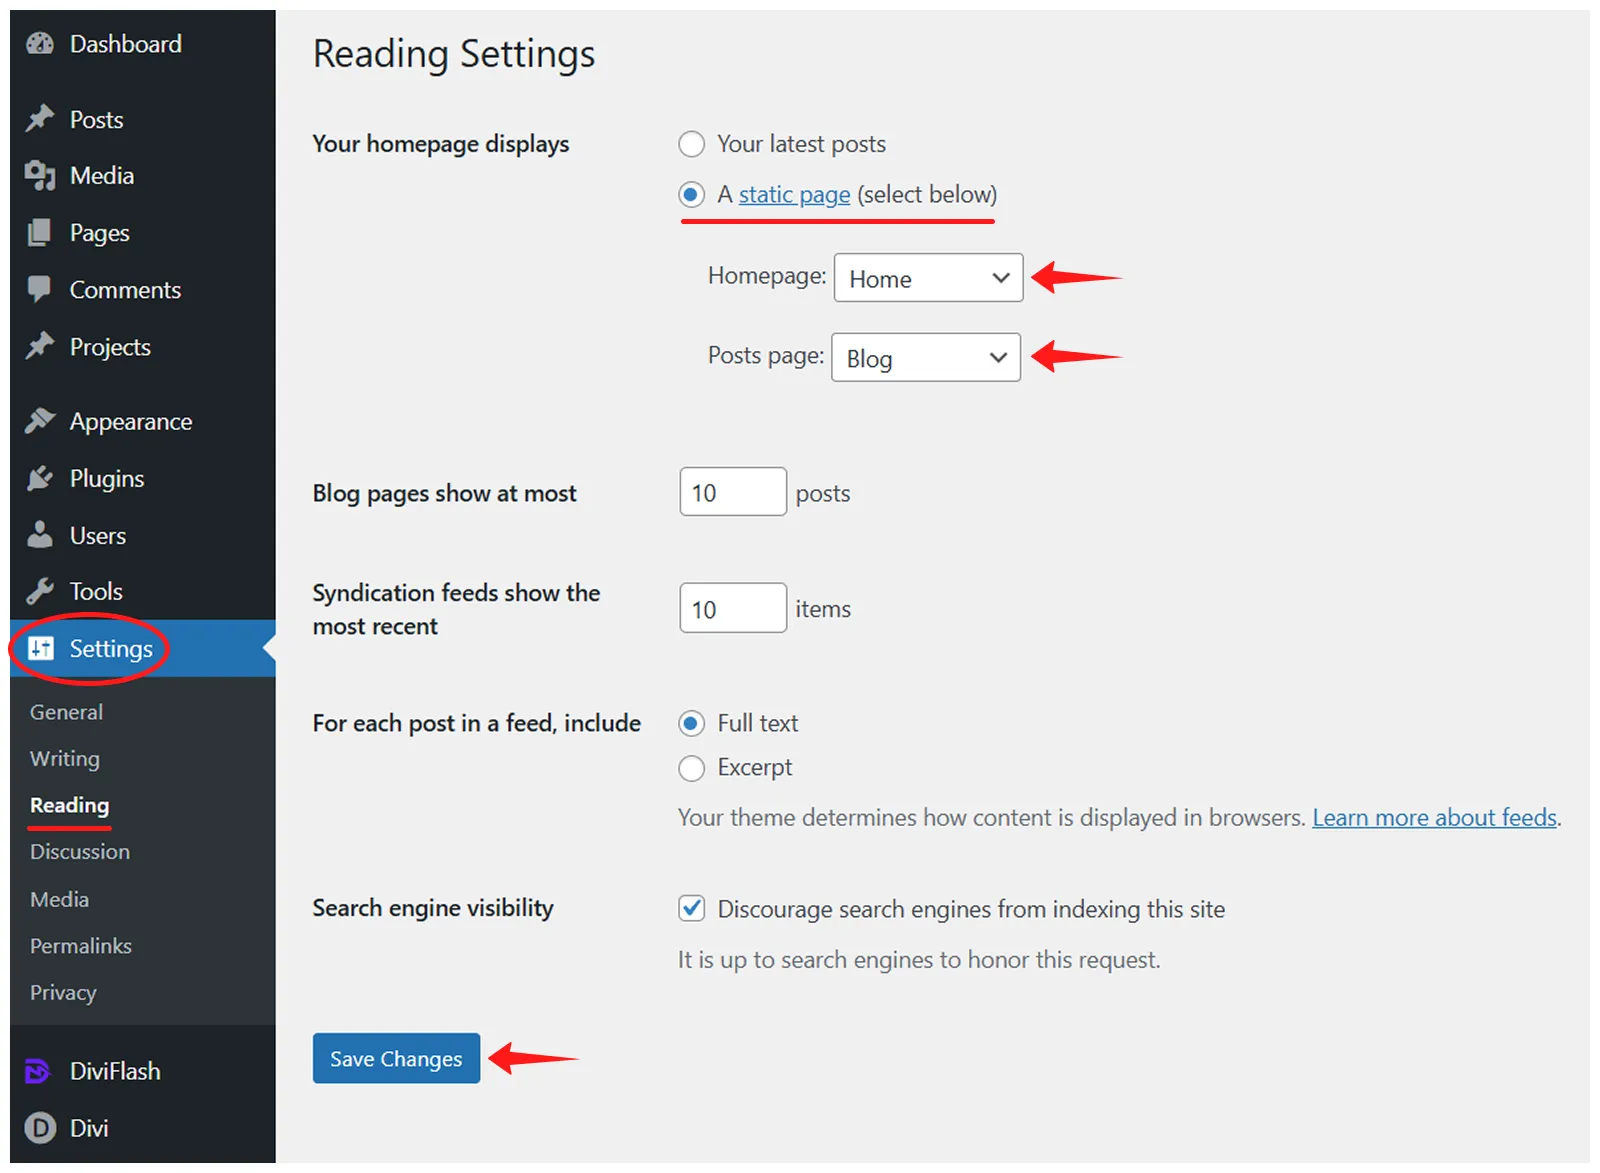
- Click on “Save Changes” to save it.
Step 6: Cleaning layout comes with a popup that you will find by going to WordPress Dashboard > DF Popups > All Popups.
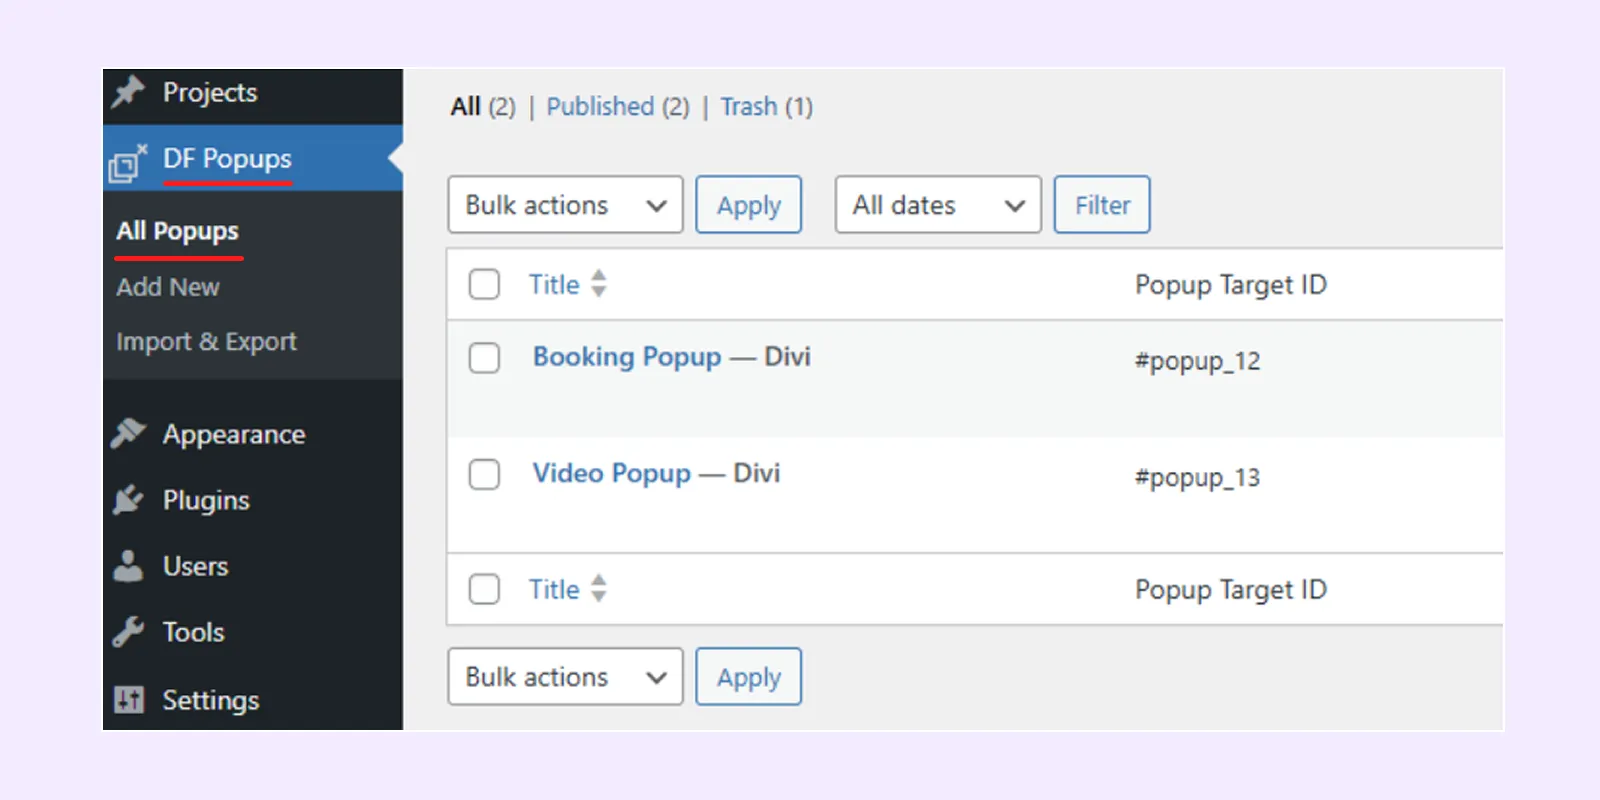
The Cleaning layout has been successfully imported and is now live on your website.
Method 2: Manually Import the Layout
Besides using the DiviFlash layout importer, you can also go for the manual approach to import the Cleaning Layout into your Divi website.
Here is how to do it:
Step 1: Install and activate the Divi theme.
Step 2: Install and activate the DiviFlash plugin.
Step 3: Download the Cleaning layout file from the DiviFlash website and unzip it.
Step 4: Import the “DiviFlash’s Dashboard” settings file into DiviFlash’s dashboard panel:
- Navigate to WordPress Dashboard > DiviFlash > Settings > Import/Export.
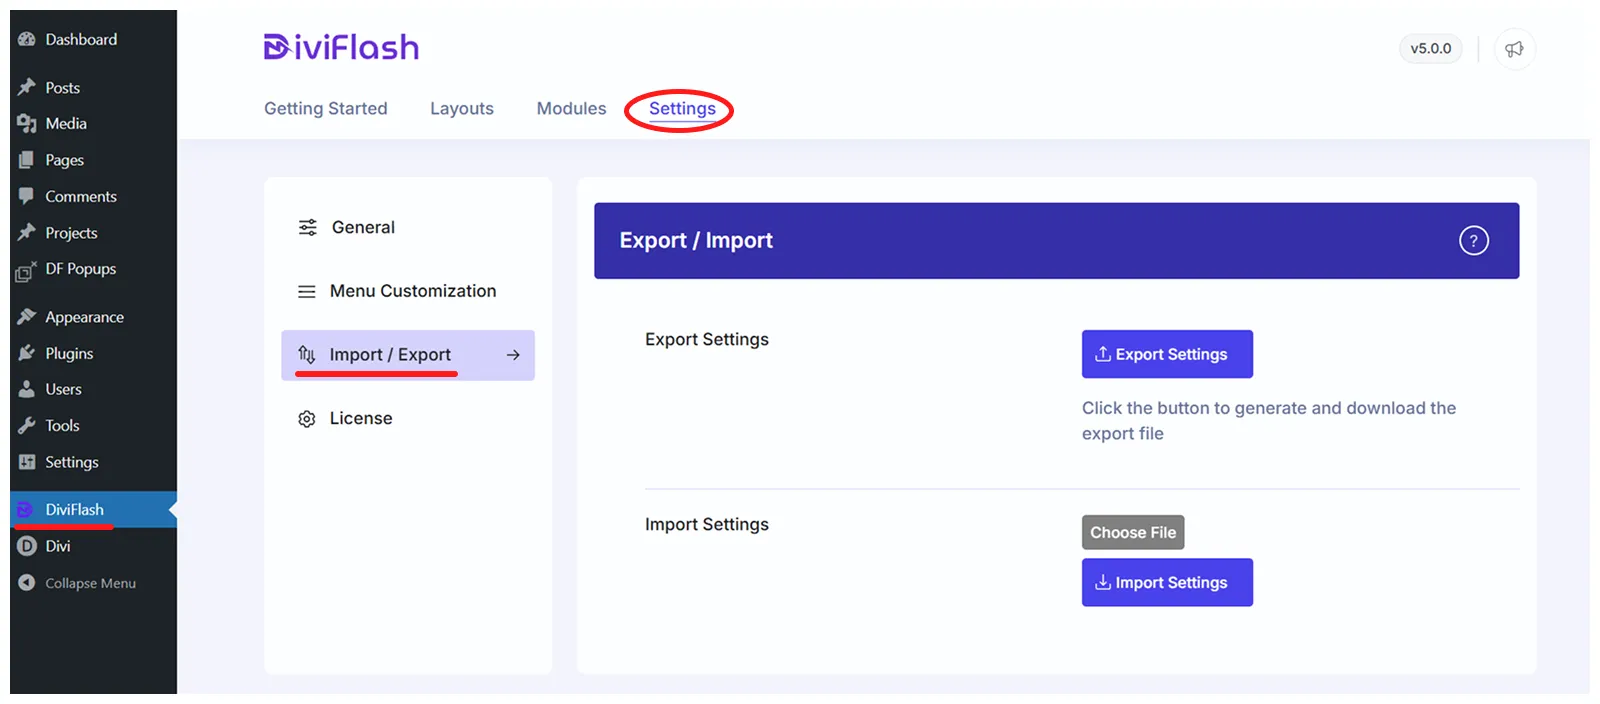
- Click on “Choose File” and select “DiviFlash Dashboard Settings - Divi Cleaning Layout Packs - DiviFlash.json”
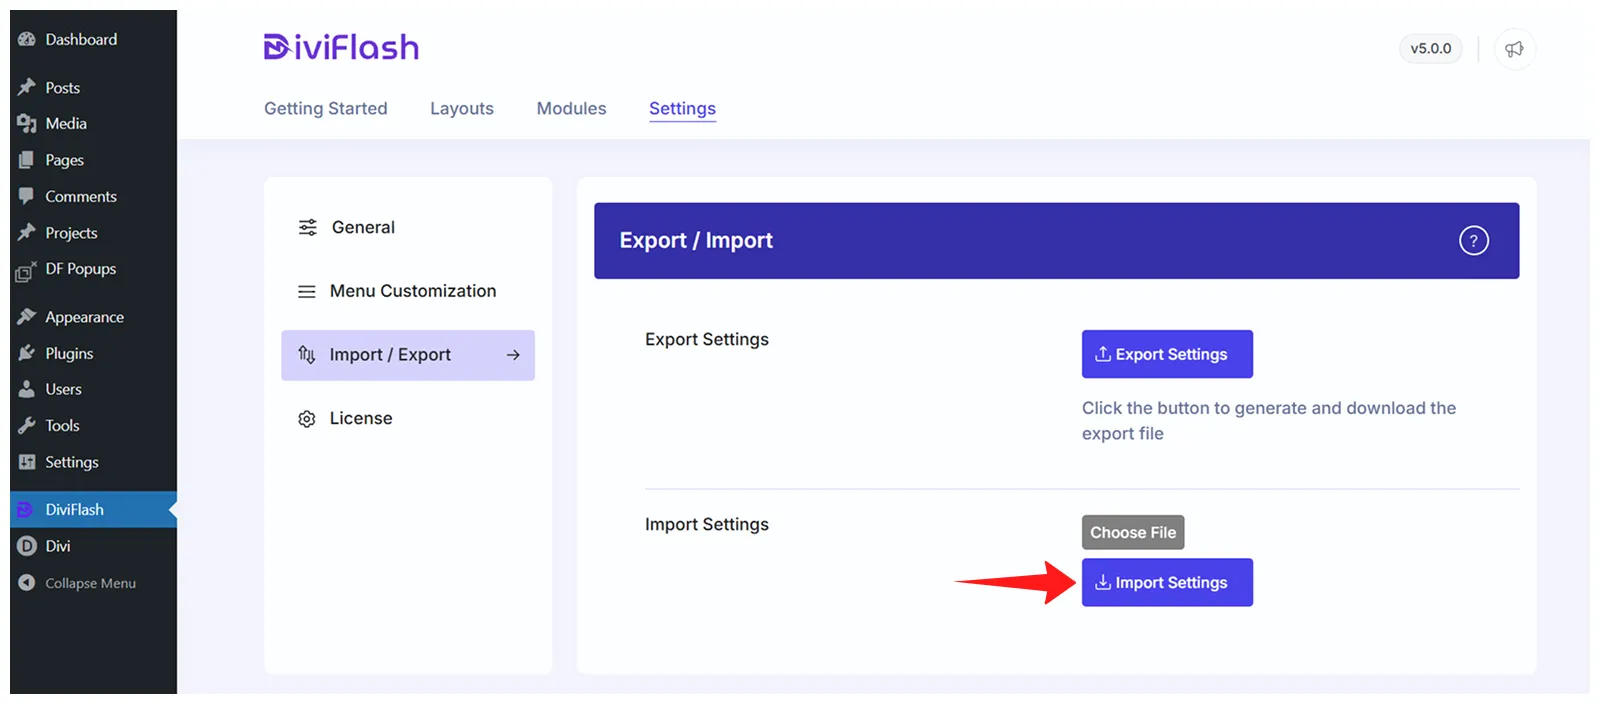
- Finally, click on the “Import Settings” button
Step 5: Import the “Divi Theme Options” file into the Divi Theme Options panel:
- Navigate to WordPress Dashboard > Divi > Theme Options
- Click on the “Import & Export” icon in the right side corner
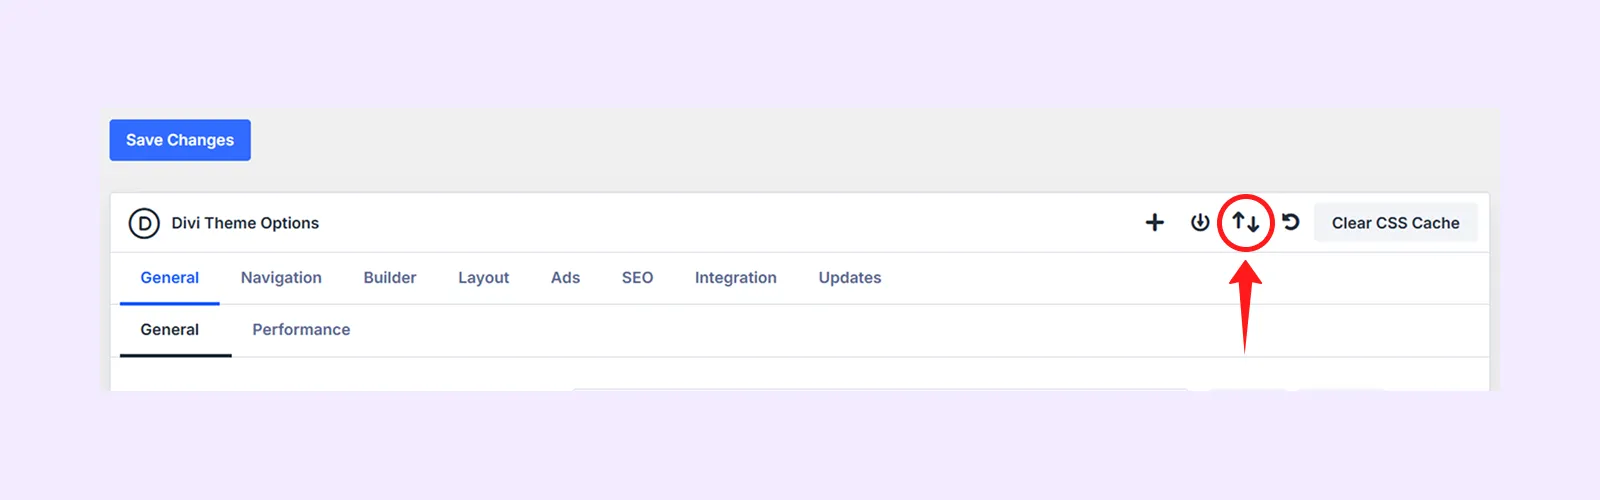
- Select the Import tab and click “Choose Files” to upload the JSON file named “Divi Theme Options Settings - Divi Cleaning Layout Packs - DiviFlash.json”
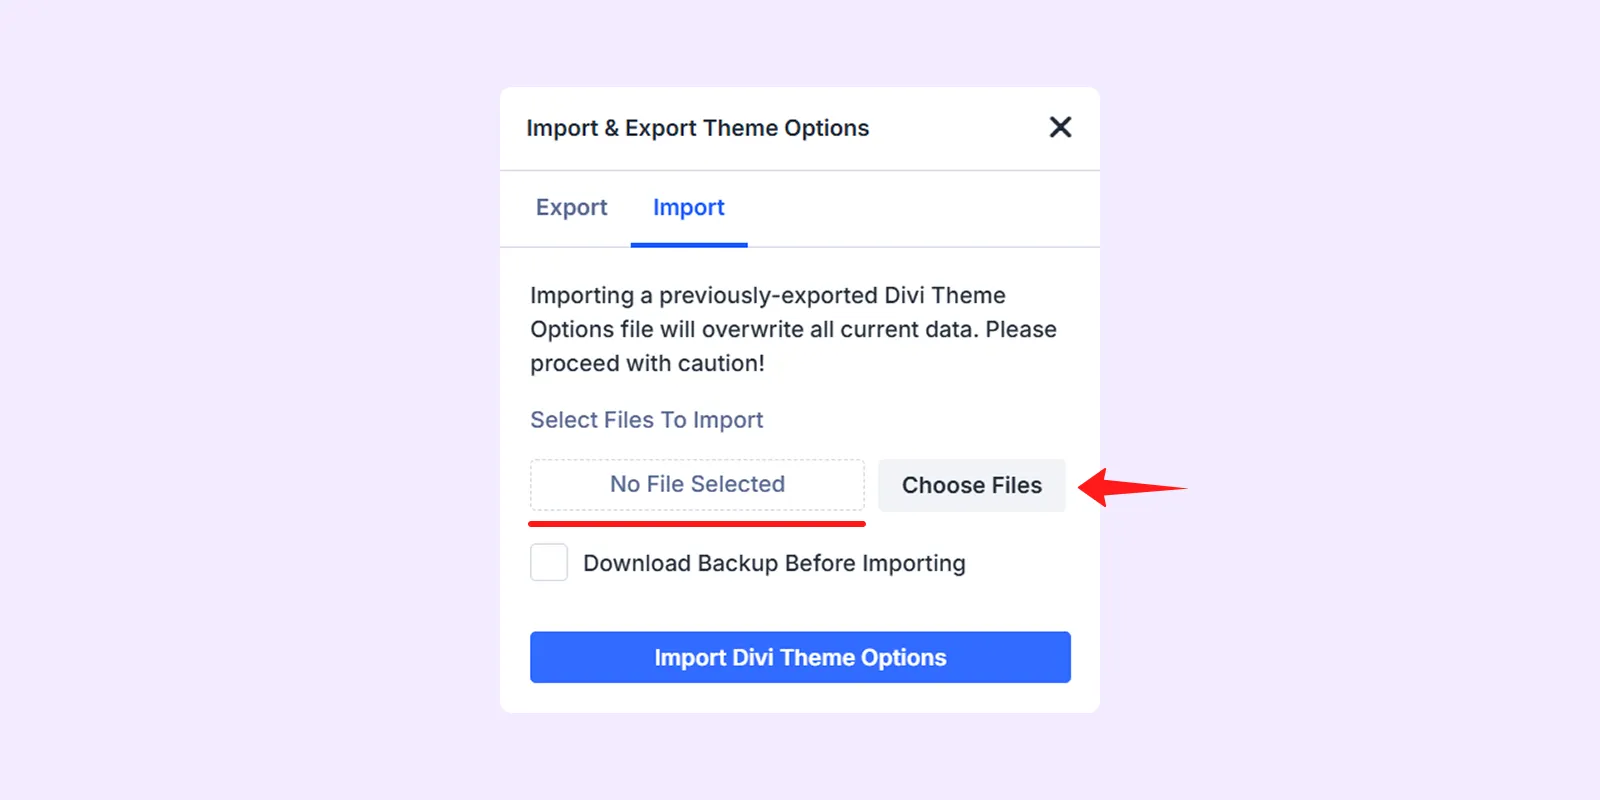
- Finally, click on “Import Divi Theme Options”
Step 6: Import the “Theme Builder” file into the Divi Theme Builder panel:
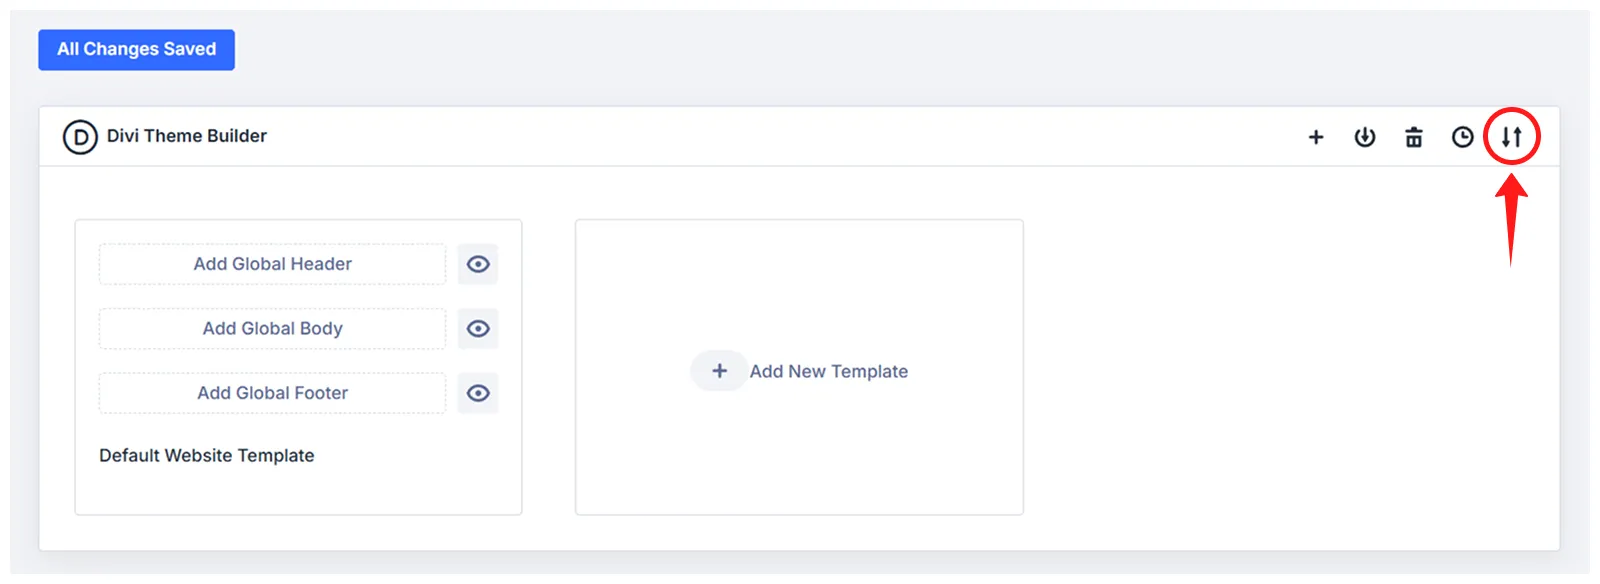
- Navigate to your WordPress dashboard and go to Divi > Theme Builder
- Click on the “Import & Export” icon in the right side corner
- Select the Import tab and click “Choose Files” to upload the JSON file named “Divi Theme Builder Settings - DiviCleaning Layout Packs - DiviFlash.json”
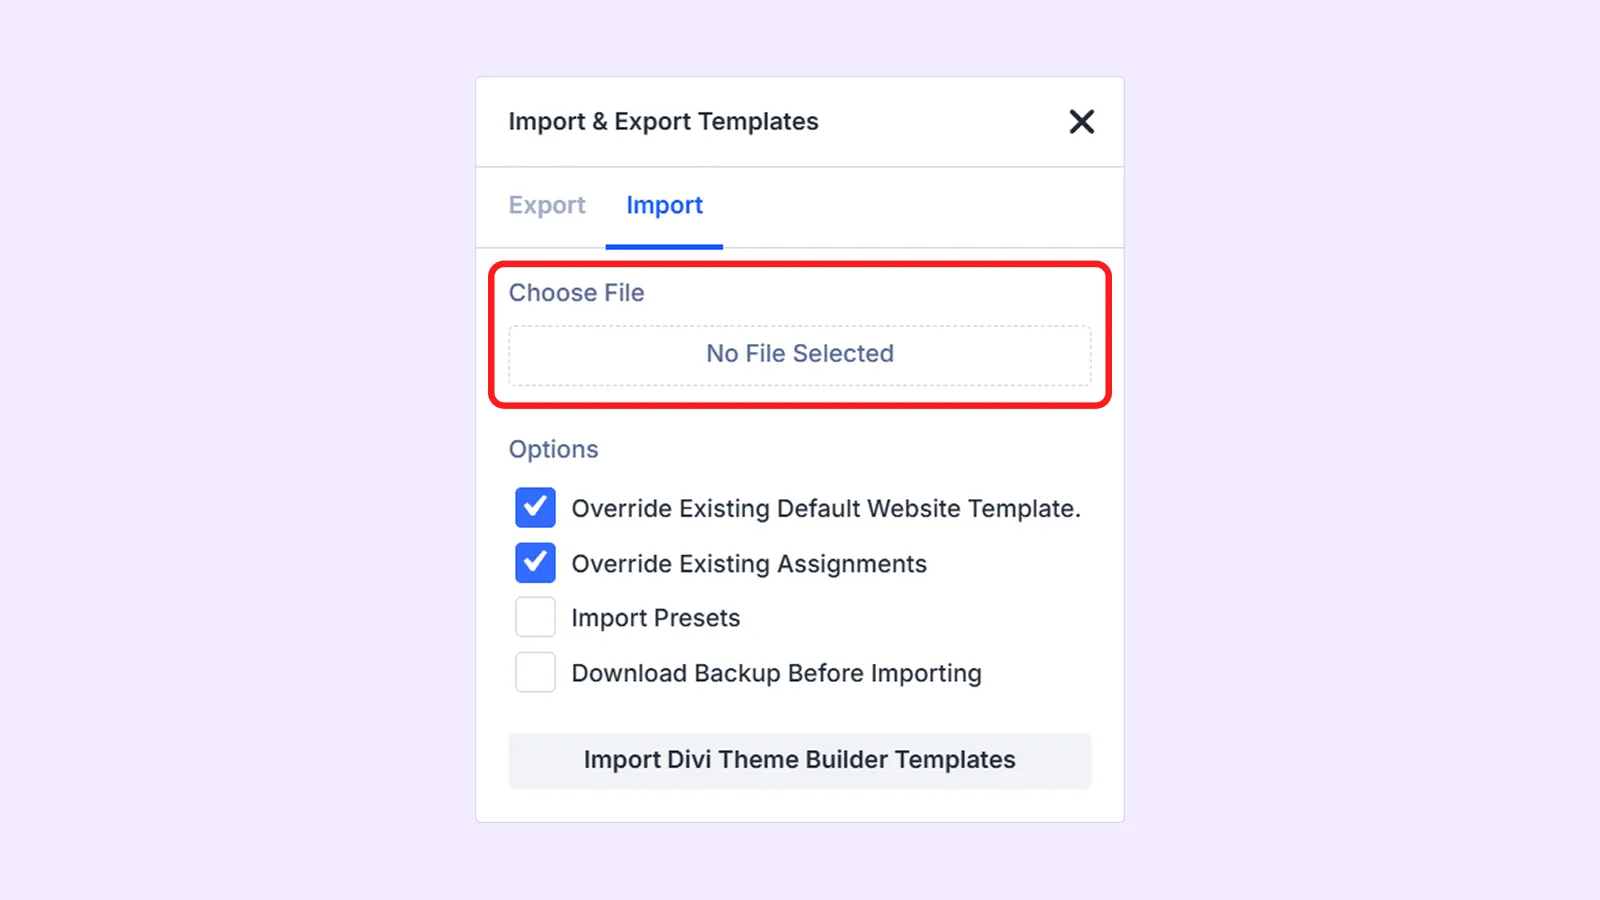
- Finally, click on “Import Divi Theme Builder Templates”.
Step 7: Import Cleaning Layout Library Items into Divi Library:
- Navigate to your WordPress dashboard and go to Divi > Divi Library
- Click on the “Import & Export” button on the top left
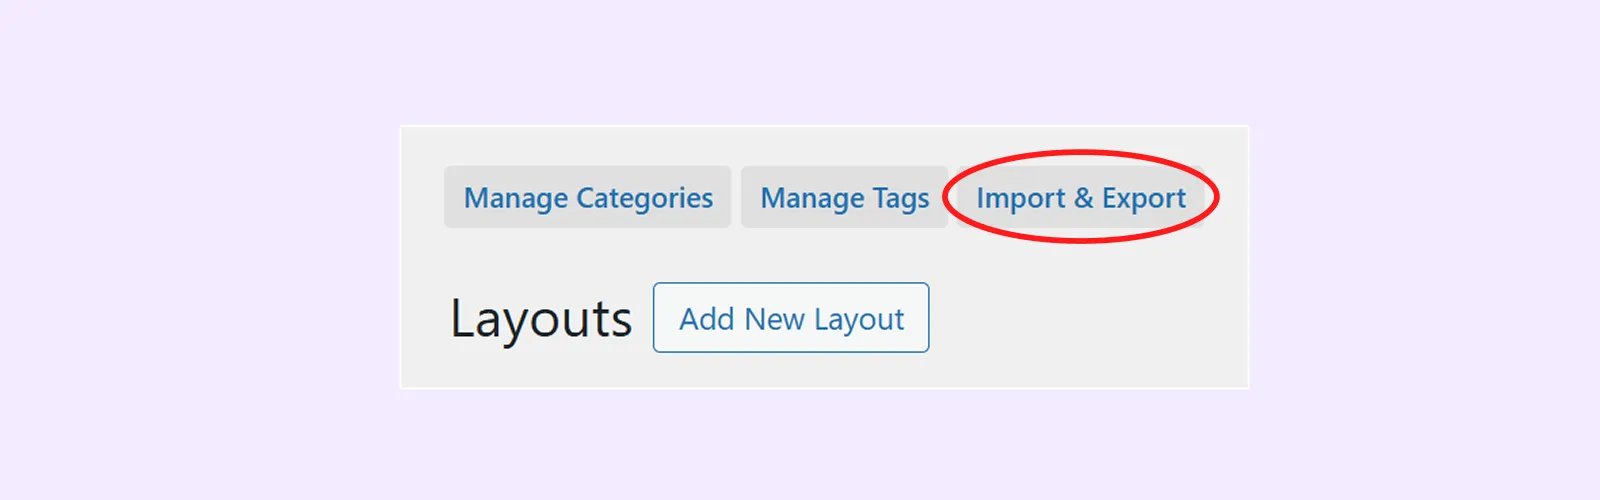
- Select the Import tab and click “Choose Files” to upload the JSON file named “All in one Divi Library - Divi Cleaning Layout Packs - DiviFlash.json"
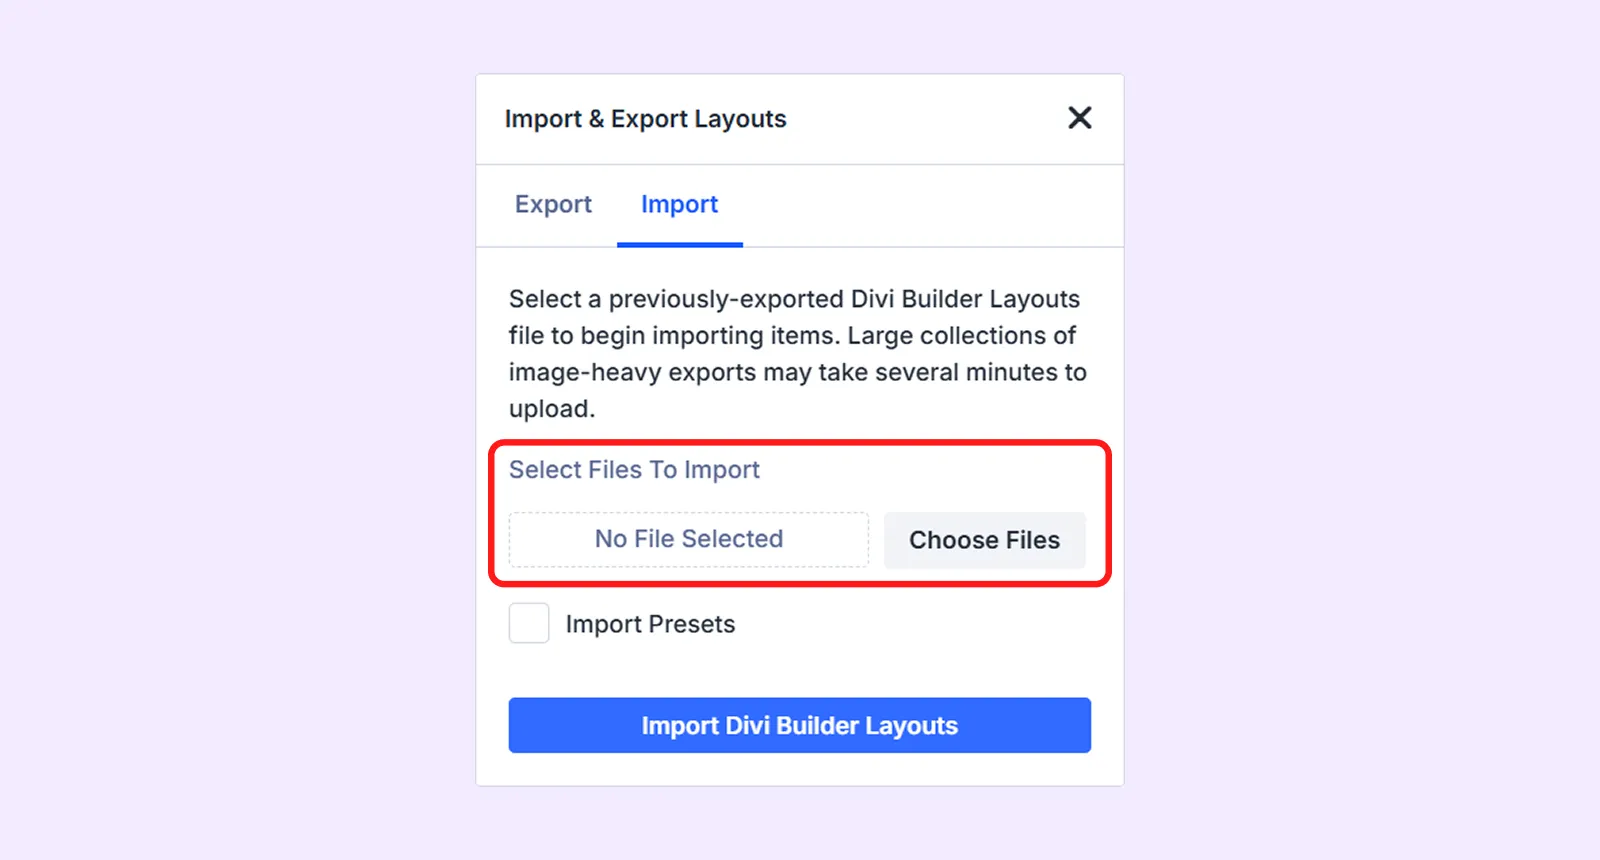
- Click on the “Import Divi Builder Layouts” button.
Step 8: Import the “Theme Customizer Settings” file into the Theme Customizer
- Navigate to WordPress Dashboard > Divi > Theme Customizer
- Click on the “Import & Export” icon on the top left corner.

- Select the Import tab and click “Choose Files” to upload the JSON file named “Divi Theme Customizer Settings - Divi Cleaning Layout Packs - DiviFlash.json”
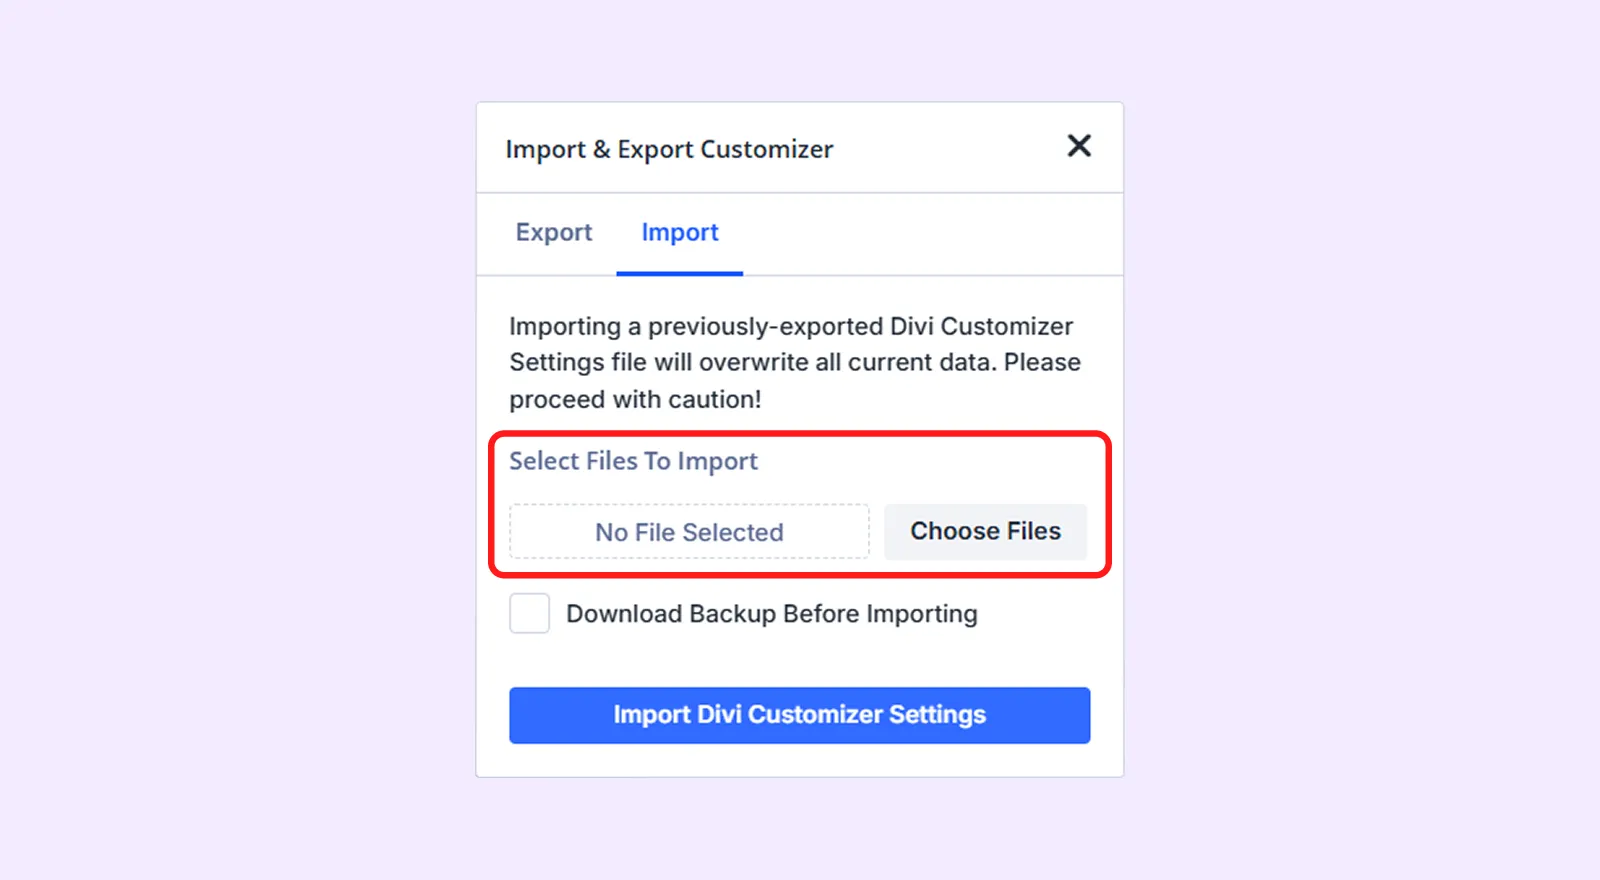
- Finally, click on “Import Divi Customizer Settings”.
Step 9: Import the Pages file for the layout
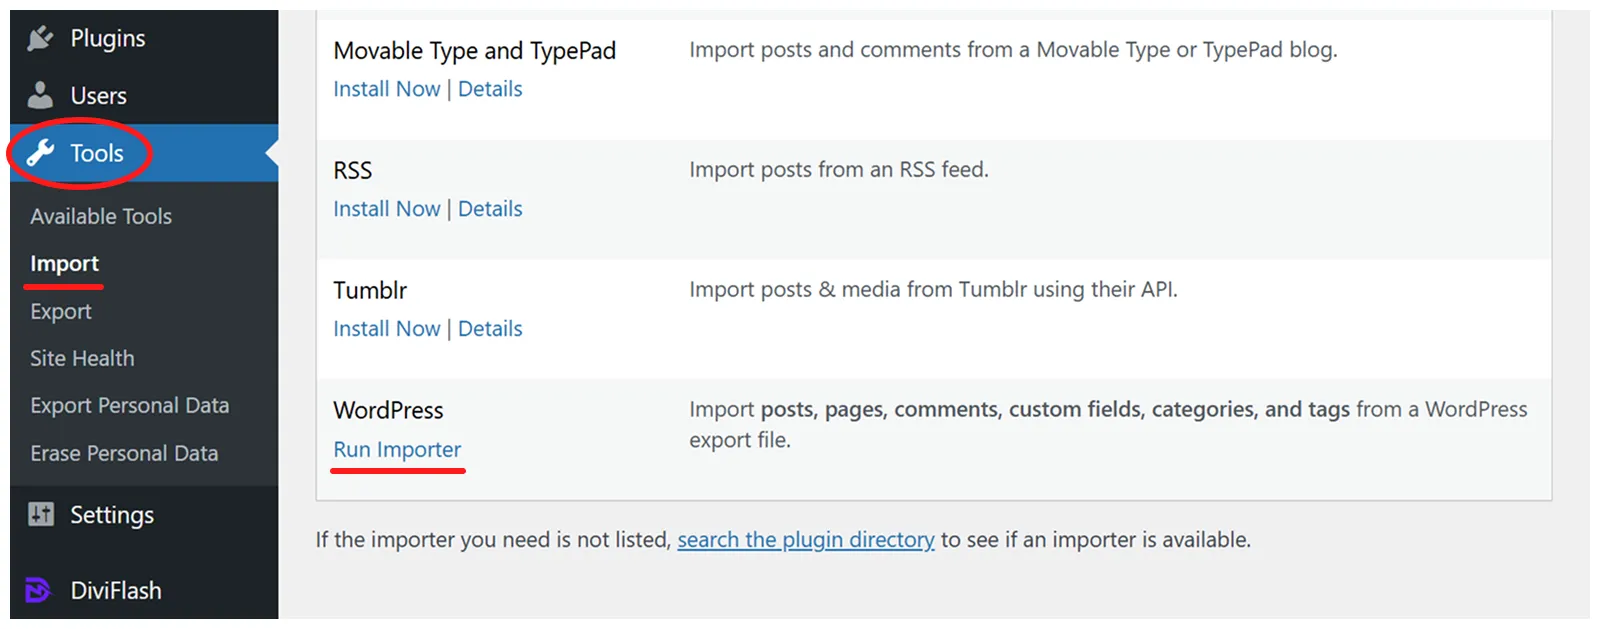
- Navigate to WordPress Dashboard > Tools > Import
- Click on Run Importer under the WordPress (If you see, “Install Now” instead of “Run Importer,” click on install. Then you will get the “Run Importer” option.)
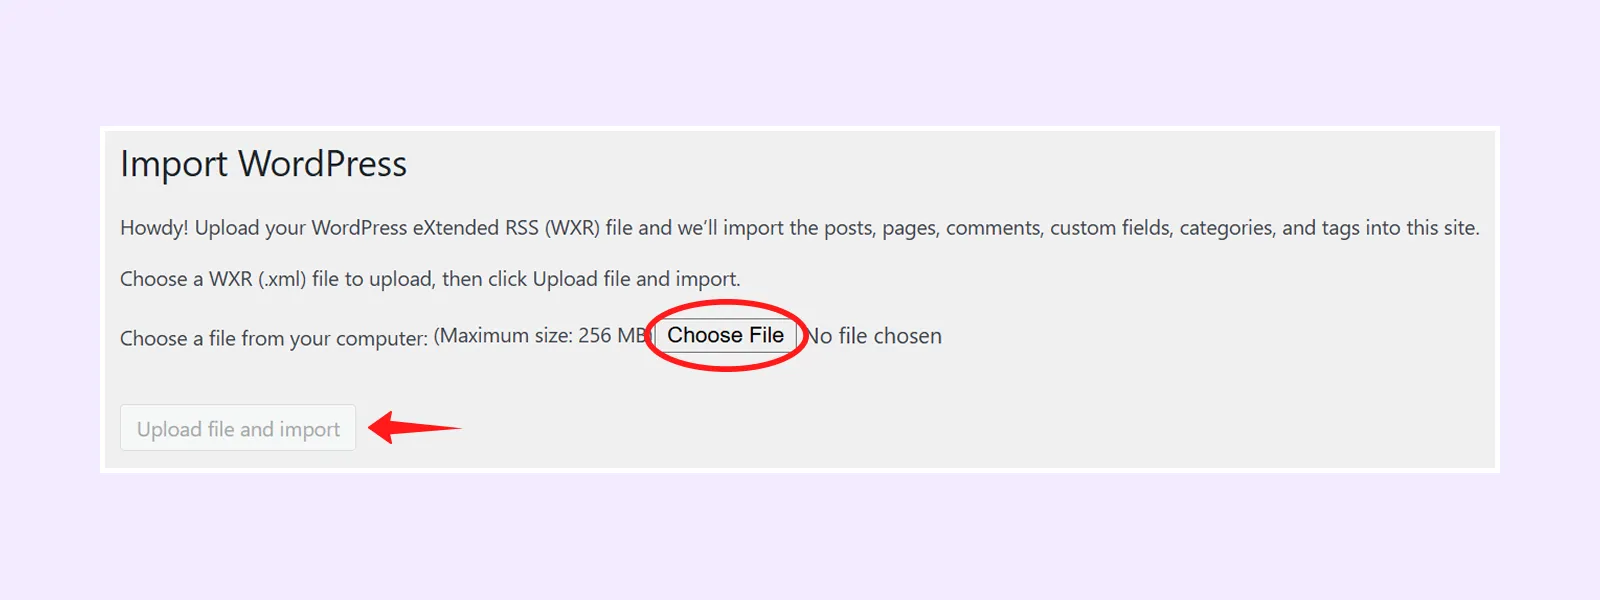
- Click on “Choose File” and import the “Pages - Divi Cleaning Layout Packs - DiviFlash.xml” file and click “Upload file and import”.
- Assign the author (or skip this step), then check the "Import Attachment" option and click "Submit" to save your changes.
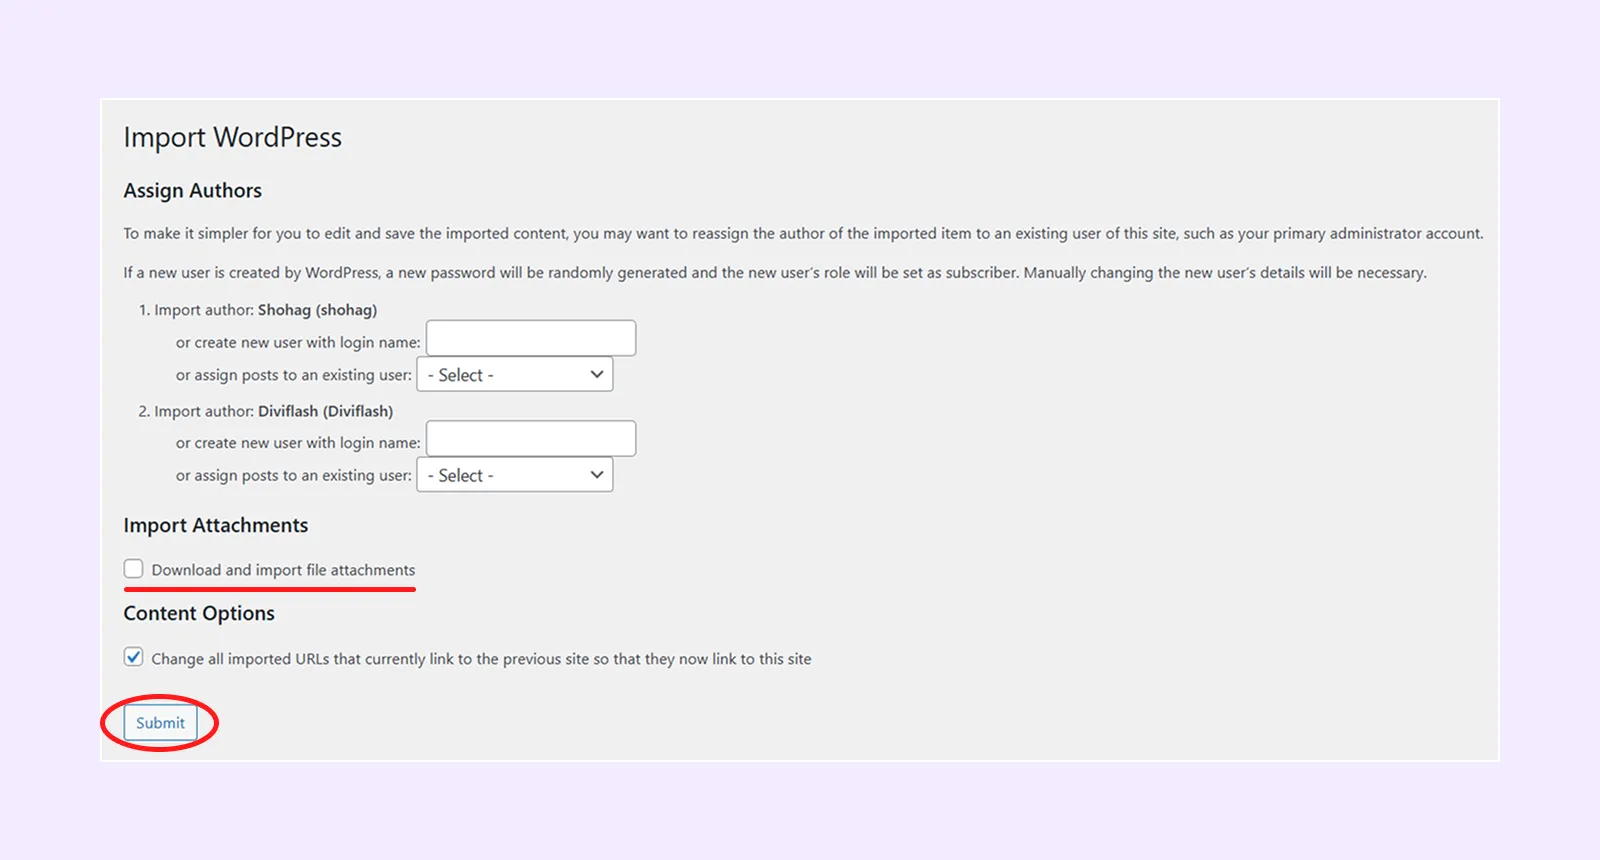
By following the same steps (WordPress dashboard > Tools > Import > Run Importer under the WordPress), you have to import Media and Posts .xml files.
Note: Instead of importing all pages via the XML file, you can import individual pages as JSON files into the Divi Library. This lets you create pages in the Divi Builder using only the layouts you need. Follow our doc on creating pages from Divi Library items.
Step 10: Import the popup file into popup import and export panel
To use the popup settings, first enable the Popup feature by going to WordPress Dashboard > DiviFlash > Settings > Popup Enable.
- Navigate to WordPress Dashboard > DF Popups > Import & Export
- Under the Import section, click on “Choose File” and select “df-popup.json” file.
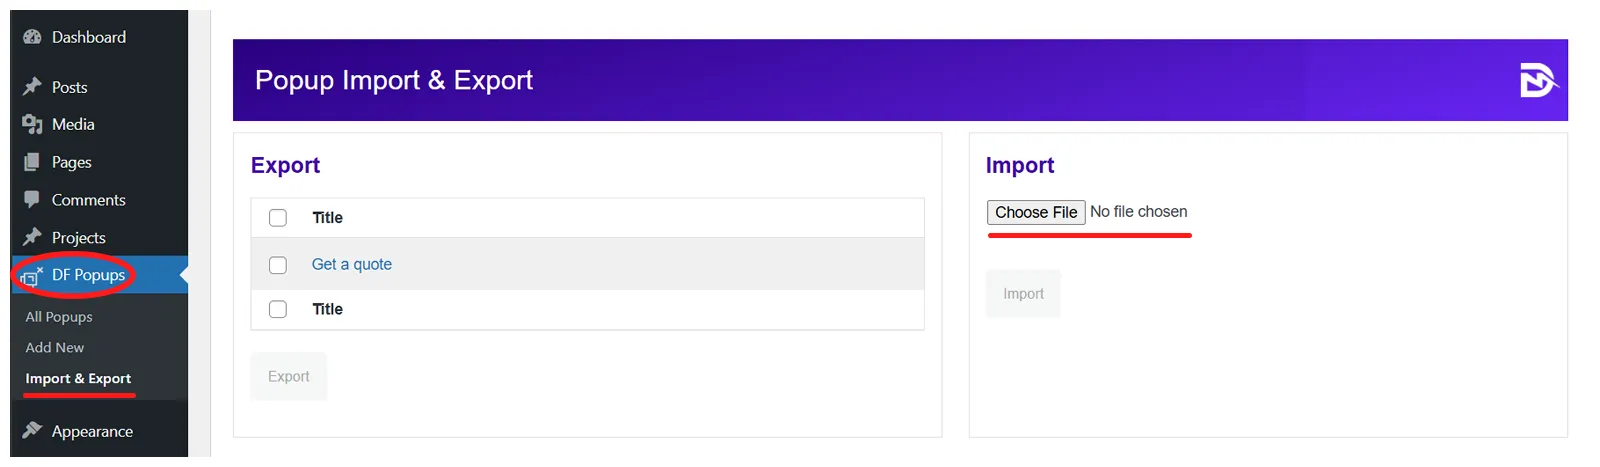
- Click the “Import” button.
Step 11: Publish the Imported Popup
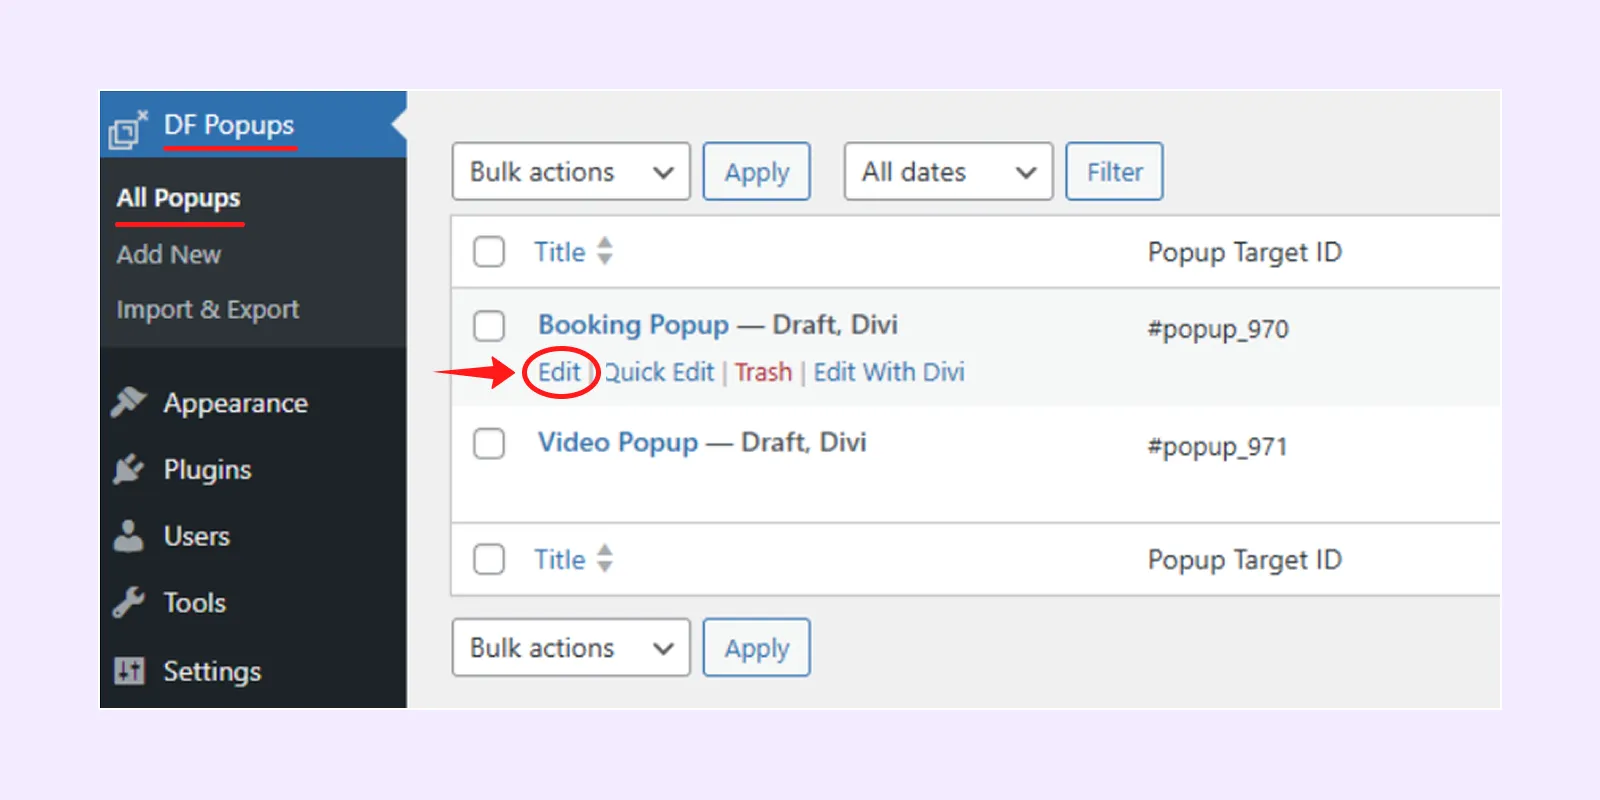
- Go to WordPress Dashboard > DF Popups > All Popups
- Click Edit below the popup name.
- Click the Publish button.
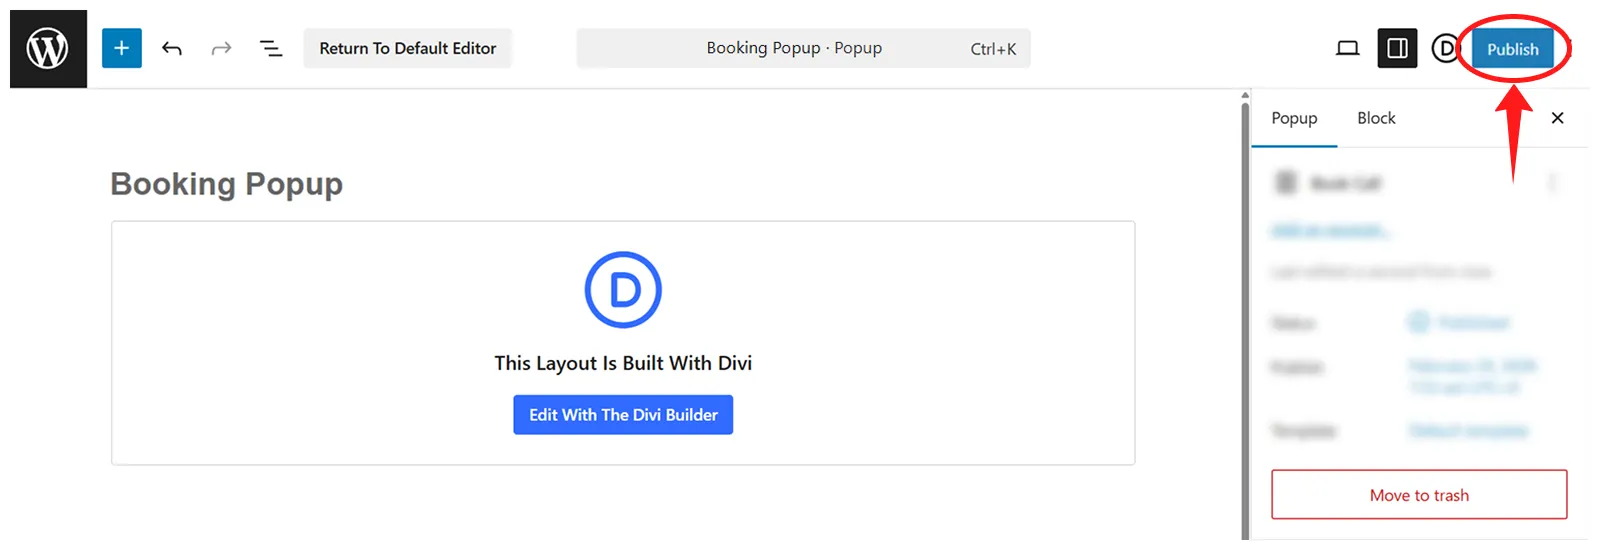
- Repeat these steps to publish the second popup.
Step 12: Set your homepage and blog page.
- Go to WordPress Dashboard > Settings > Reading.
- Below “Your homepage displays,” select “A static page.”
- Choose “Home” from the homepage dropdown menu.
- Choose “Blog” from the post page dropdown menu.
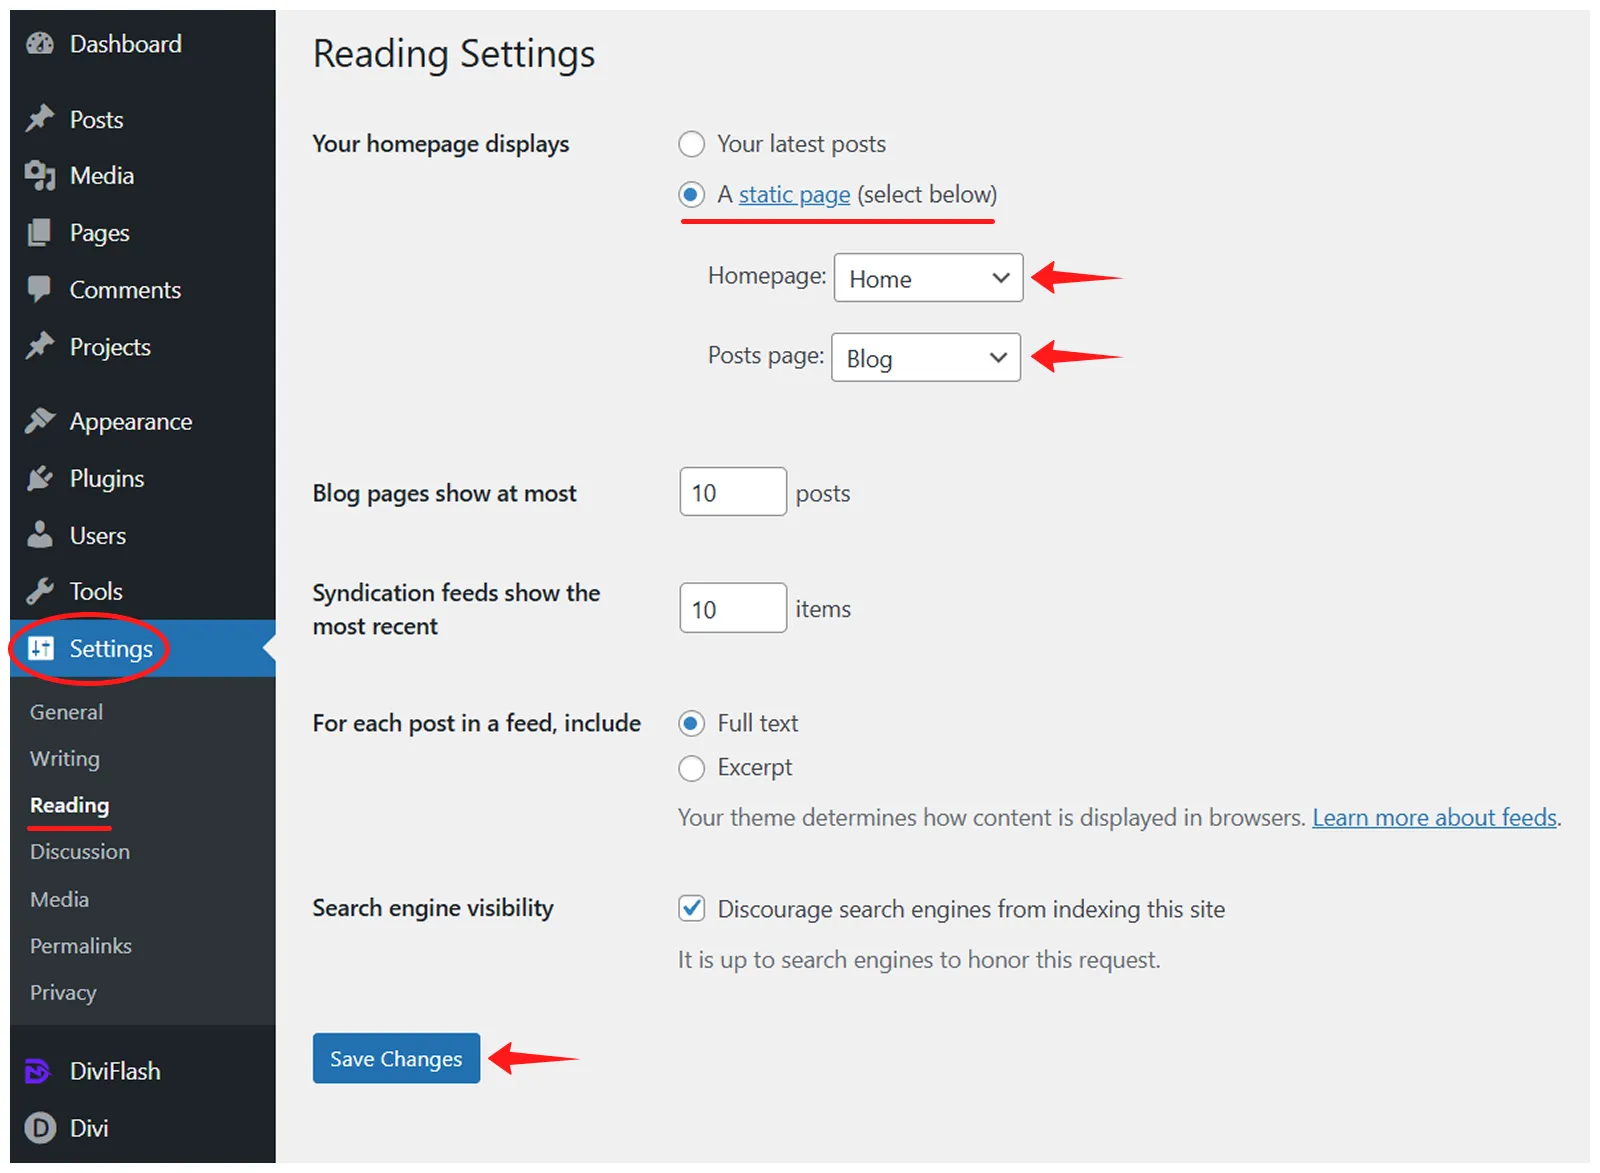
- Click on “Save Changes” to save it.
Step 13: Create a menu for the imported layout. You can follow Divi Layout Menu Customization doc.
Note: Cleaning layout has a mega menu in the menu’s “Service” item that you have to activate manually. For that, follow these steps:
- Go to Appearance > Menus and enable DiviFlash menu settings.
- Select Service > Edit Menu, and under “Layout Settings” make these changes:
- Submenu Type: Divi Layout
- Library Item: Mega Menu
- Content Width Type: Custom width
- Custom Width (px): 770
- Click Save & Exit.
Now your website should look exactly the same as the Cleaning layout!
Any Questions?
If you have any questions, please feel free to contact our support team at [email protected]