
You can add the Magazine layout to your Divi site using one of the following methods:
- Method 1: Using the DiviFlash layout importer (recommended).
- Method 2: Manually importing the layout.
In this doc, we will show you how to use this layout using both methods. Let's get started.
Method 1: Using DiviFlash Layout Importer
Step 1: Install and activate the Divi theme.
Step 2: Install and activate the DiviFlash plugin.
Step 3: In the WordPress Dashboard, go to DiviFlash > Layouts, then search for the "Magazine Layout".
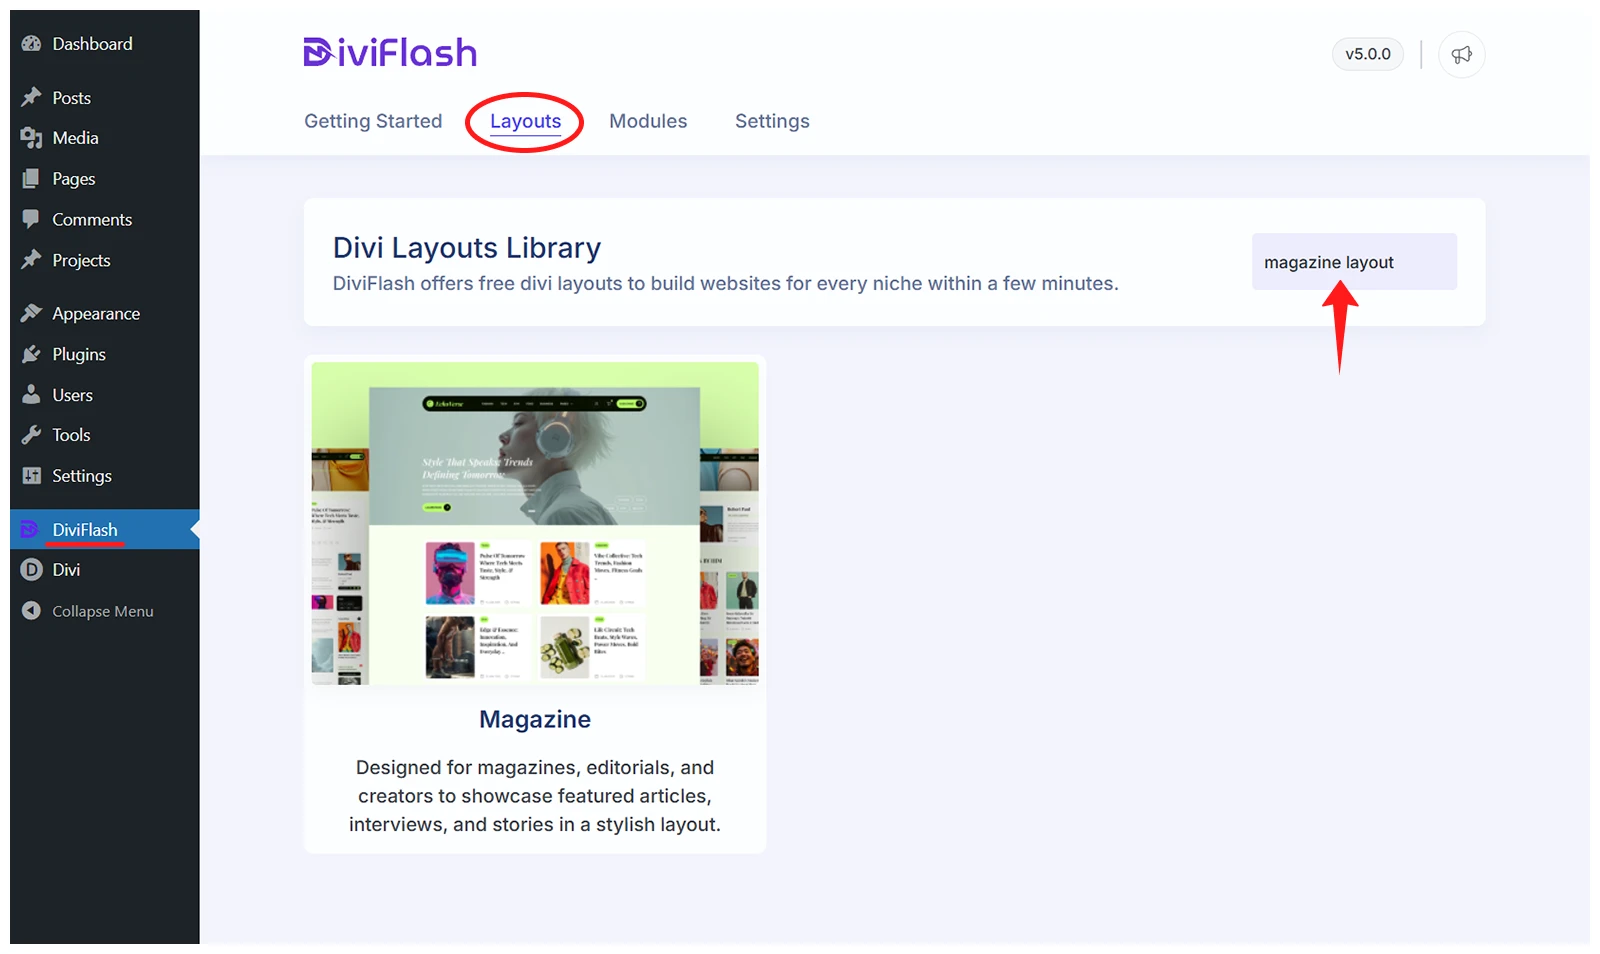
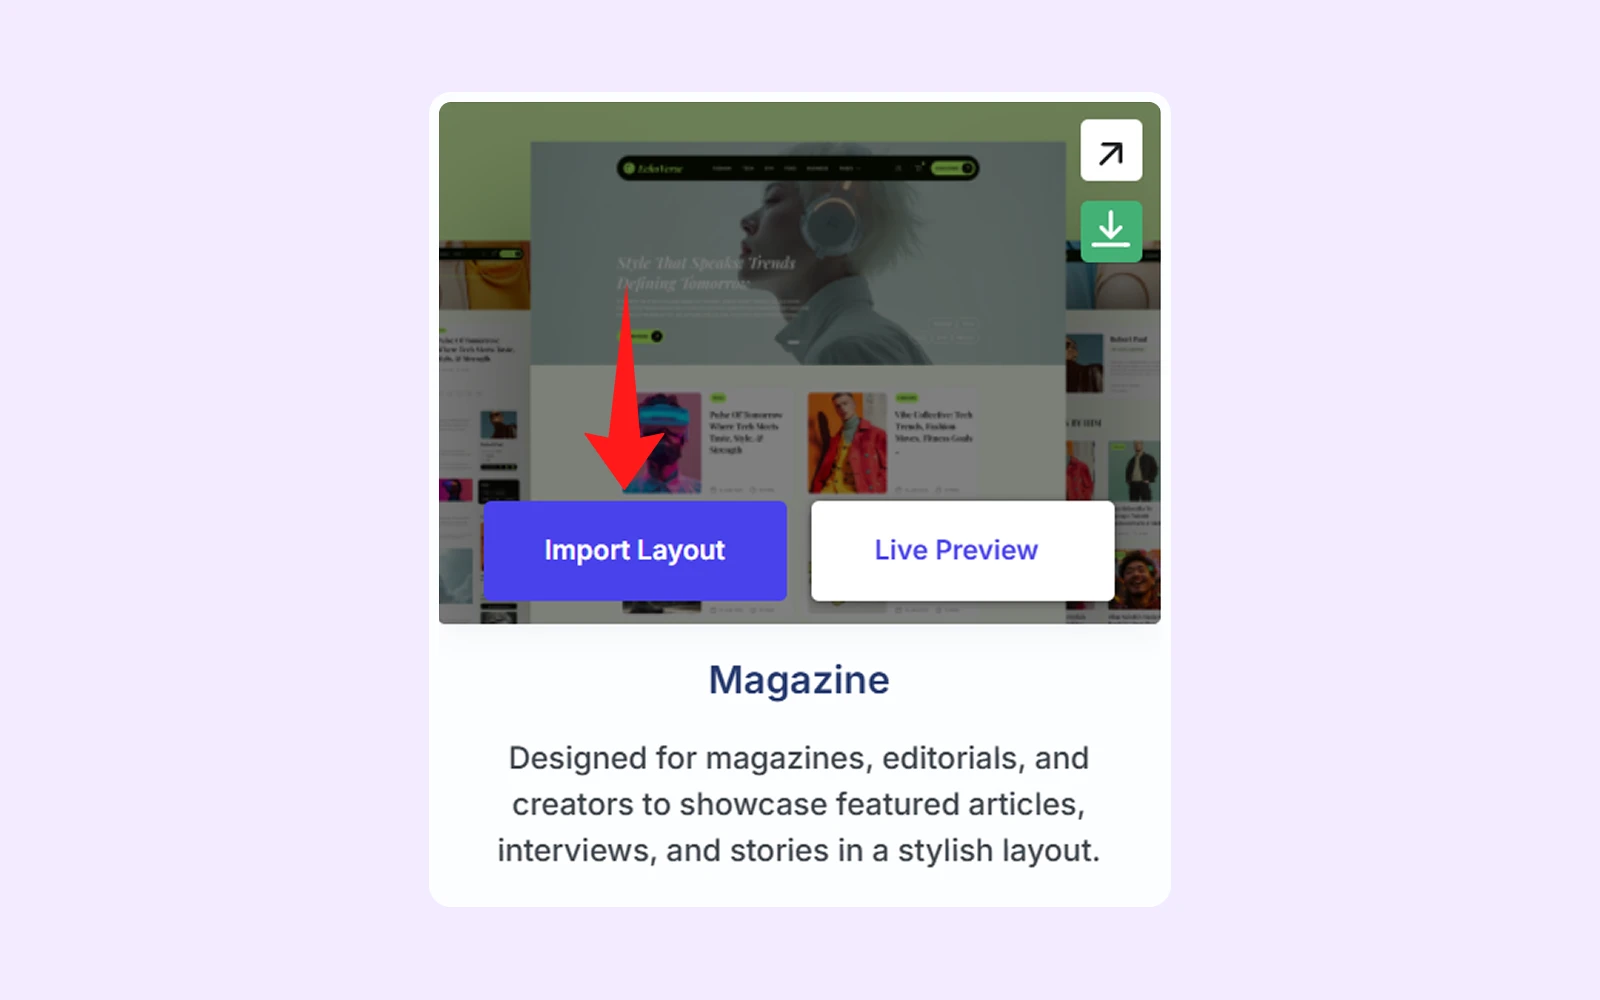
Step 4: In this step, point your mouse at the layout and click on "Import Layout".
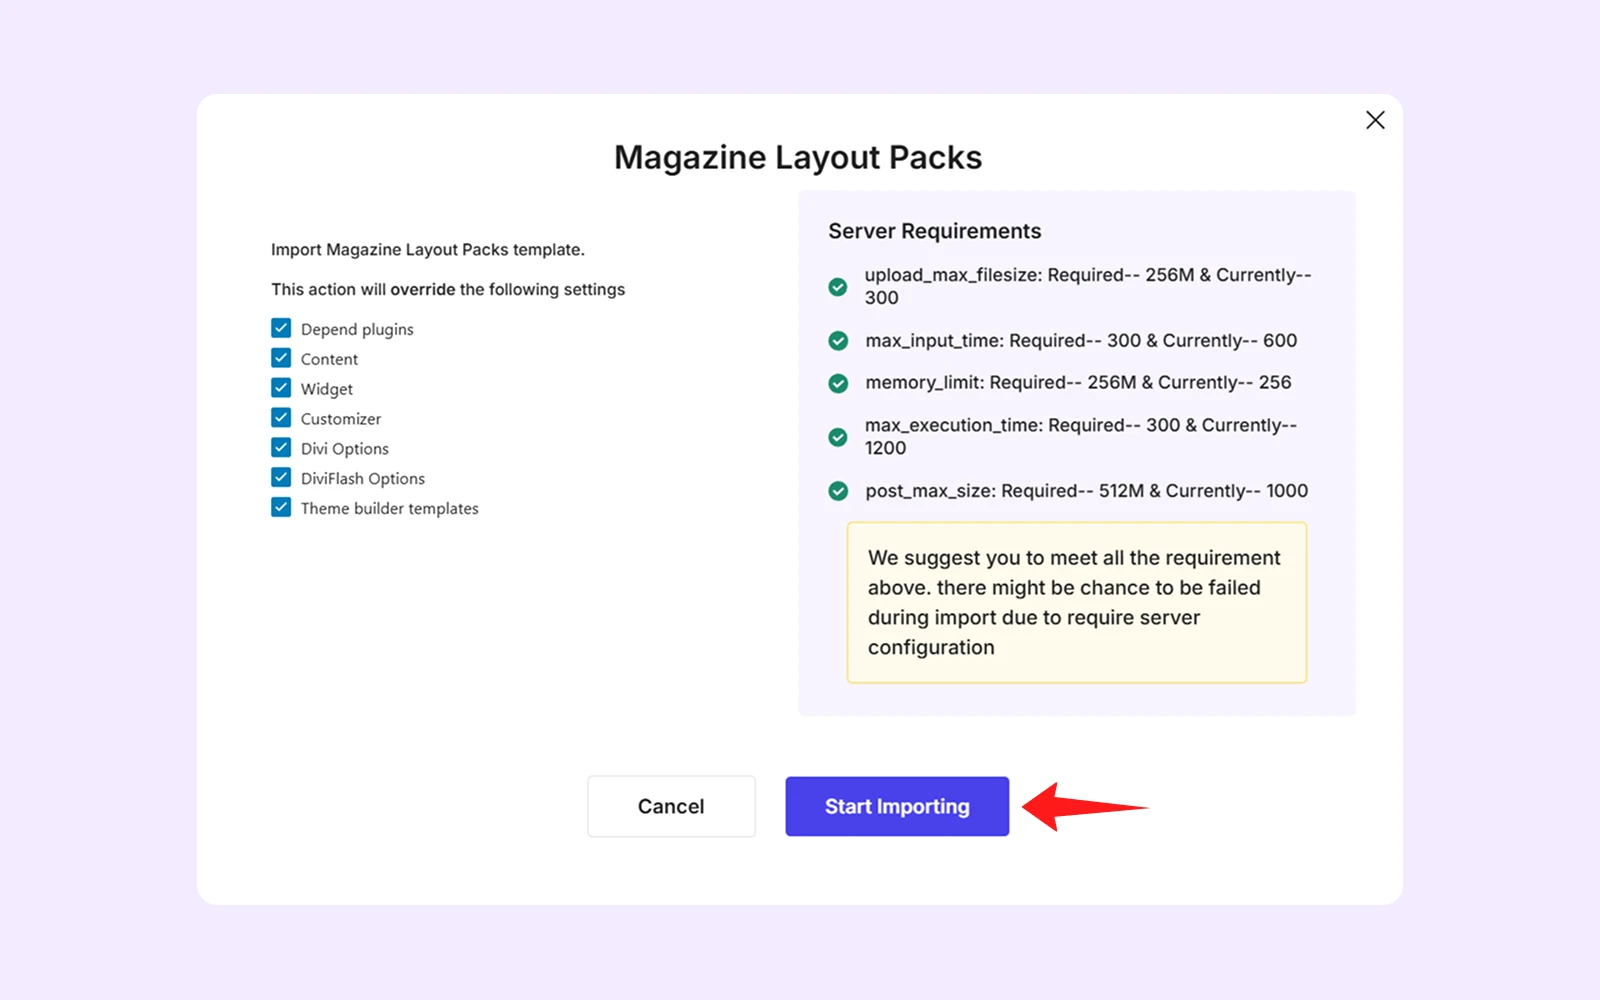
- After clicking “Import Layout,” a popup will show the layout settings and server requirements. Make sure there are no red crosses. If there are, fix your server settings before clicking “Start Importing.”
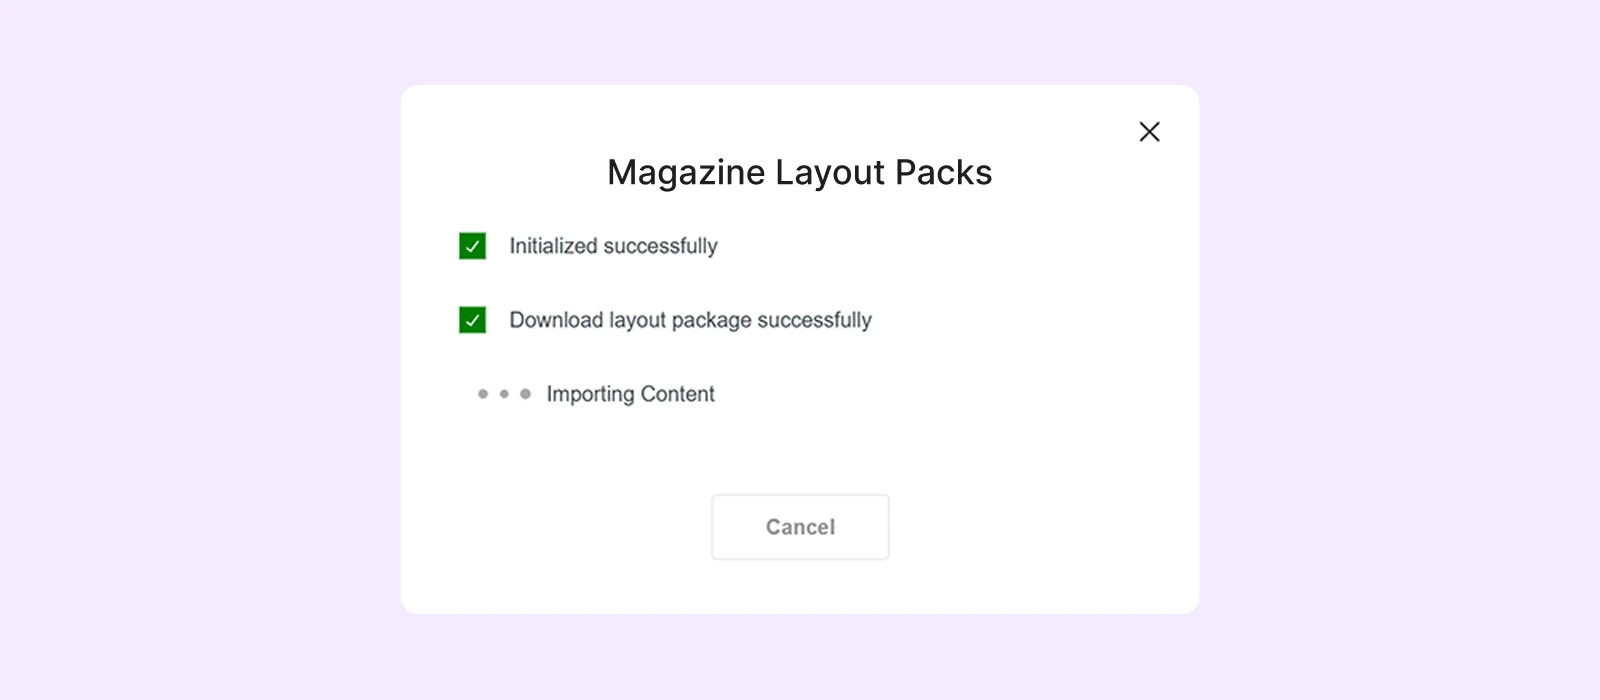
- This process of importing may take a few minutes.
- When the import is done, click on the "Menu Customize" to customize the menu according to your preferences. You can follow our Divi Layout Menu Customization doc.
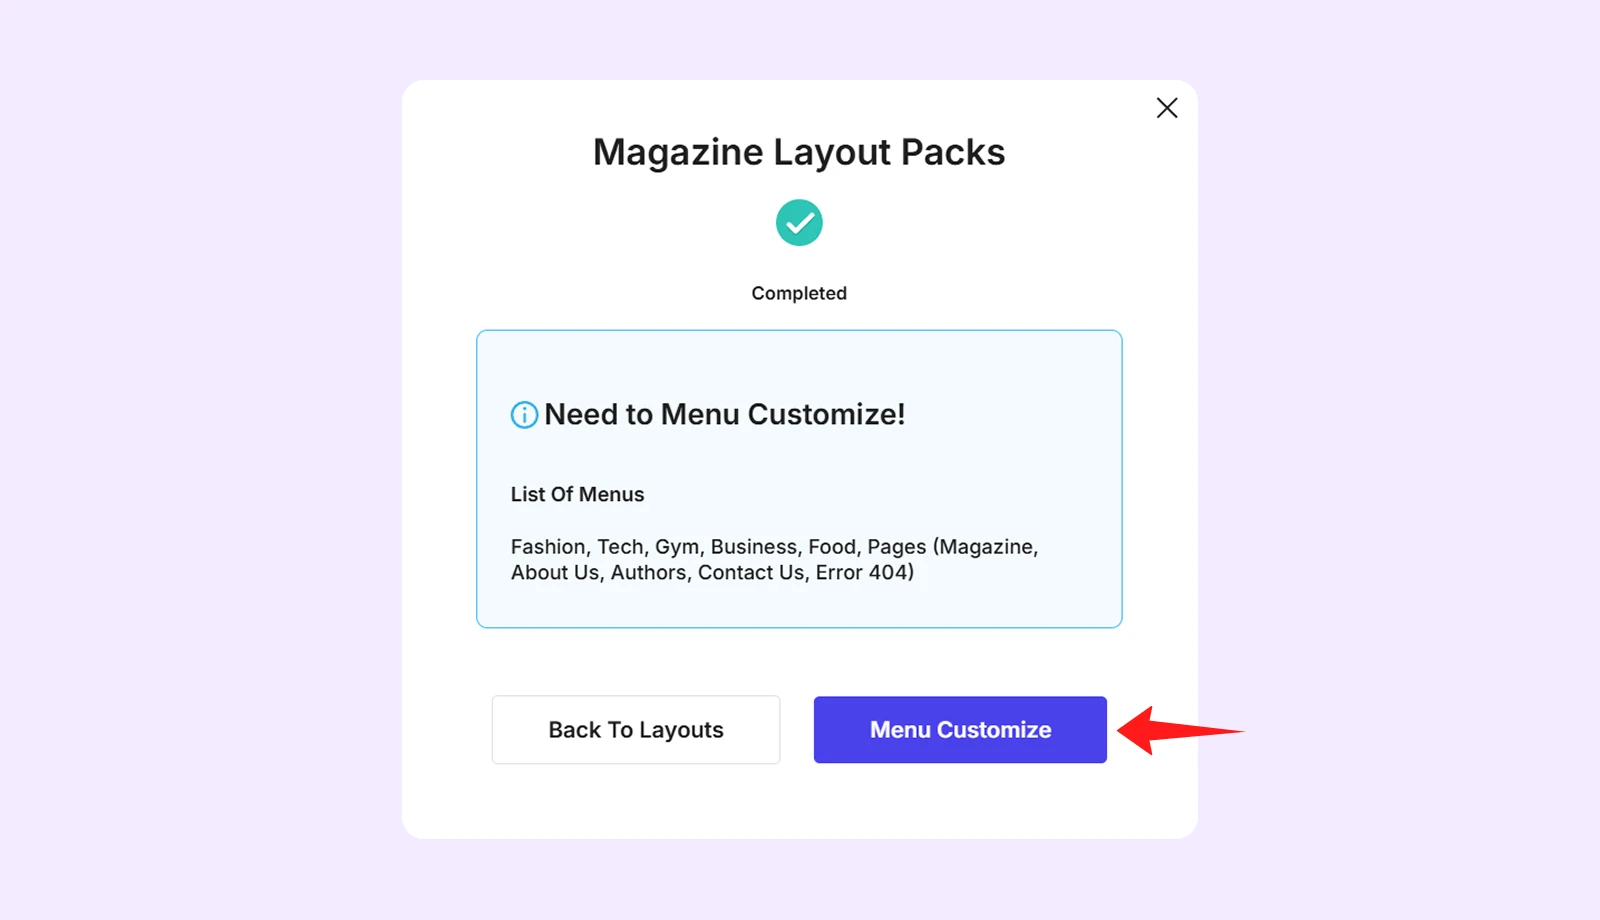
Step 5: The Magazine Layout includes a popup in the homepage menu. To make it work, you need to manually update the popup ID where it’s triggered.
Here is how to do it:
- Go to WordPress Dashboard > DF Popups > All Popups.
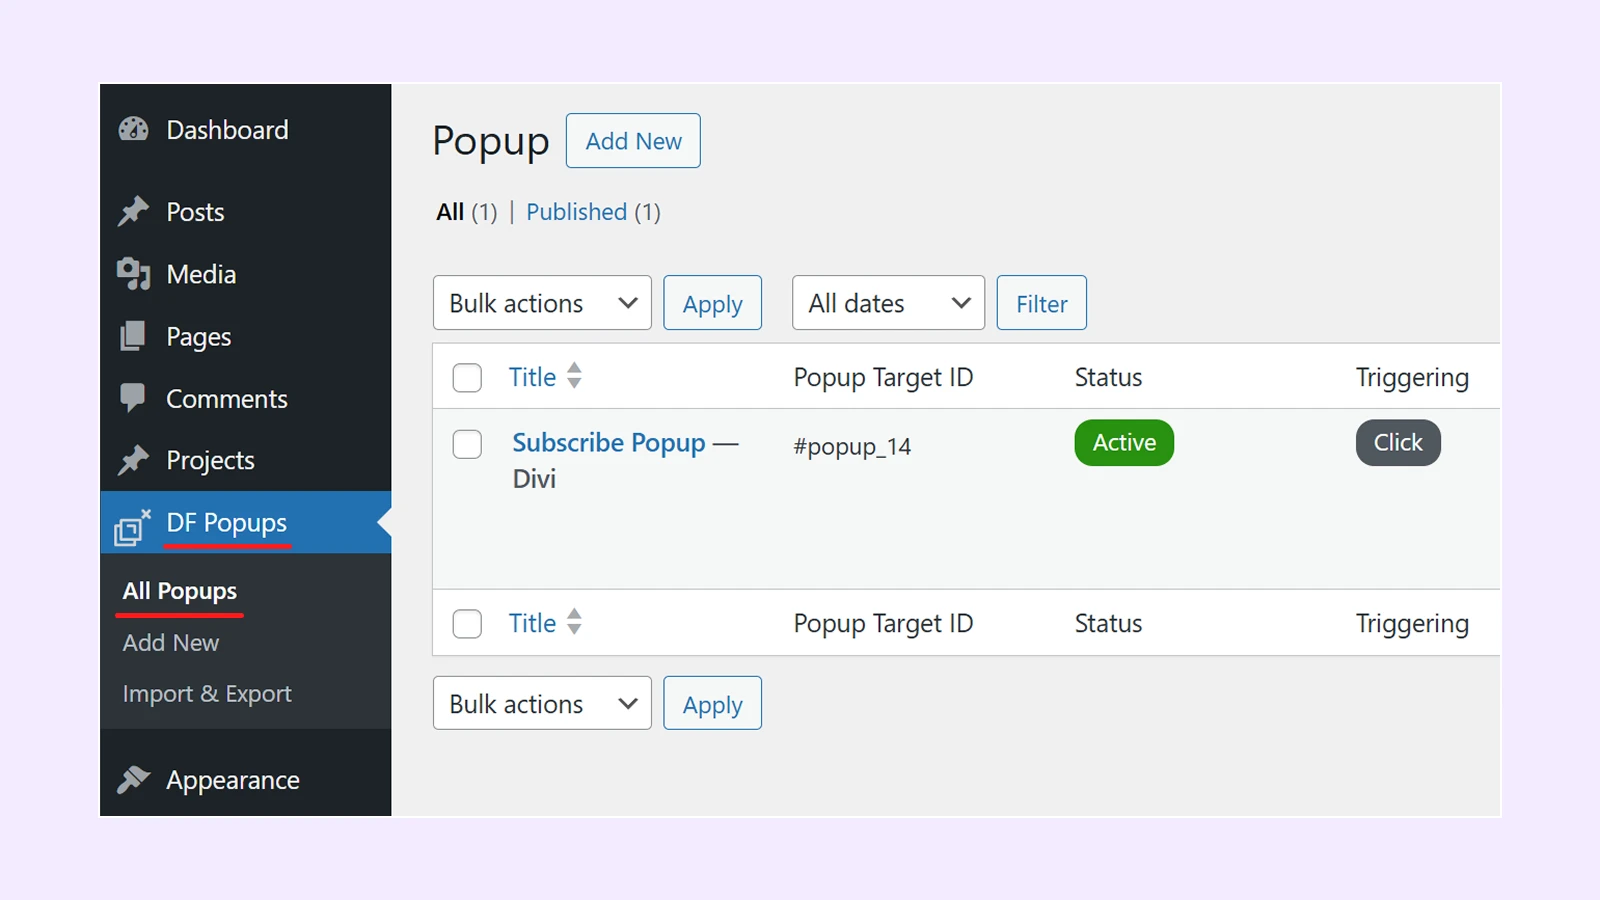
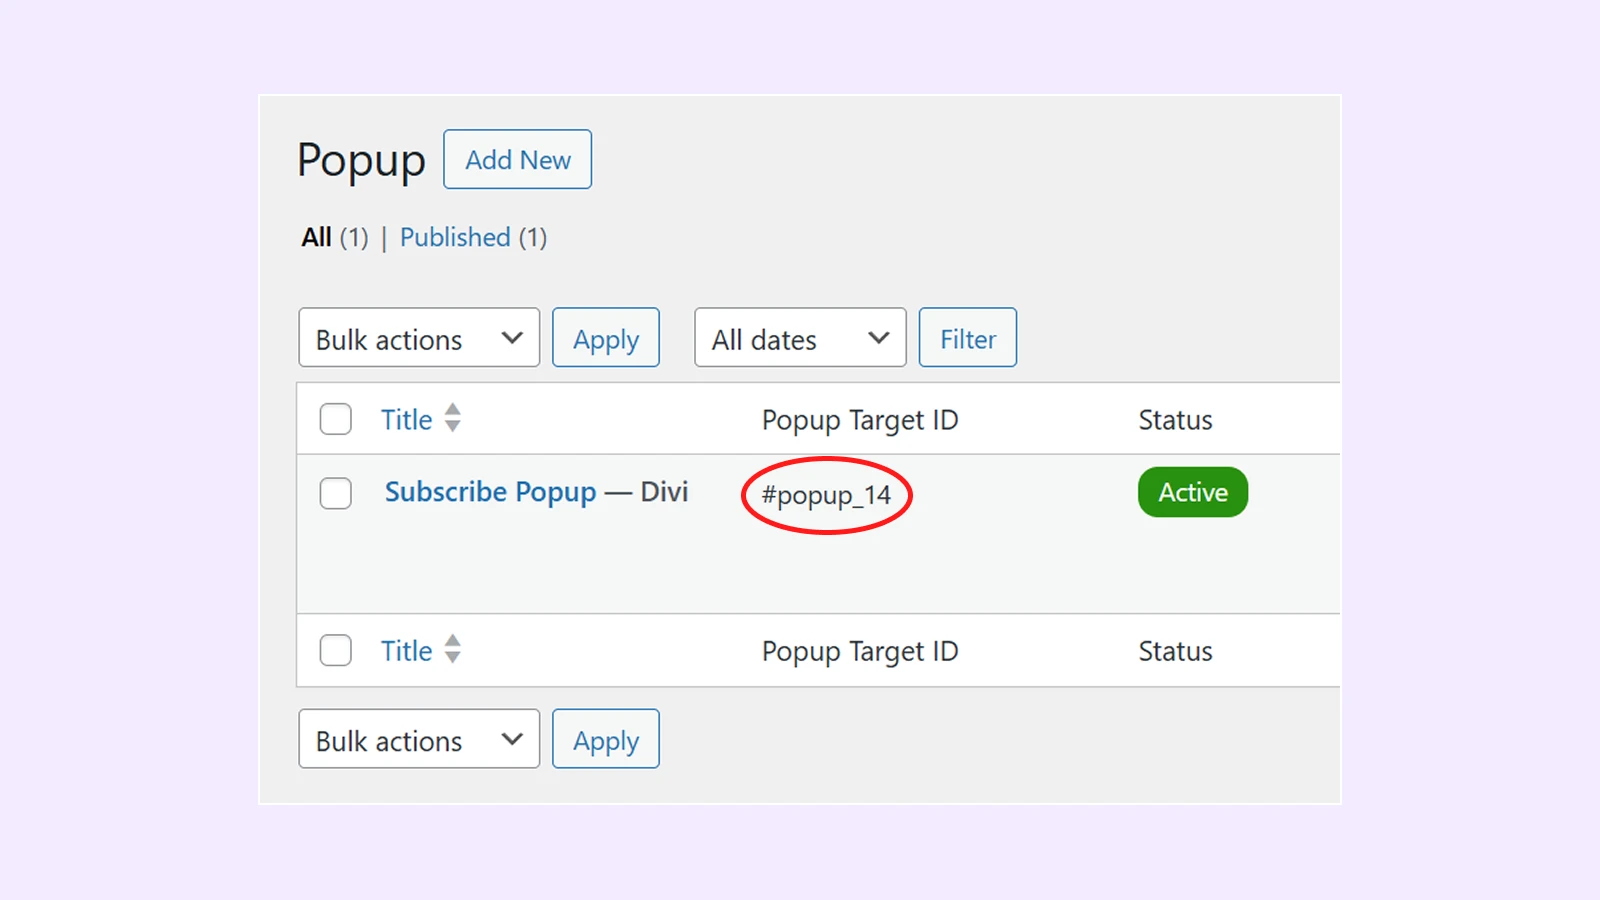
- Copy the Popup Target ID.
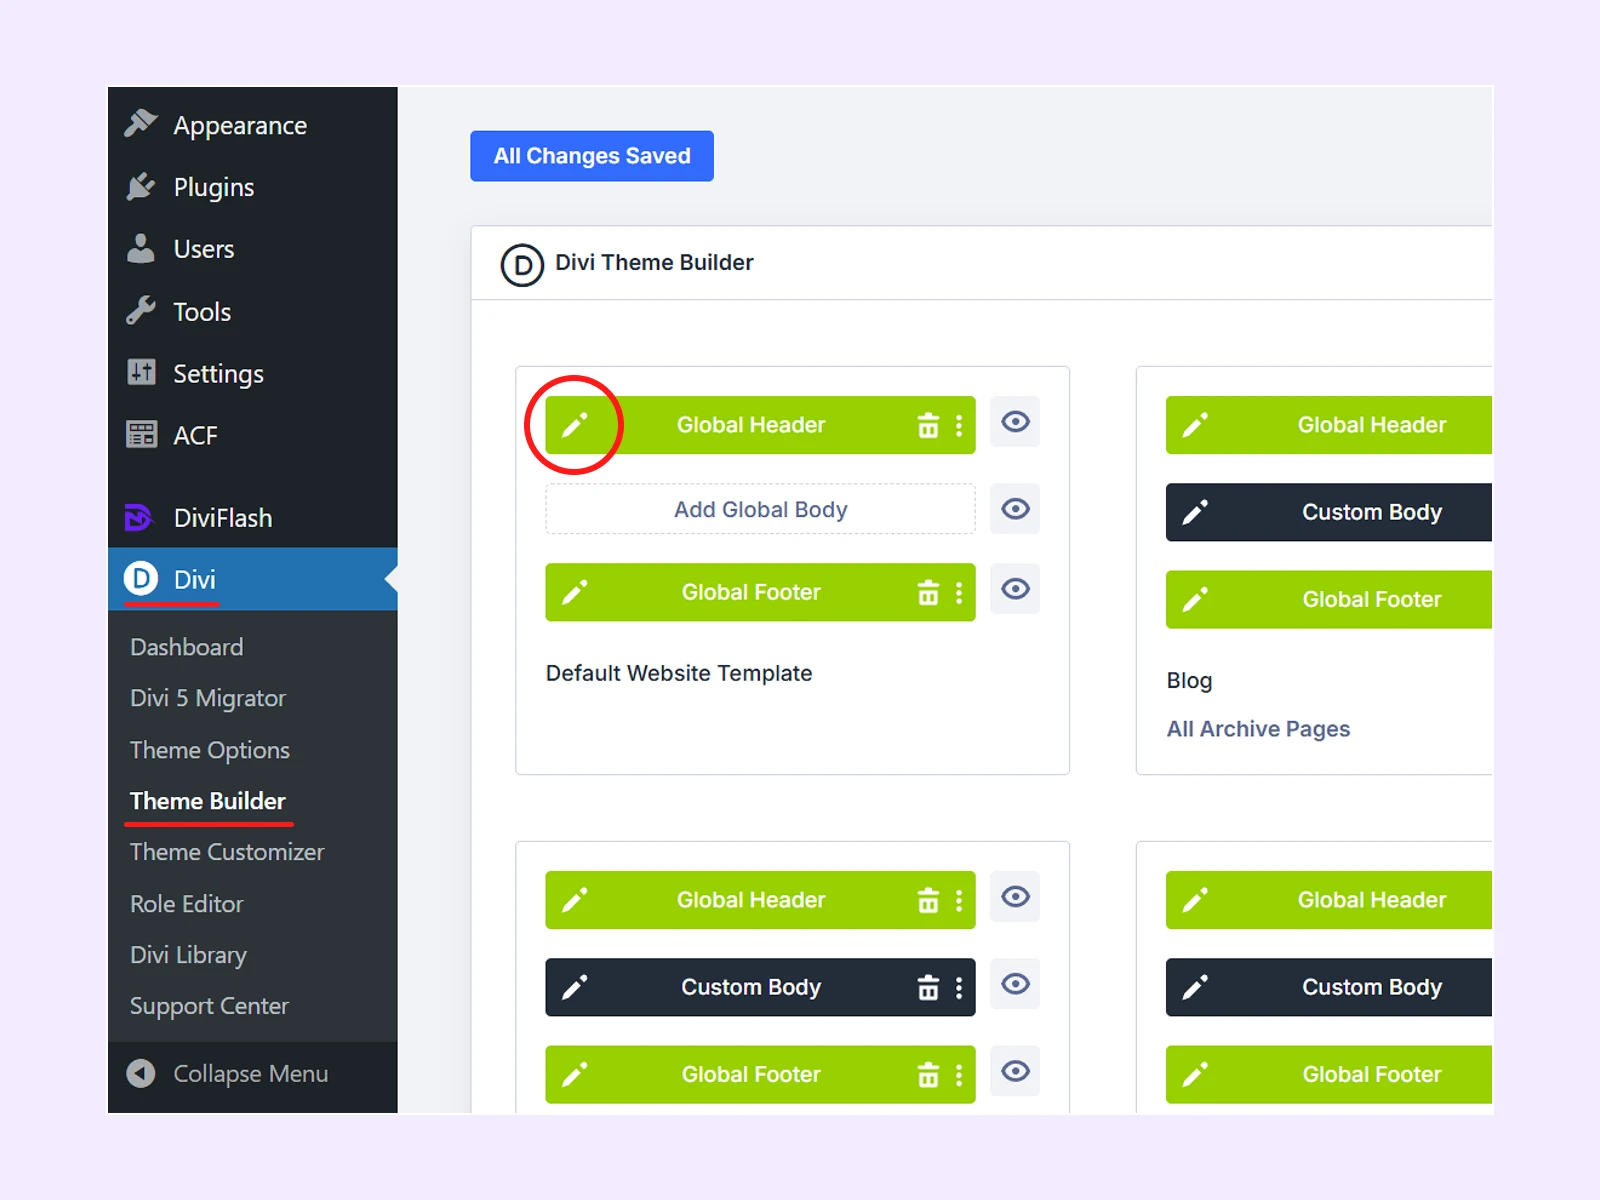
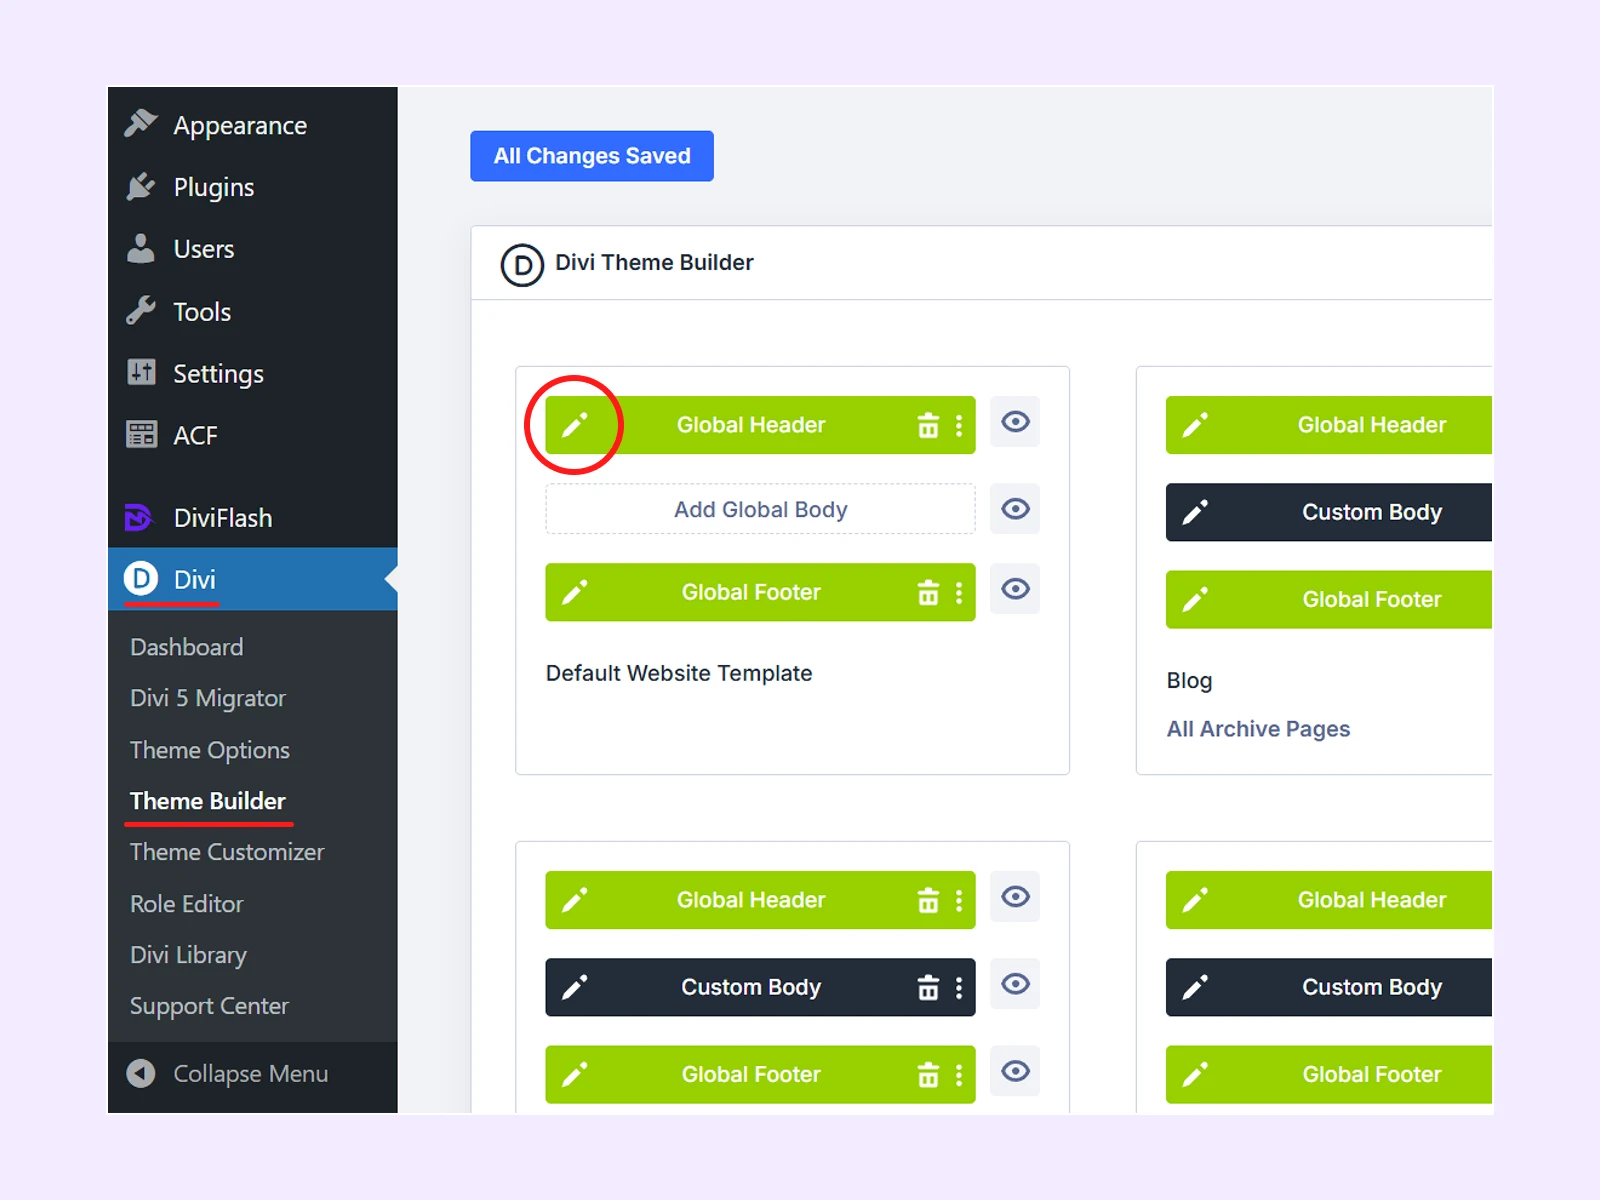
- Go to WordPress Dashboard > Divi > Theme Builder.
- Click the edit icon for the Global Header in the default website template.
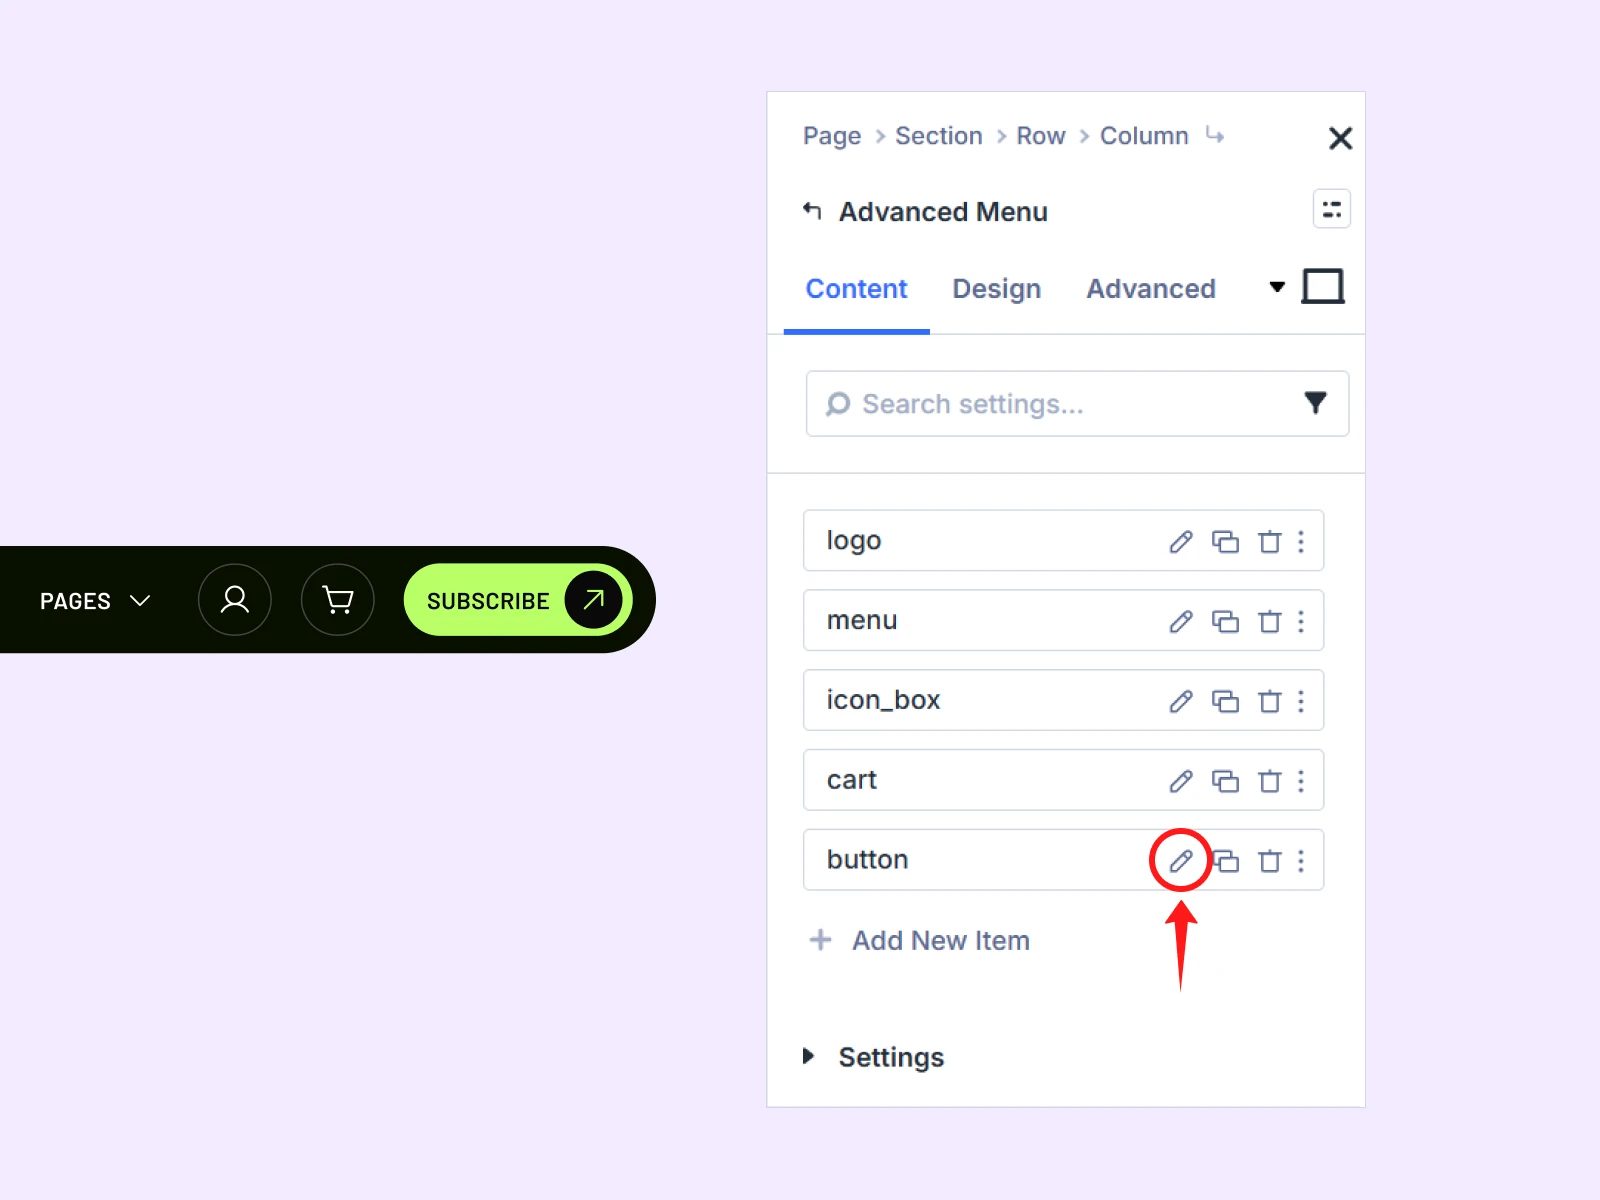
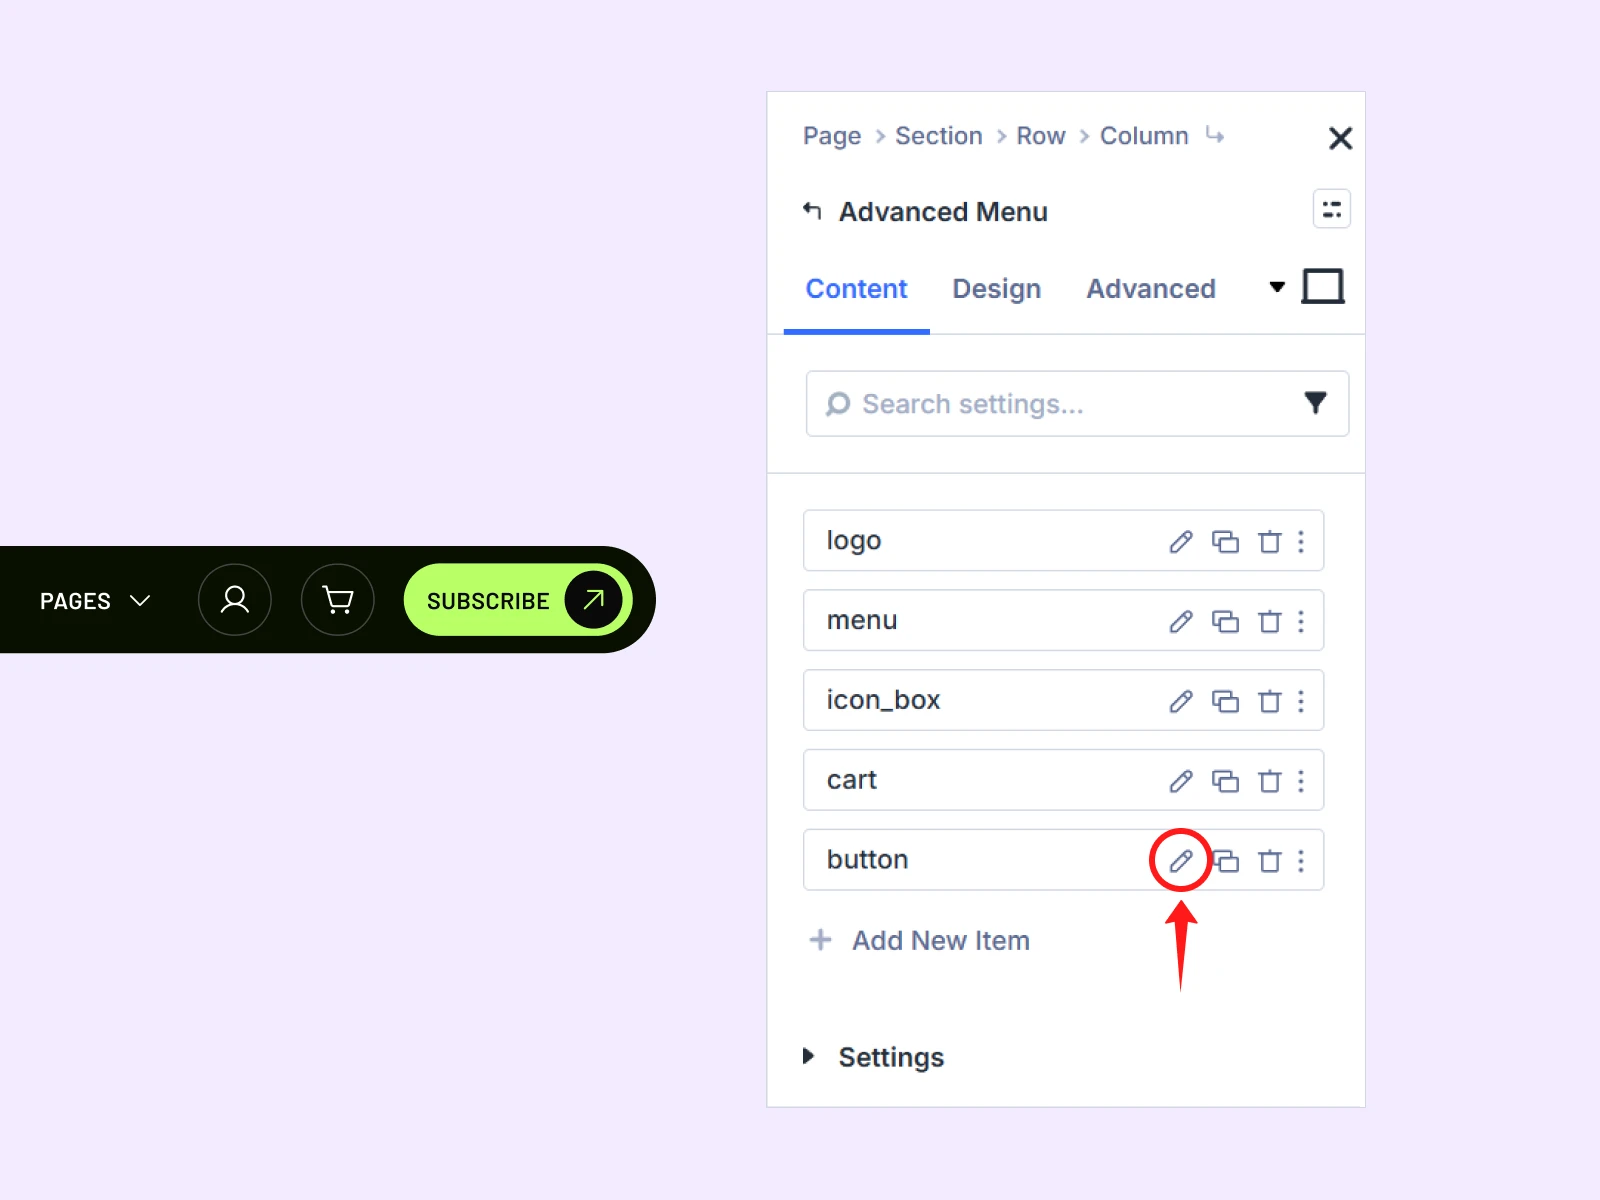
- Hover over the menu and click the Module Settings icon.

- Now click on the edit item of the “Button” item.
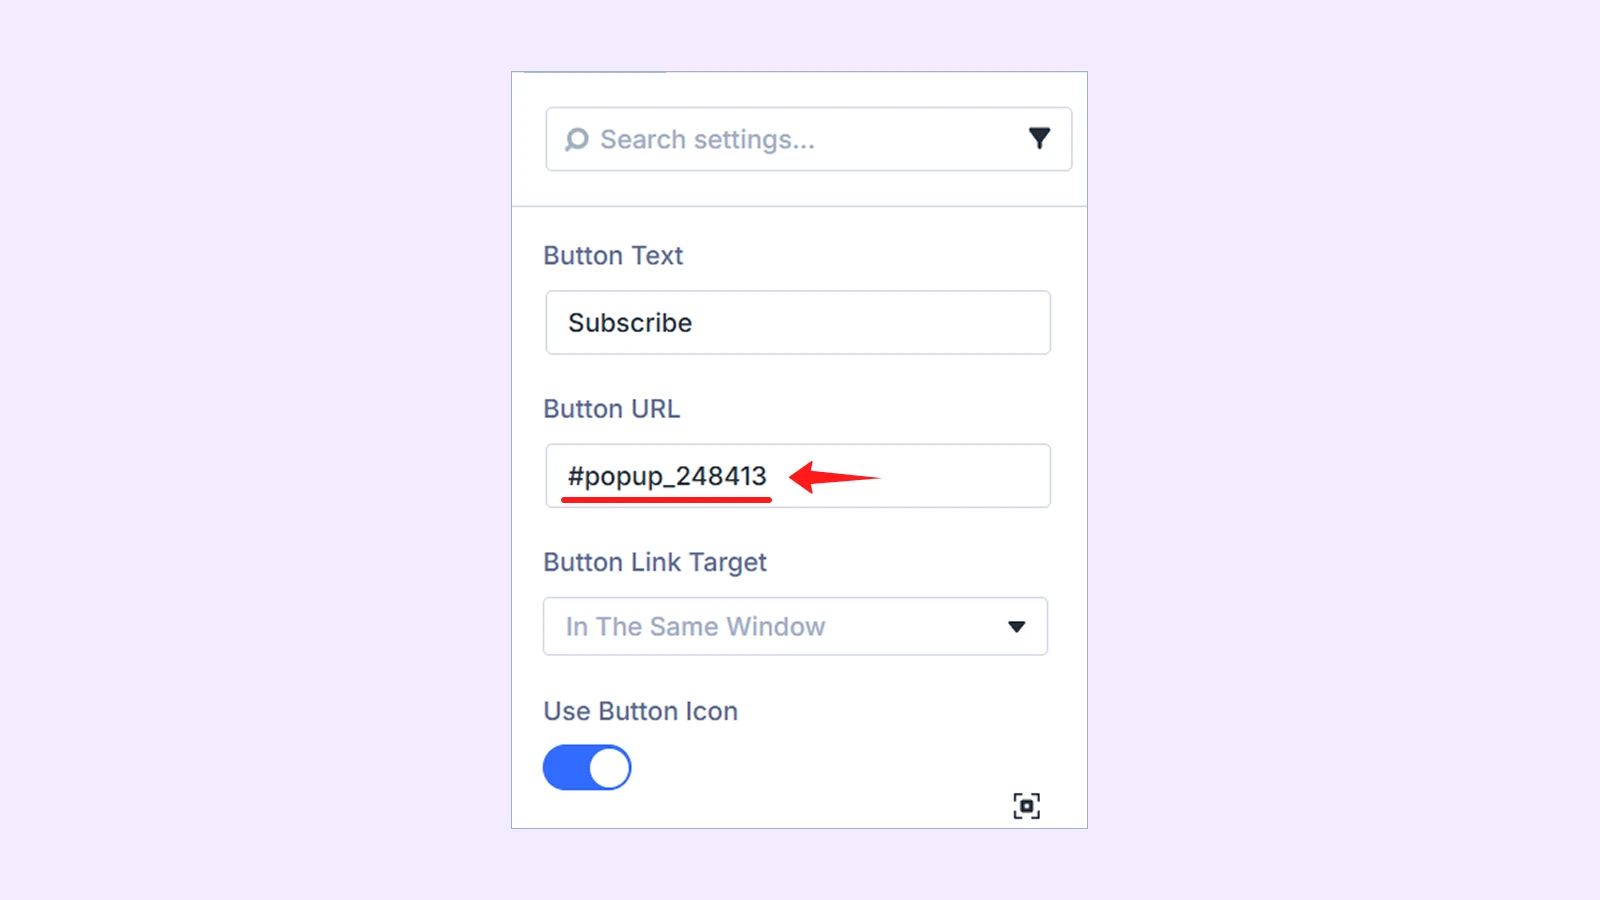
- Scroll down to the “Button URL” field and paste the copied Popup ID.
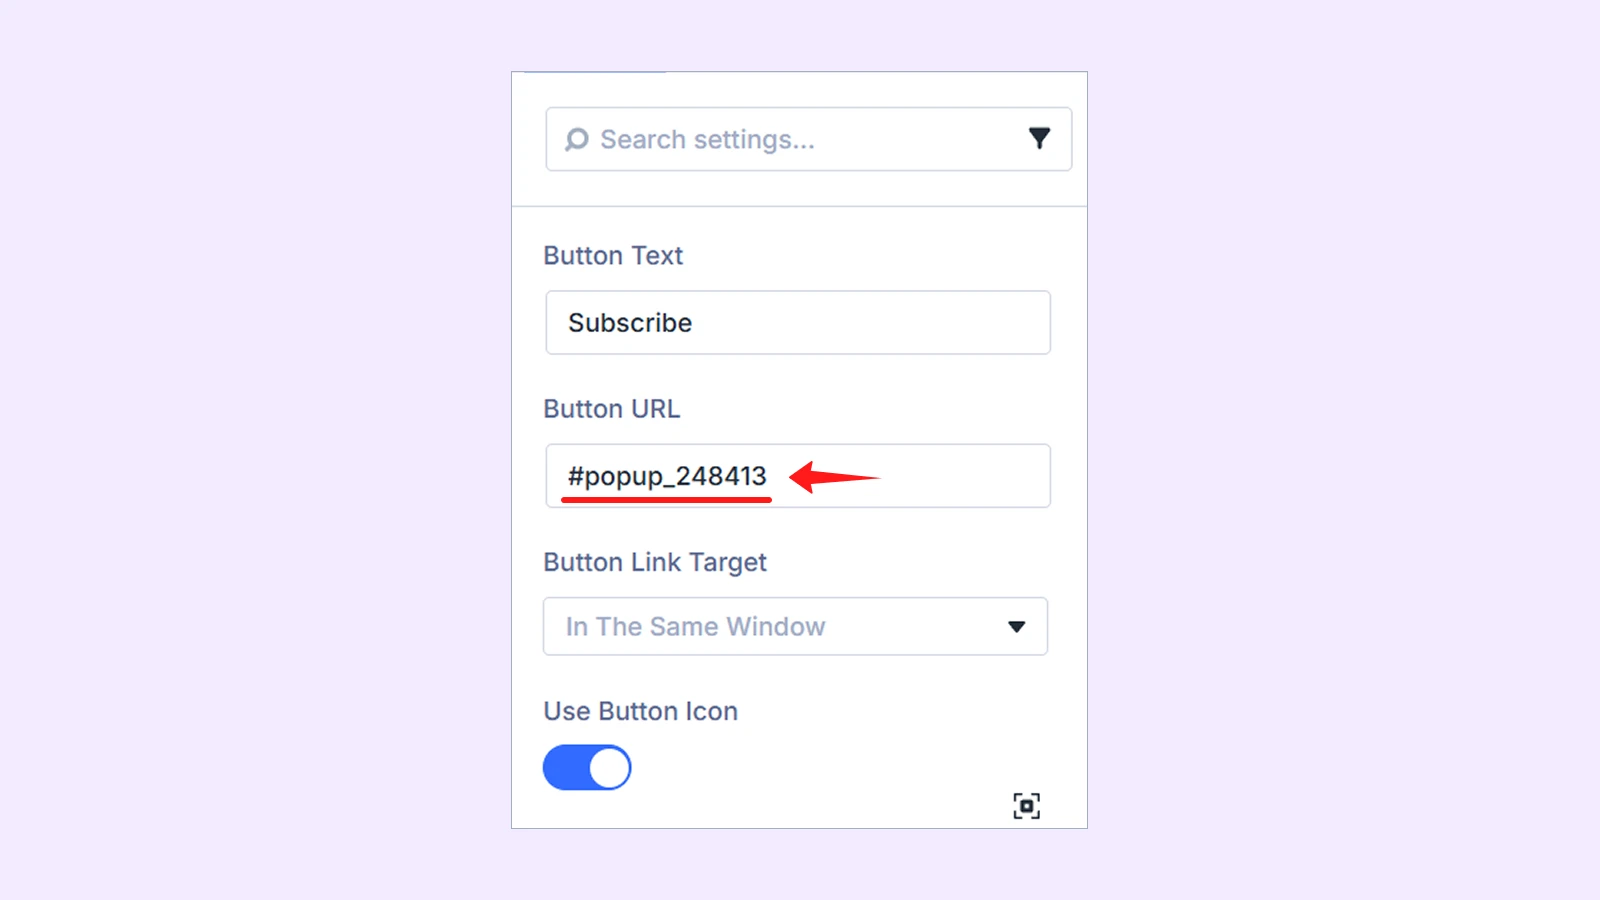
- Save the page and your popup should now work as expected.
Note: You will need to manually update the Popup ID for all custom headers in the Theme Builder.
Step 6: Set the side widget for your Home Page
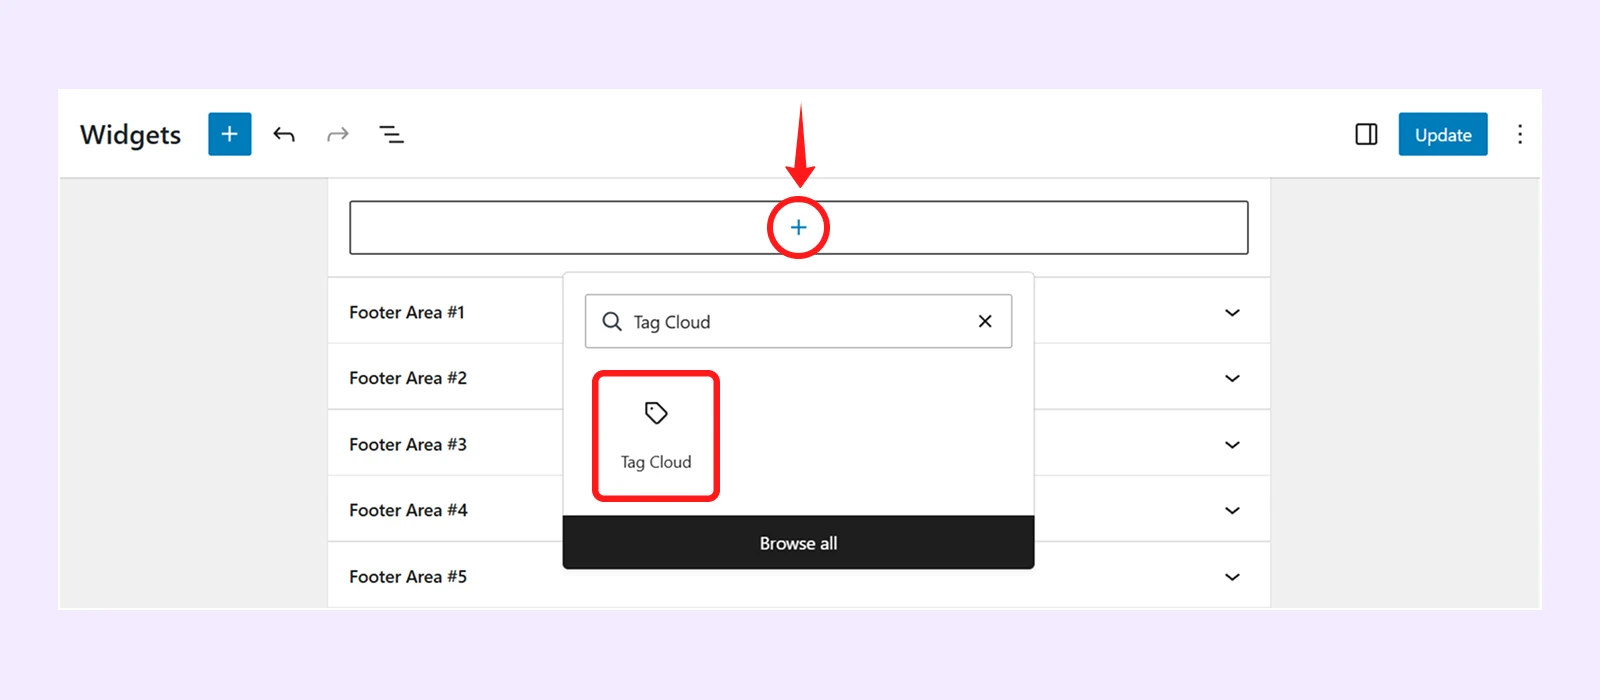
- Go to WordPress Dashboard > Appearance > Widgets
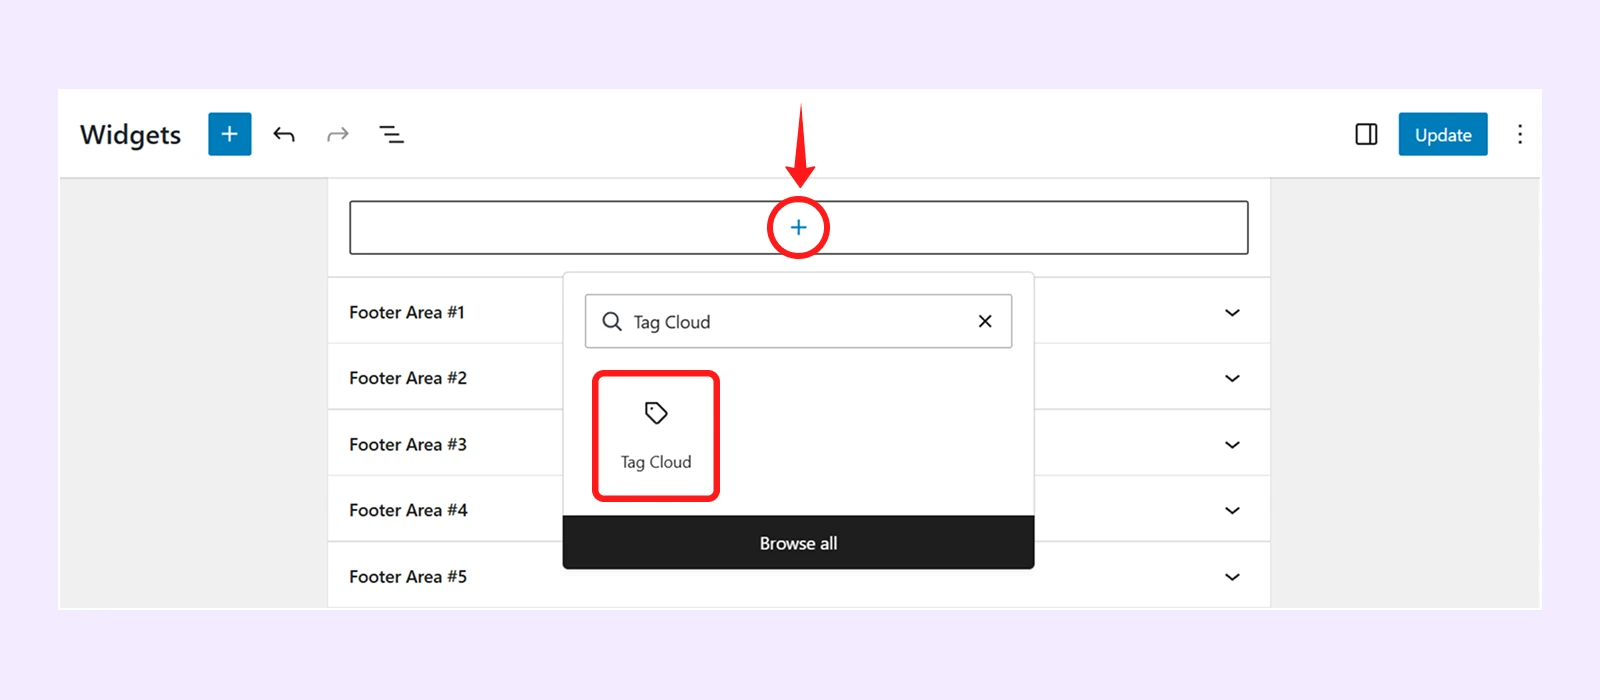
- Under the sidebar area, click the Plus “+” button, search for “Tag Cloud” and click on it, then update it.
Step 7: In the final steps, it’s time to set the homepage of your site. Here is how to do it:
- Click on the WordPress Dashboard > Settings > Reading.
- In the "Your homepage displays" section, choose "A static page".
- Then select the "Home" from the homepage dropdown menu.
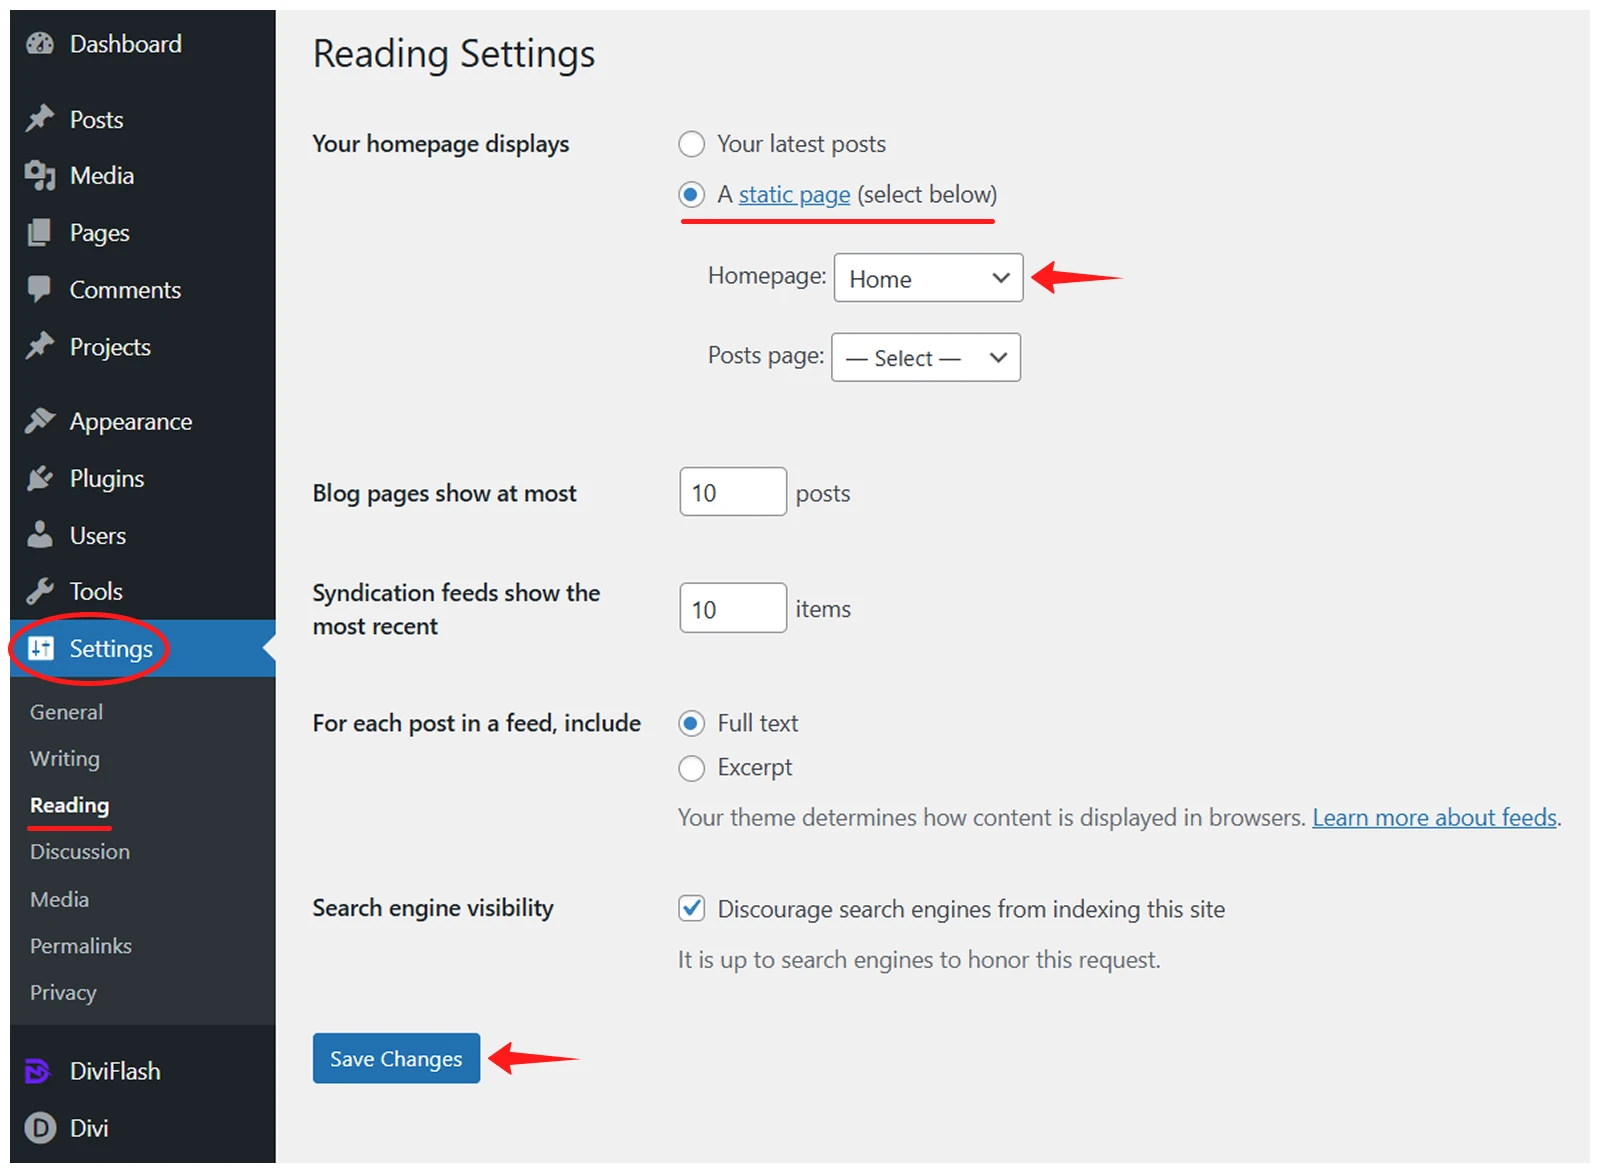
- At last, click on "Save Changes" to save the changes you have made.
The Megazine layout has been successfully imported and is now live on your website.
Method 2: Manually Import the Layout
Apart from method one, you can manually import the Magazine Layout. Here is a step-by-step guide:
Step 1: Install and activate the Divi theme.
Step 2: Install and activate the DiviFlash plugin.
Step 3: Download the Magazine Layout packs and unzip it.
Step 4: Install and activate the “WooCommerce plugin”. (This layout has WooCommerce elements.)
Step 5: Install and activate the “Advanced Custom Fields” plugin.
Step 6: Import the “ACF - Magazine Layout - DiviFlash.json” file into the ACF plugin.
- Go to WordPress Dashboard > ACF > Tools
- Under the “Import” section, click on “Choose File” and select “ACF - Magazine Layout - DiviFlash.json” file.
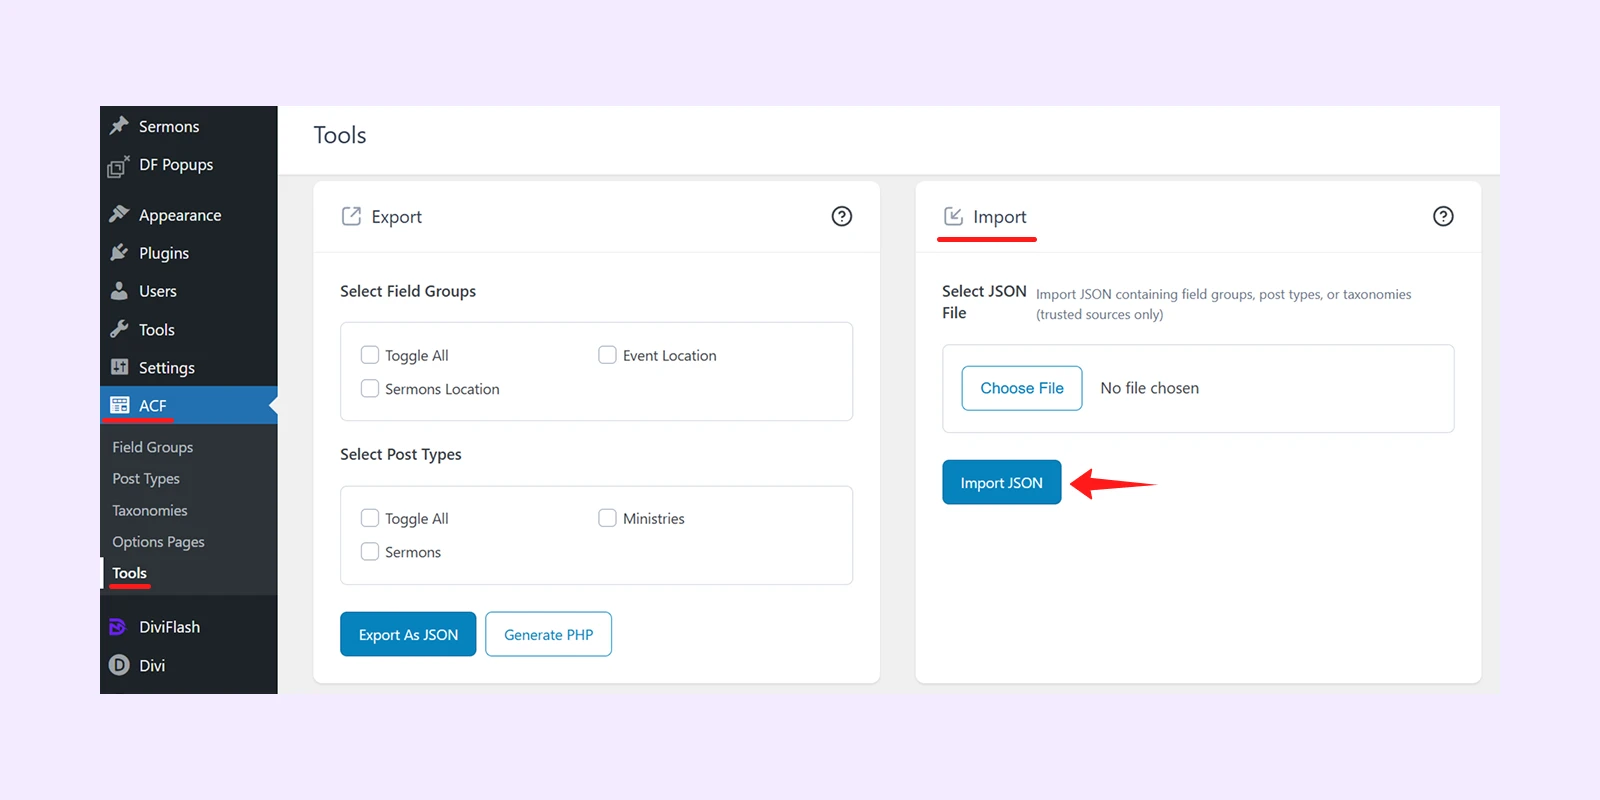
- Finally, click on the “Import JSON”
Step 7: Upload the "DiviFlash Dashboard" file into the DiviFlash Dashboard panel:
- Go to WordPress Dashboard > DiviFlash > Settings > Import/Export.
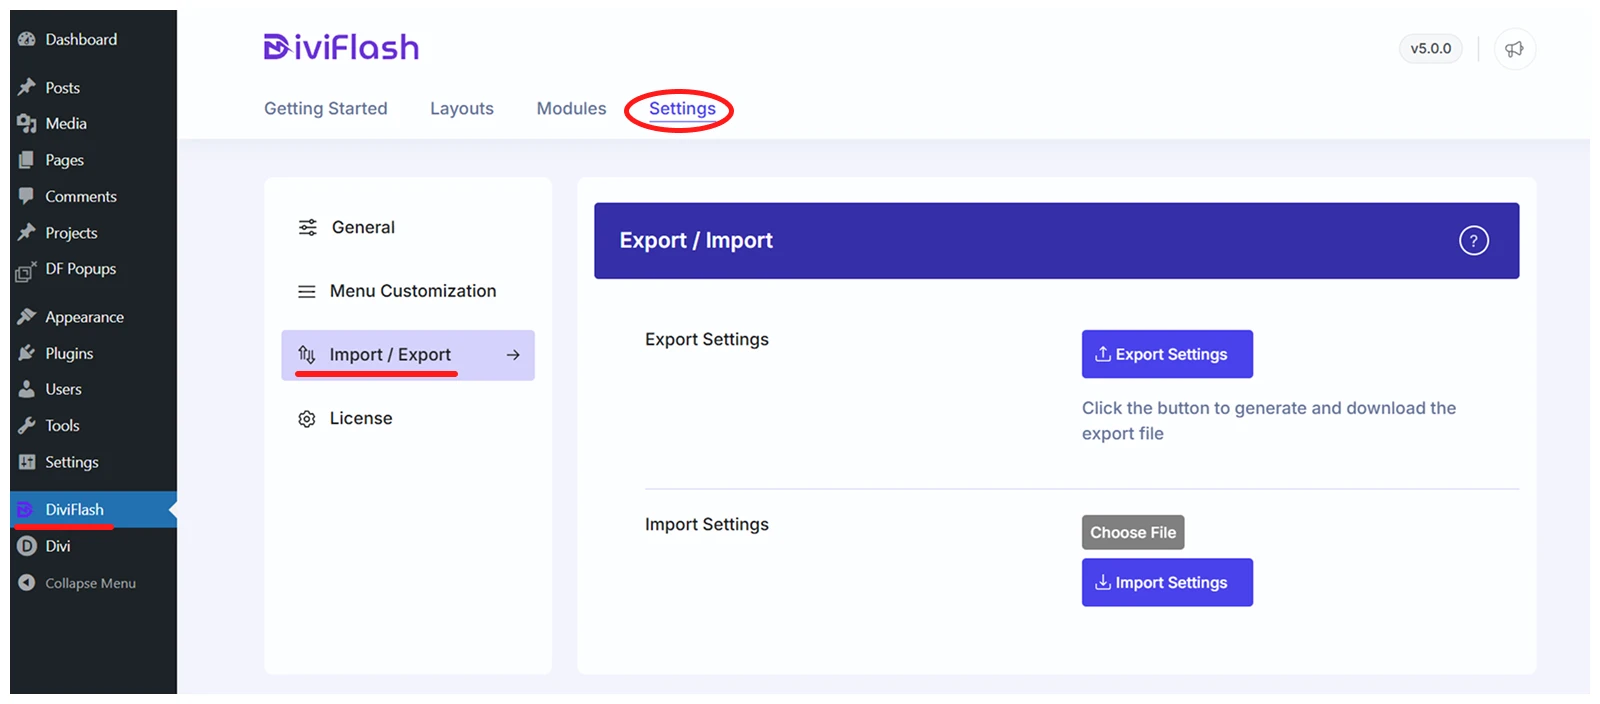
- Click "Choose File" and select "DiviFlash Dashboard - Magazine Layout - DiviFlash.Json"
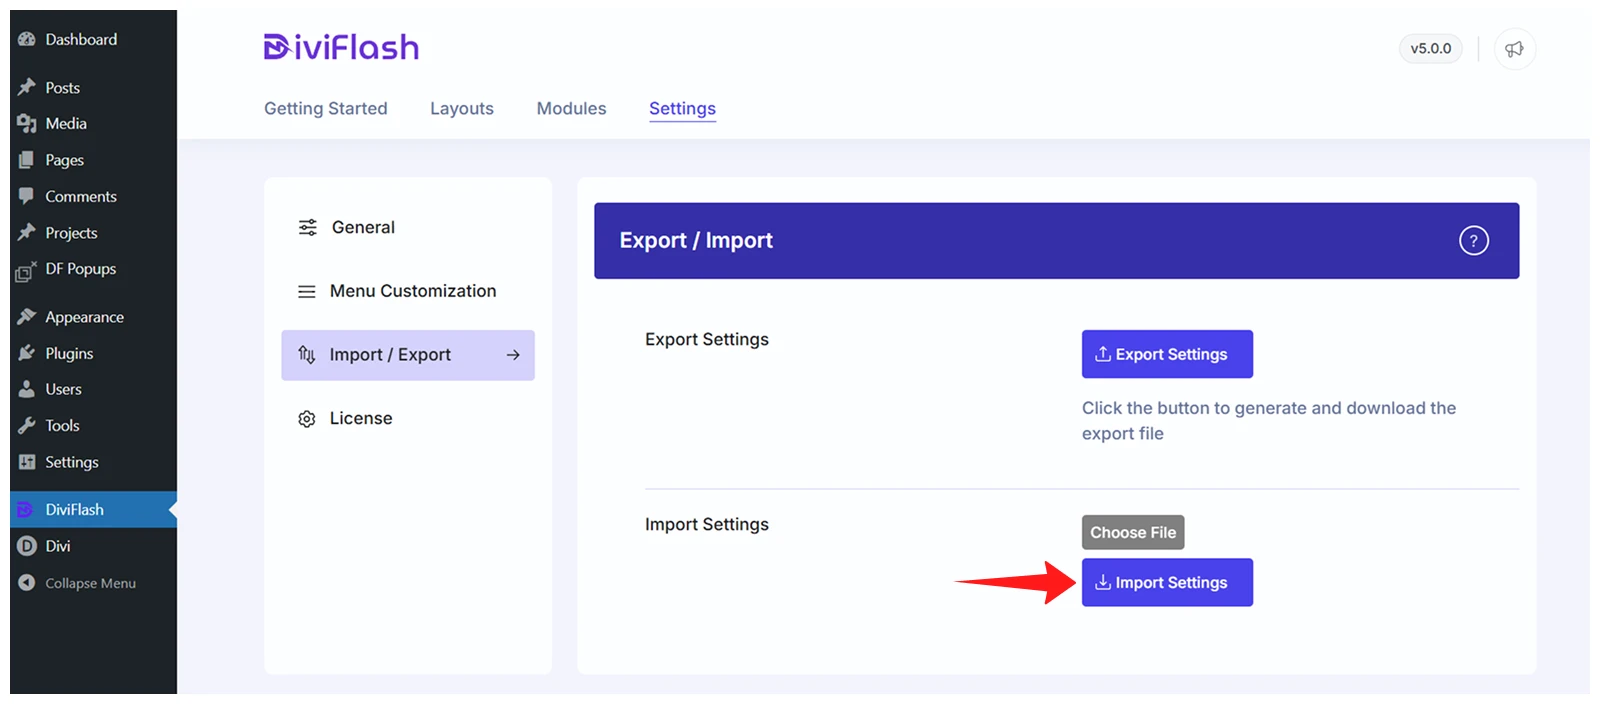
- Then, press the "Import Settings" button.
Step 8: Now, import the "Divi Theme Options" setting file into the Divi Theme Options panel:
- Go to WordPress Dashboard > Divi > Theme Options
- Press the "Import & Export" icon exactly on the right side of the corner
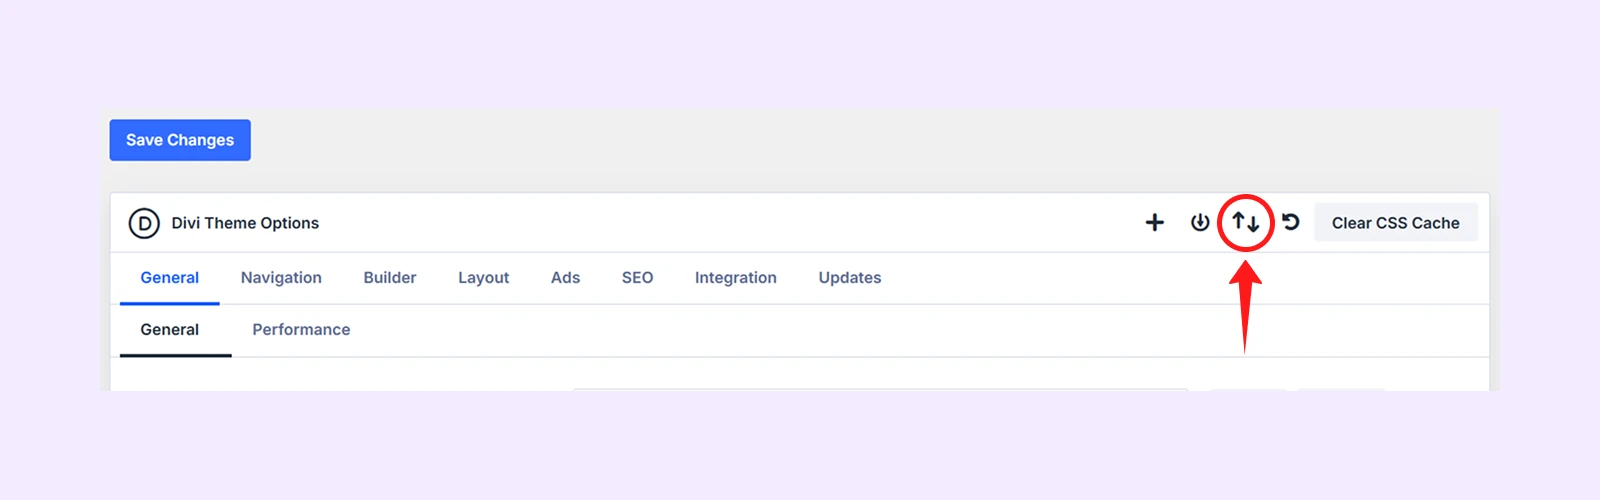
- Select the Import tab and click “Choose Files” to upload the JSON file named "Divi Theme Options - Magazine Layout - DiviFlash.json"
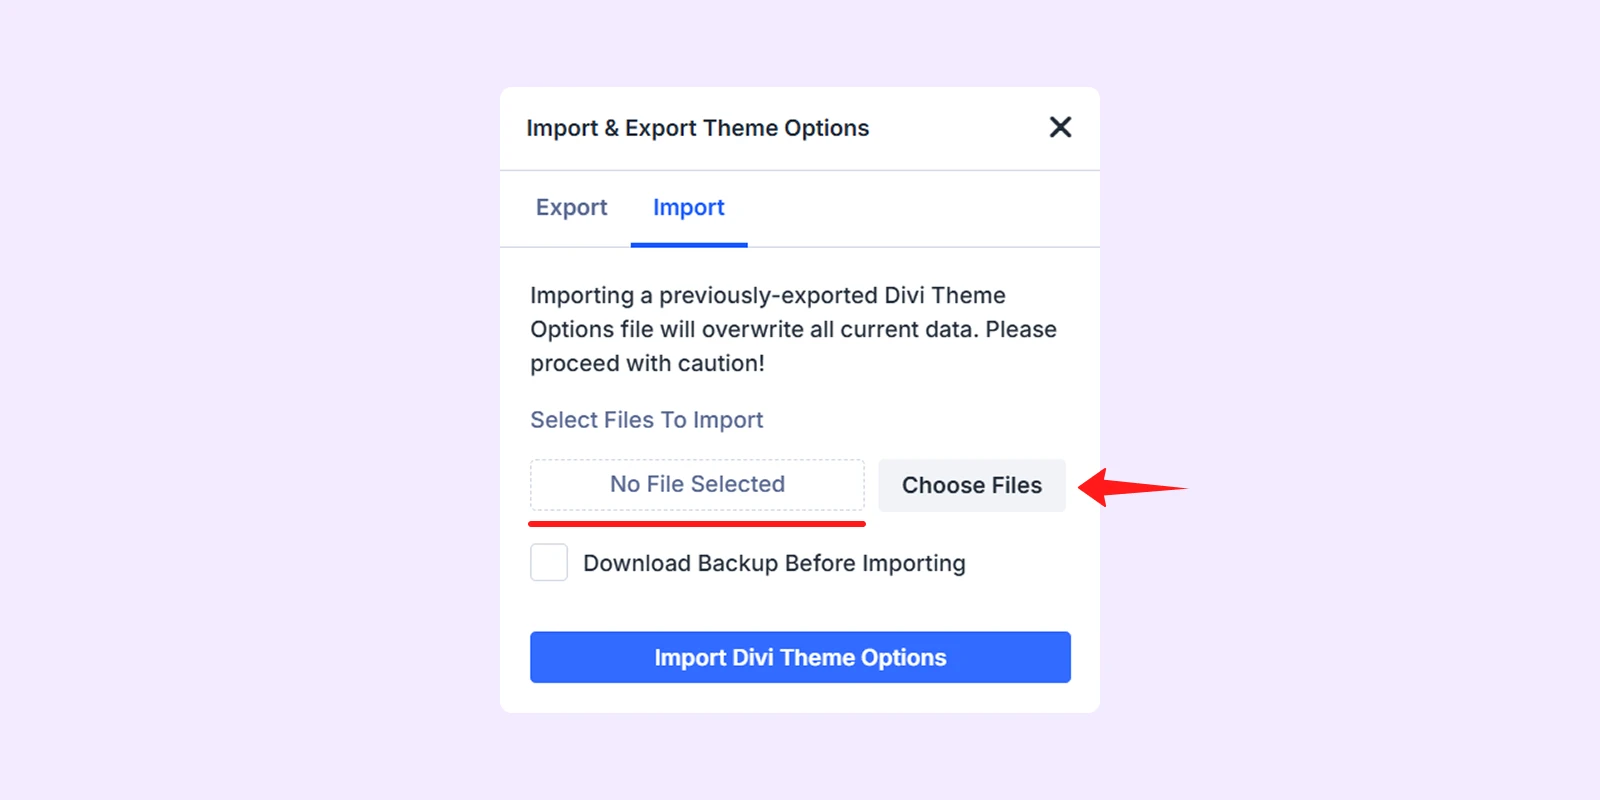
- Lastly, click on the "Import Divi Theme Options" and save it.
Step 9: Import the "Divi Theme Builder Settings" file into the Divi Theme Builder panel:
- Go to WordPress Dashboard > Divi > Theme Builder.
- Click on the "Import & Export" icon on the right side of the screen.
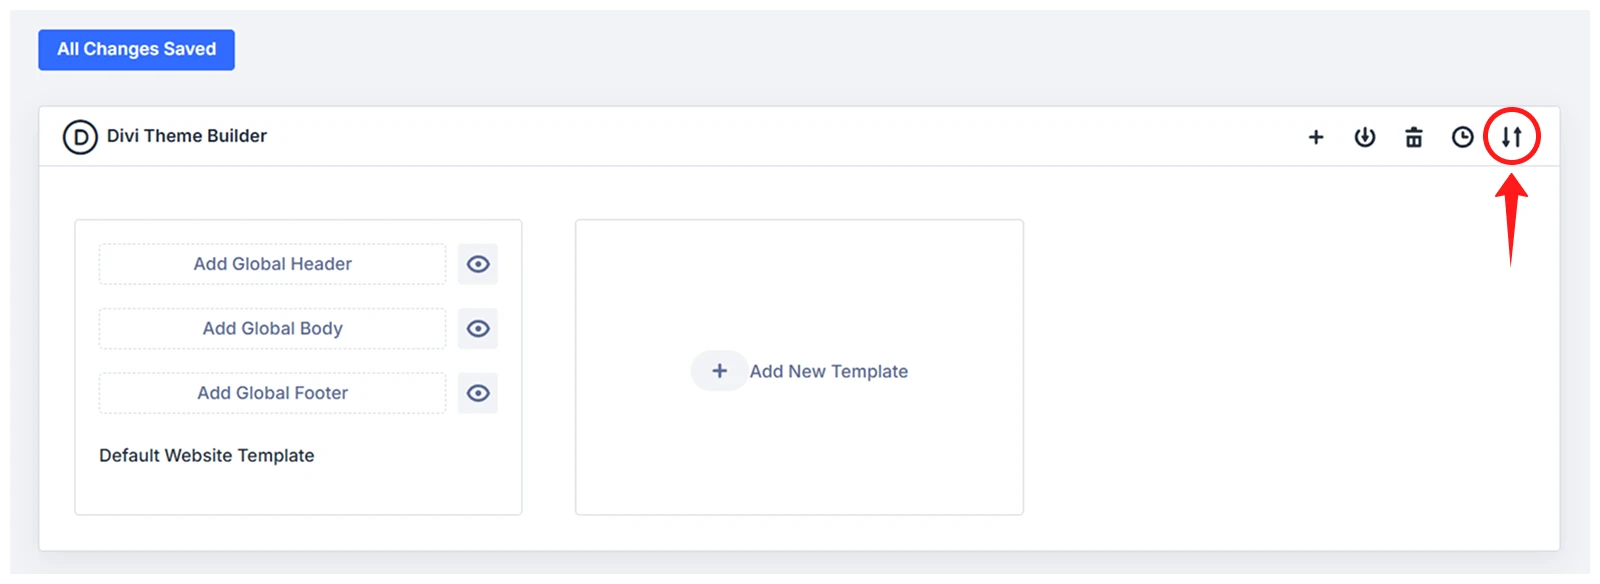
- Select the Import tab and click “Choose Files” to upload the JSON file named "Divi Theme Builder Settings - Magazine Layout - DiviFlash.json"
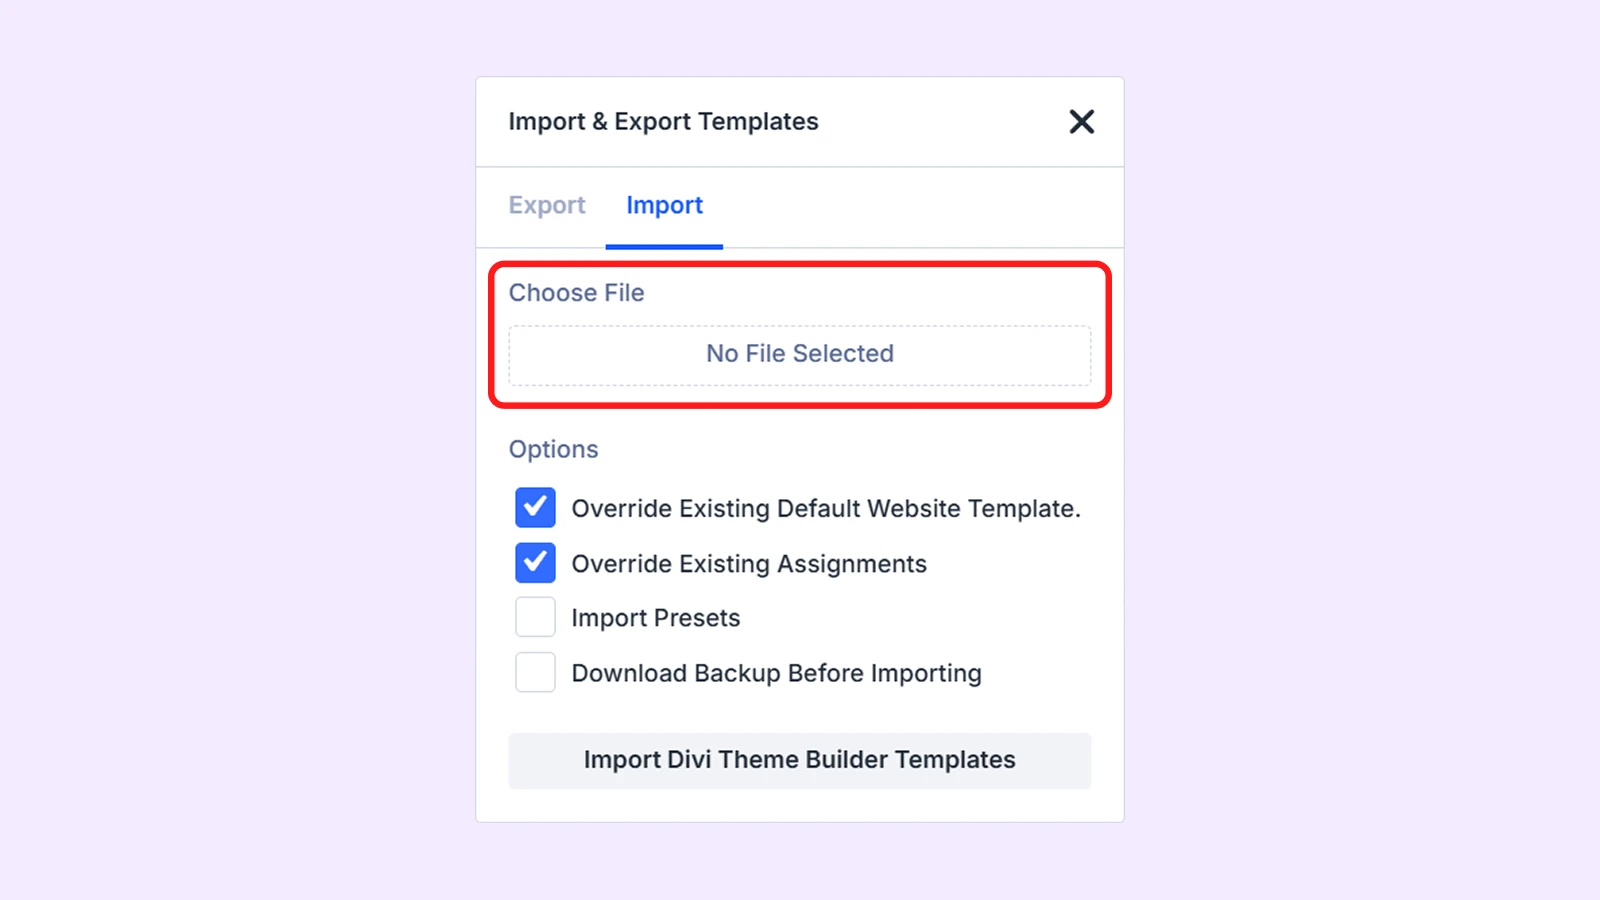
- At the end, click on the "Import Divi Theme Builder Templates" and save it.
Step 10: Import the "Divi Library" file into the Divi Library panel
- Go to the WordPress Dashboard > Divi > Divi Library
- Click on the "Import & Export" icon on just right side of the corner

- Select the Import tab and click “Choose Files” to upload the JSON file named "All In One - Magazine Layout - DiviFlash.json"
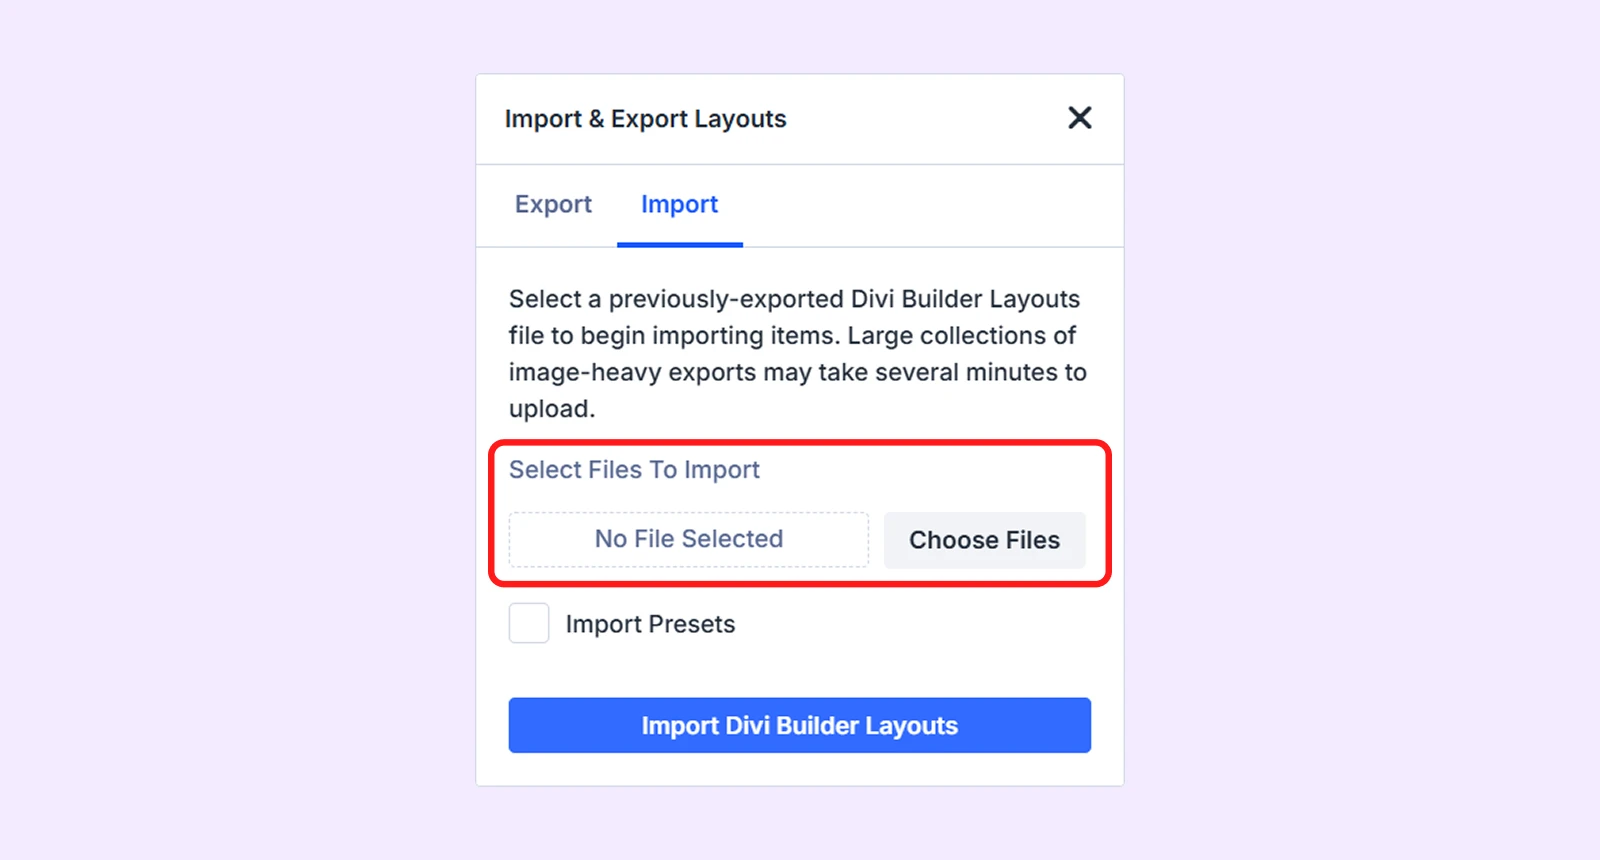
- Now, click on the "Import Divi Builder Layouts"
Step 11: Import the "Theme Customizer Settings" file into the Theme Customizer Panel:
- Go to WordPress Dashboard > Divi > Theme Customizer
- Click on the "Import & Export" on the left corner of the screen

- Select the Import tab and click “Choose Files” to upload the JSON file named "Divi Theme Customizer Settings - Magazine Layout - DiviFlash.json"
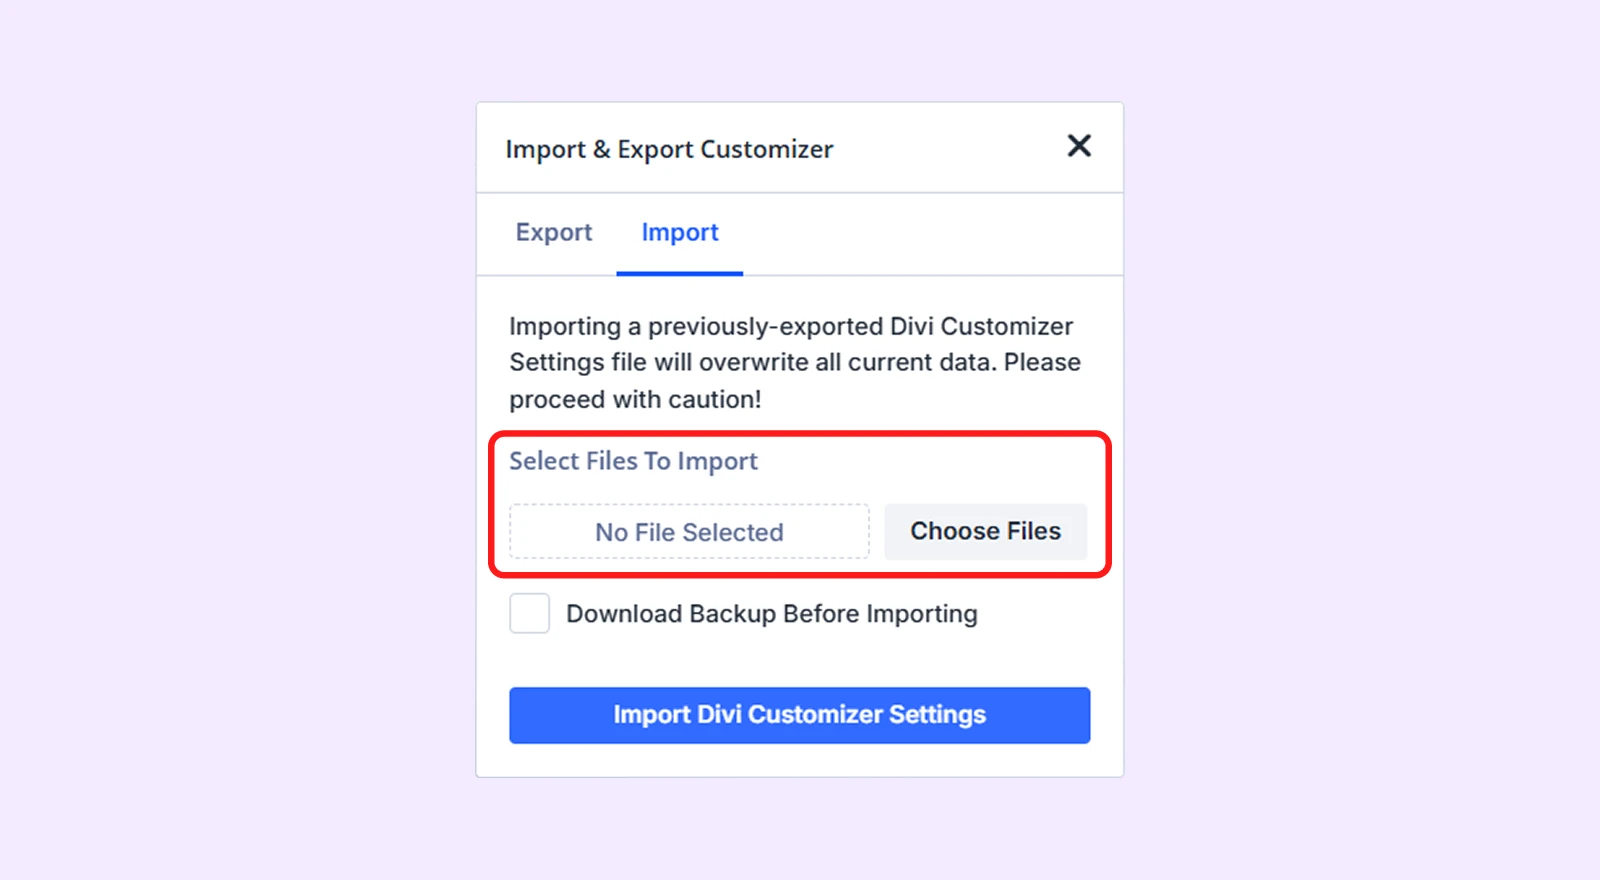
- Finally, click on the "Import Divi customizer Settings"
Step 12: Import the Media file for the Layout
- Go to WordPress Dashboard > Tools > Import
- Click on the “Run Importer” just below the “WordPress” (If you see "install Now" instead of "Run Importer", click install.)
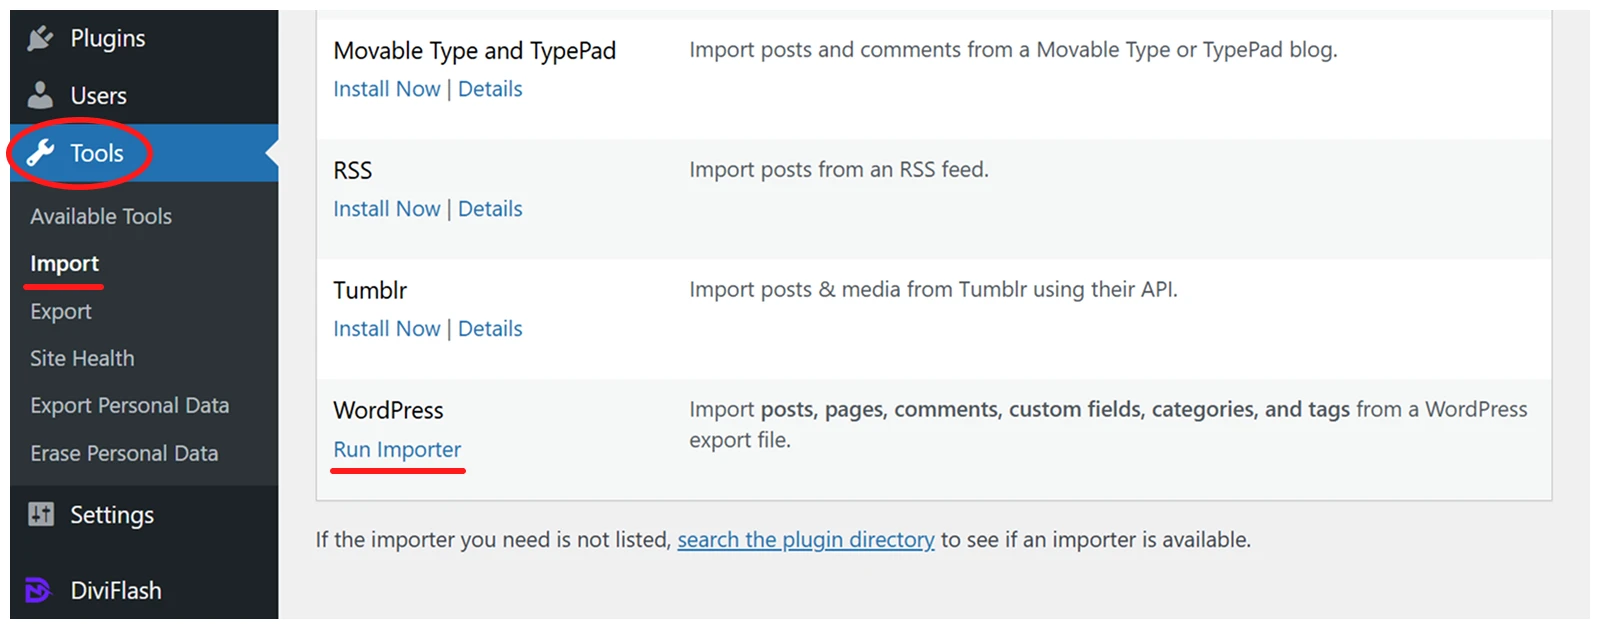
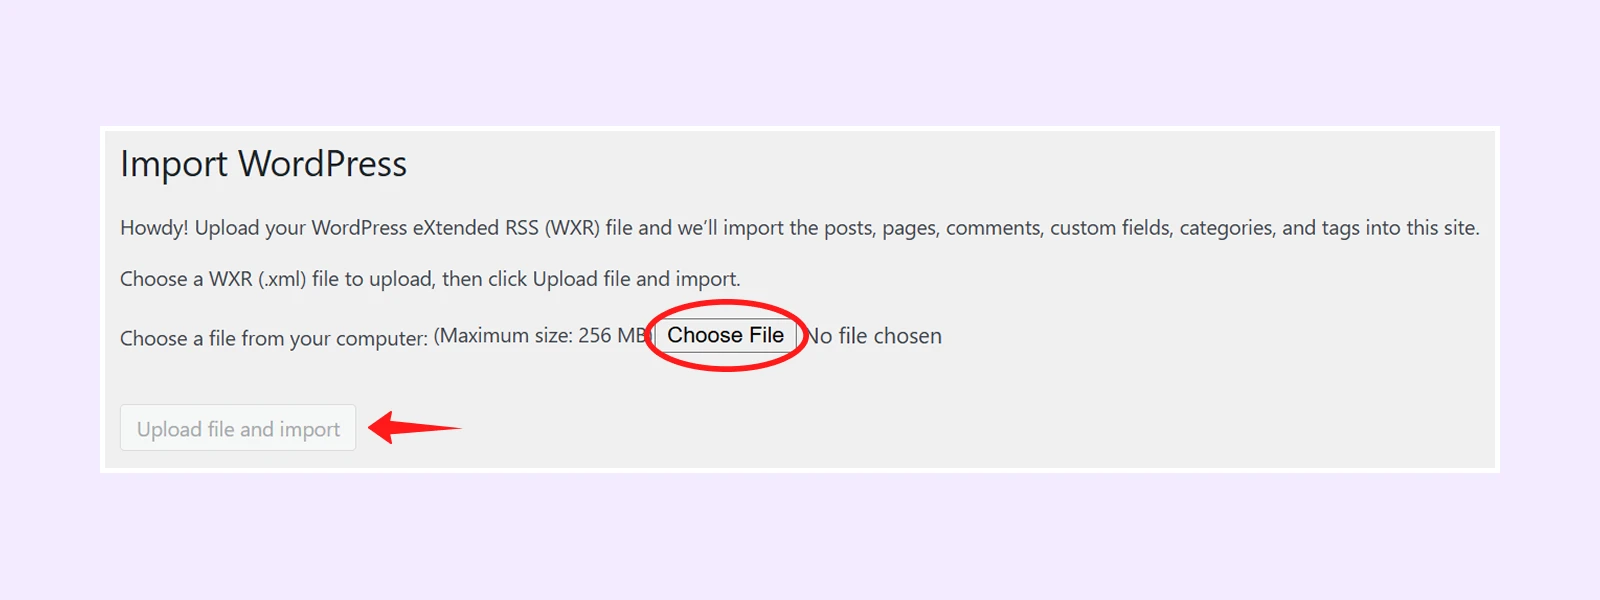
- Next, click on the "Choose File" and import the file named "Media - Magazine Layout - DiviFlash.xml" and click on the "Upload file and import"
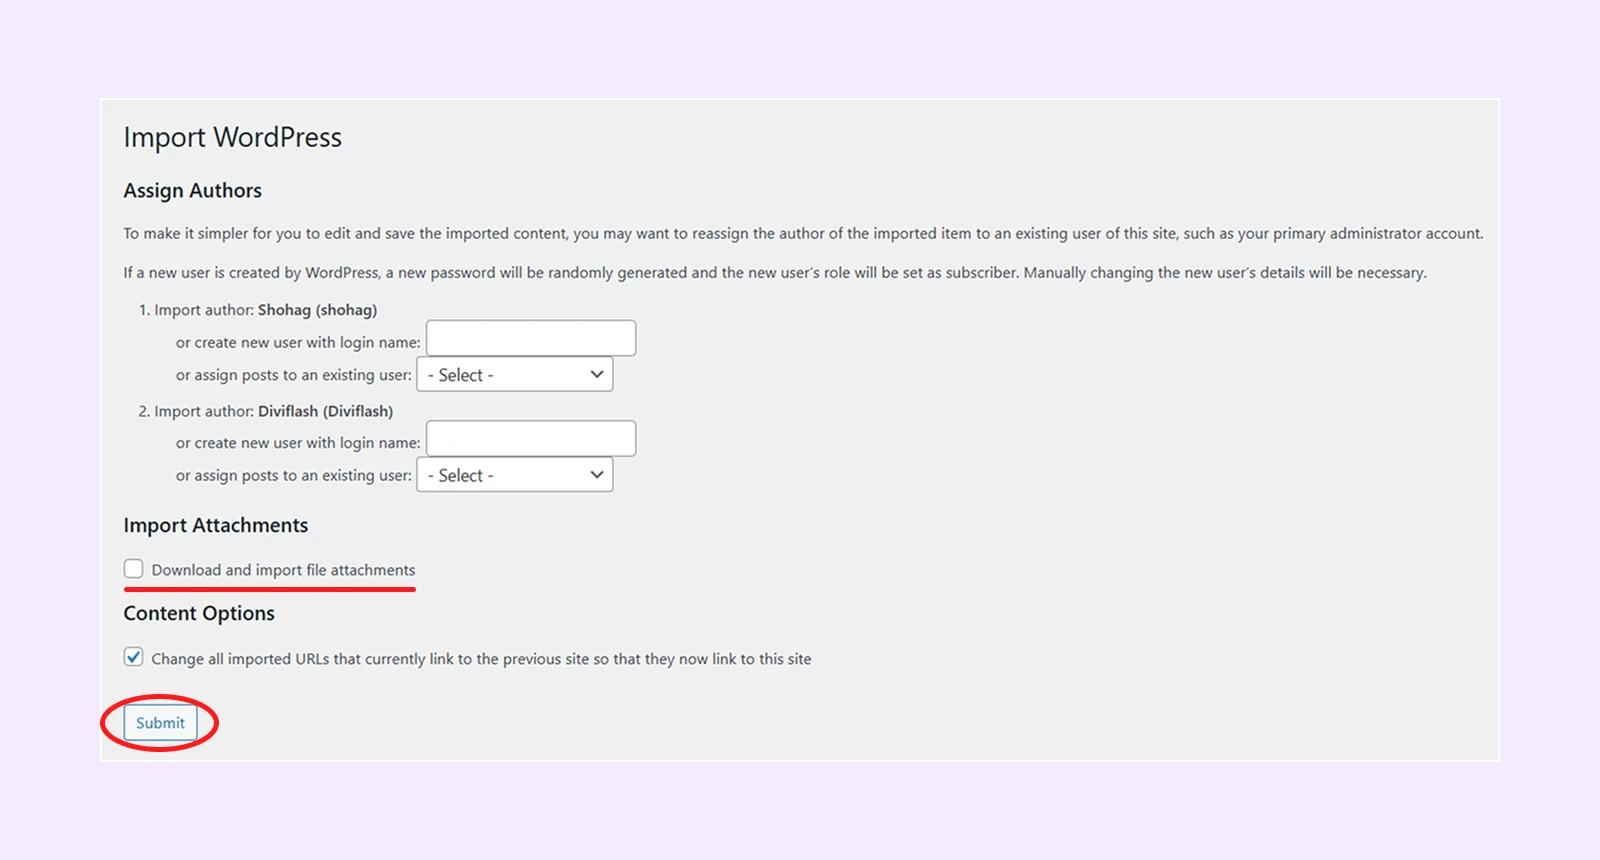
- Assign the author (or you can skip this step). After that, check the "Download and Import File Attachments" option and click "Submit" to save the changes you have made.
By following the same steps (WordPress Dashboard > Tools> Import > Run Importer under WordPress), you have to import .xml files for pages, posts, and products.
Step 13: Import the popup file
To use the popup settings, first enable the Popup feature by going to WordPress Dashboard > DiviFlash > Settings > Popup Enable.
- Go to WordPress Dashboard > DF Popups > Import & Export
- Under the “Import” section, click on “choose File” and select “Popup - Magazine Layout - DiviFlash.Json” file.
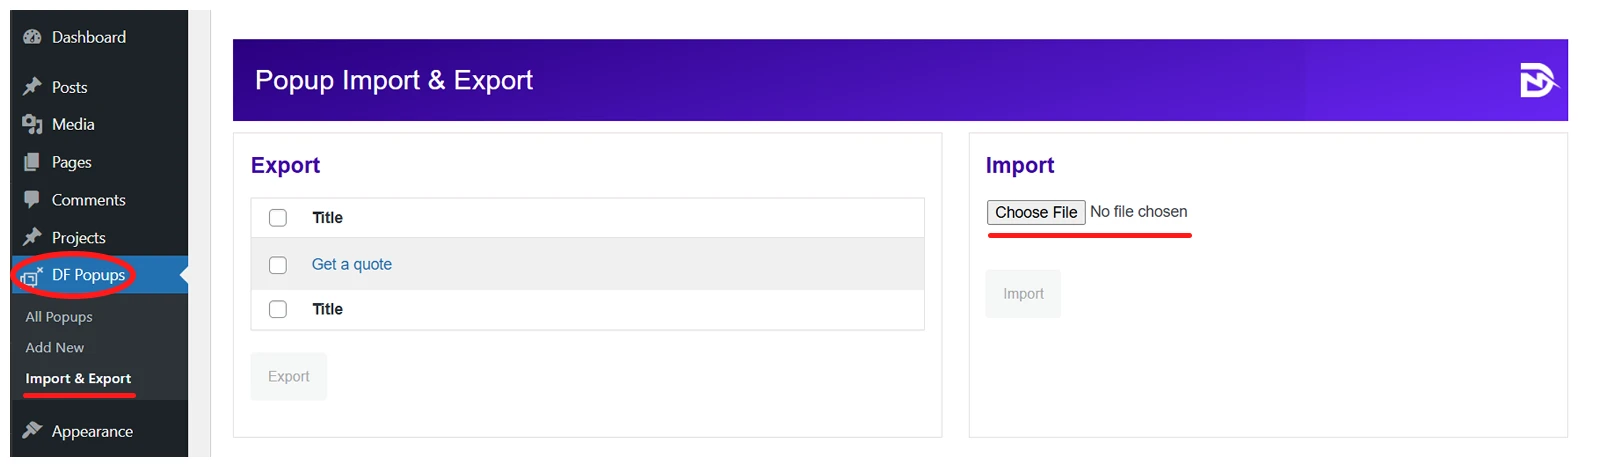
- Click on the “Import” button.
Step 14: Publish the Imported Popup
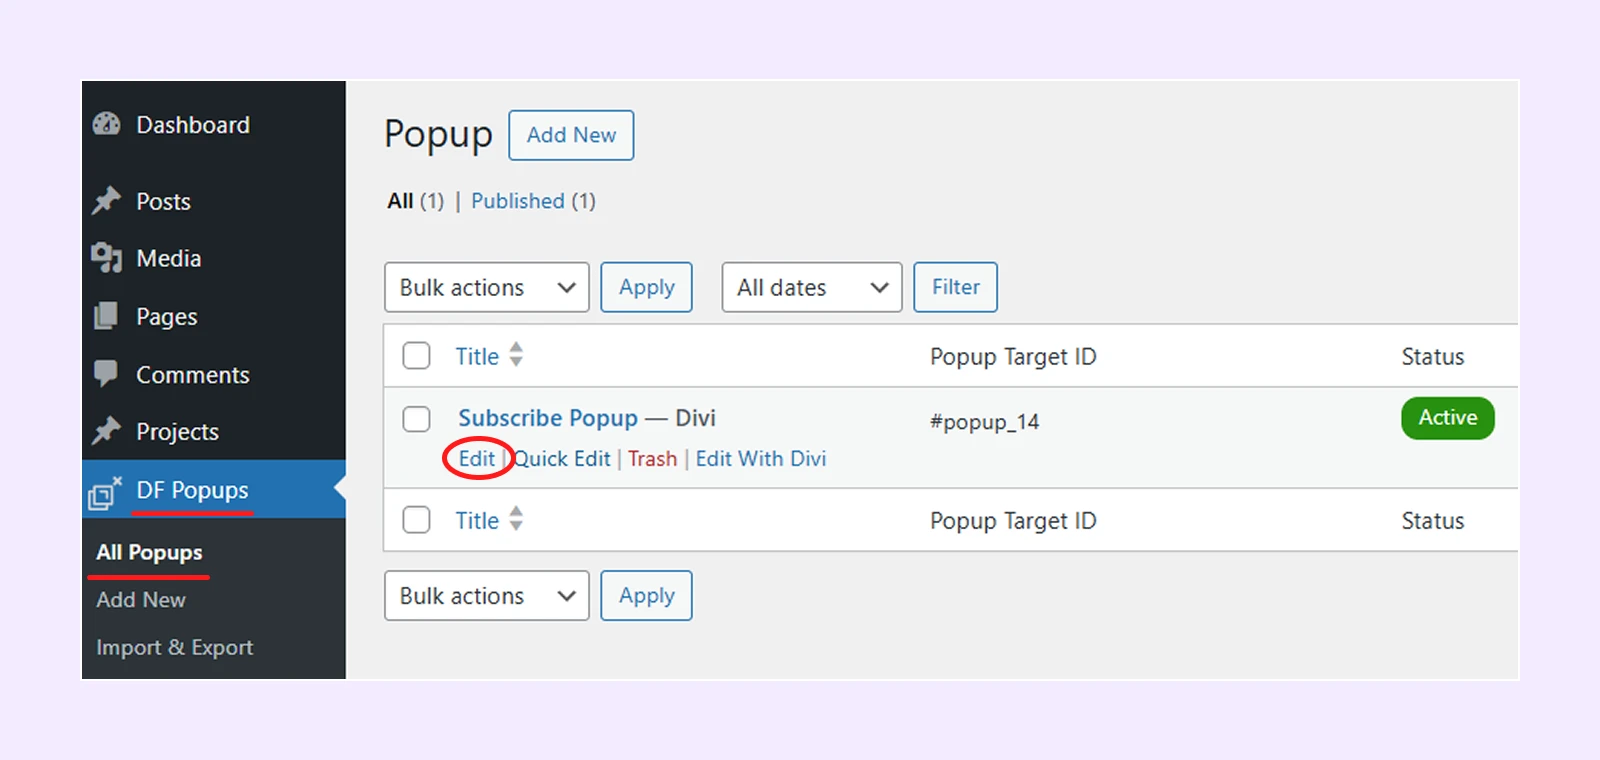
- Go to WordPress Dashboard > DF Popups > All Popups.
- Click “Edit” under the popup name.
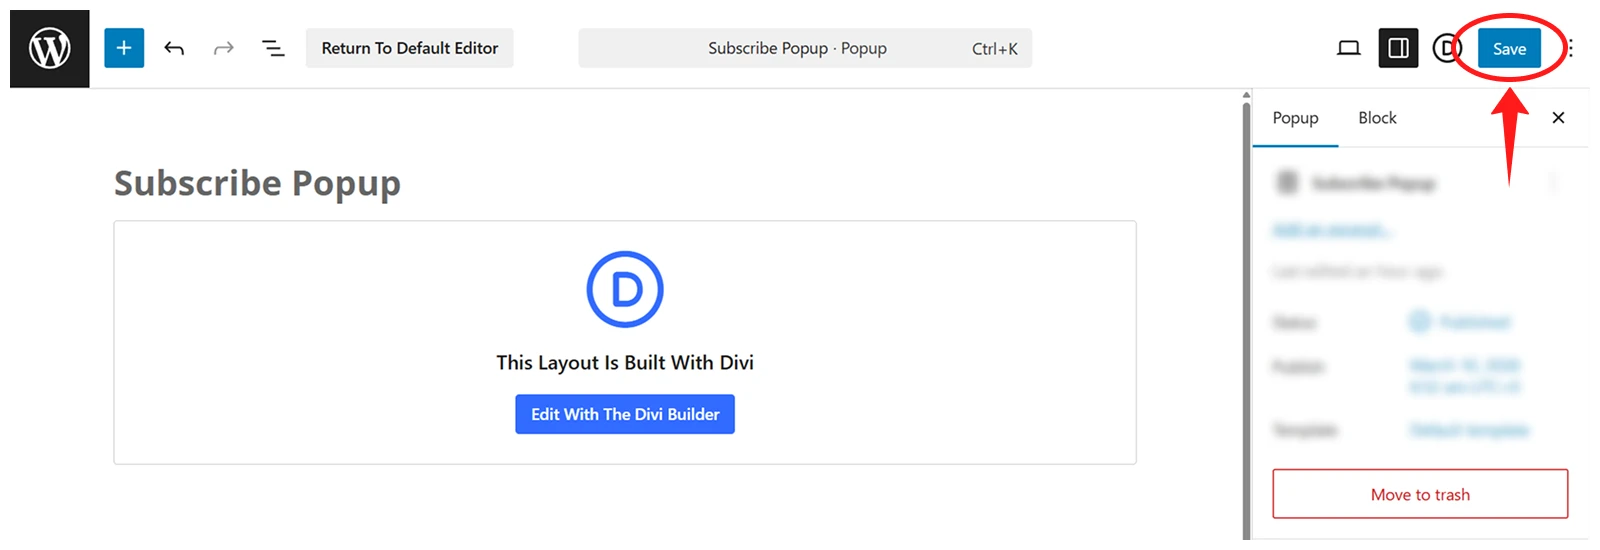
- Click “Publish” button.
- Now, go to WordPress Dashboard >DF Popups > All Popups
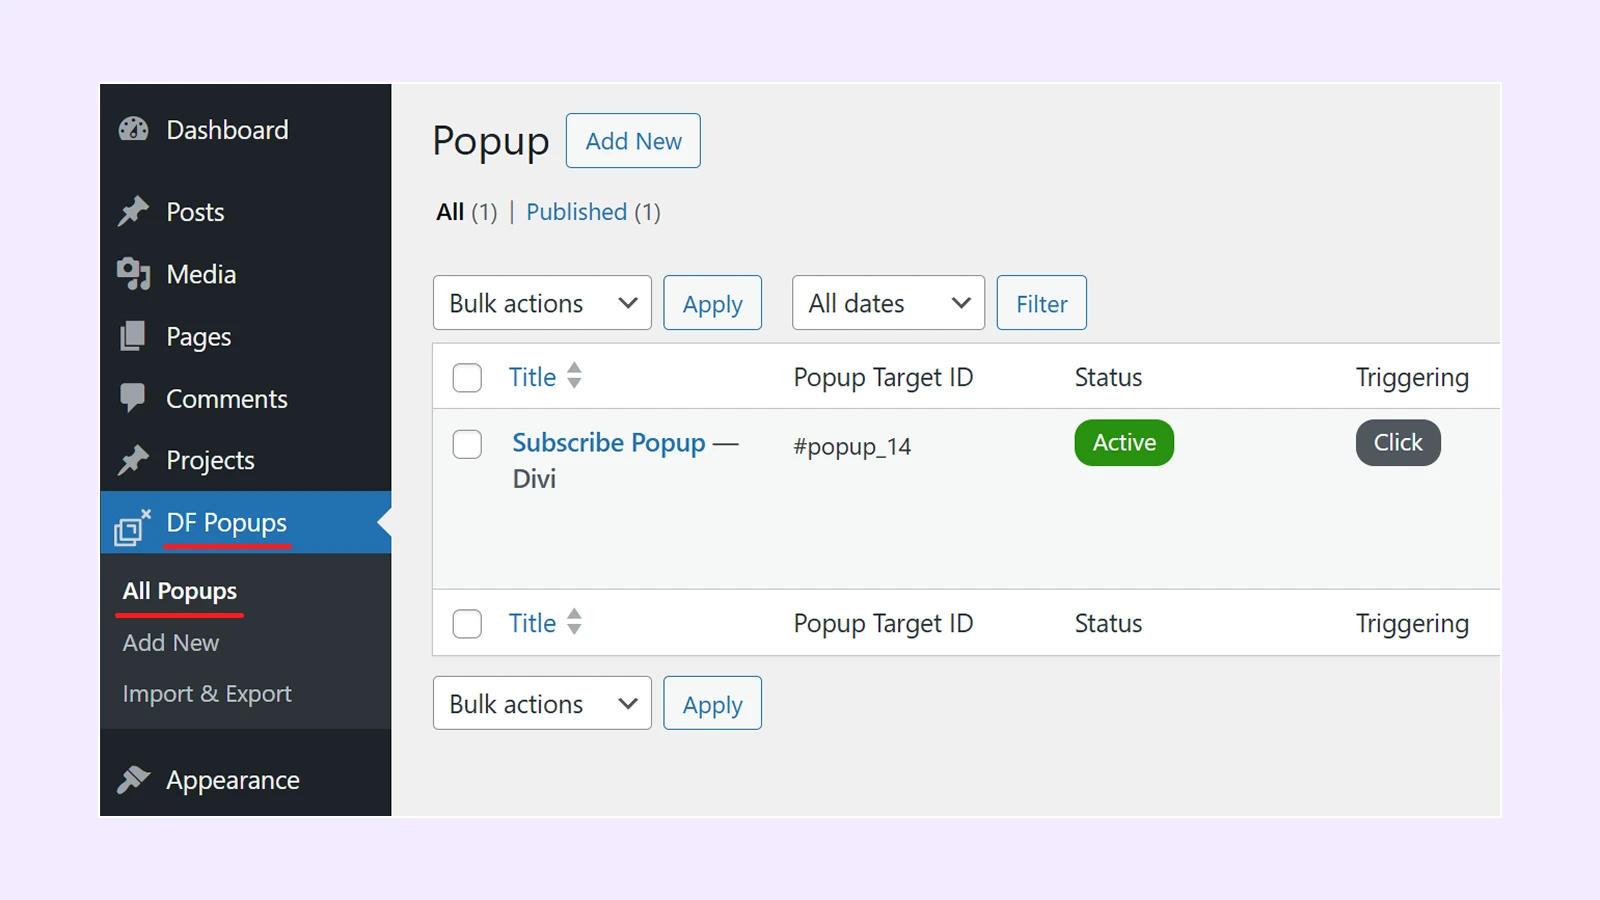
- Copy the “Popup Target ID”
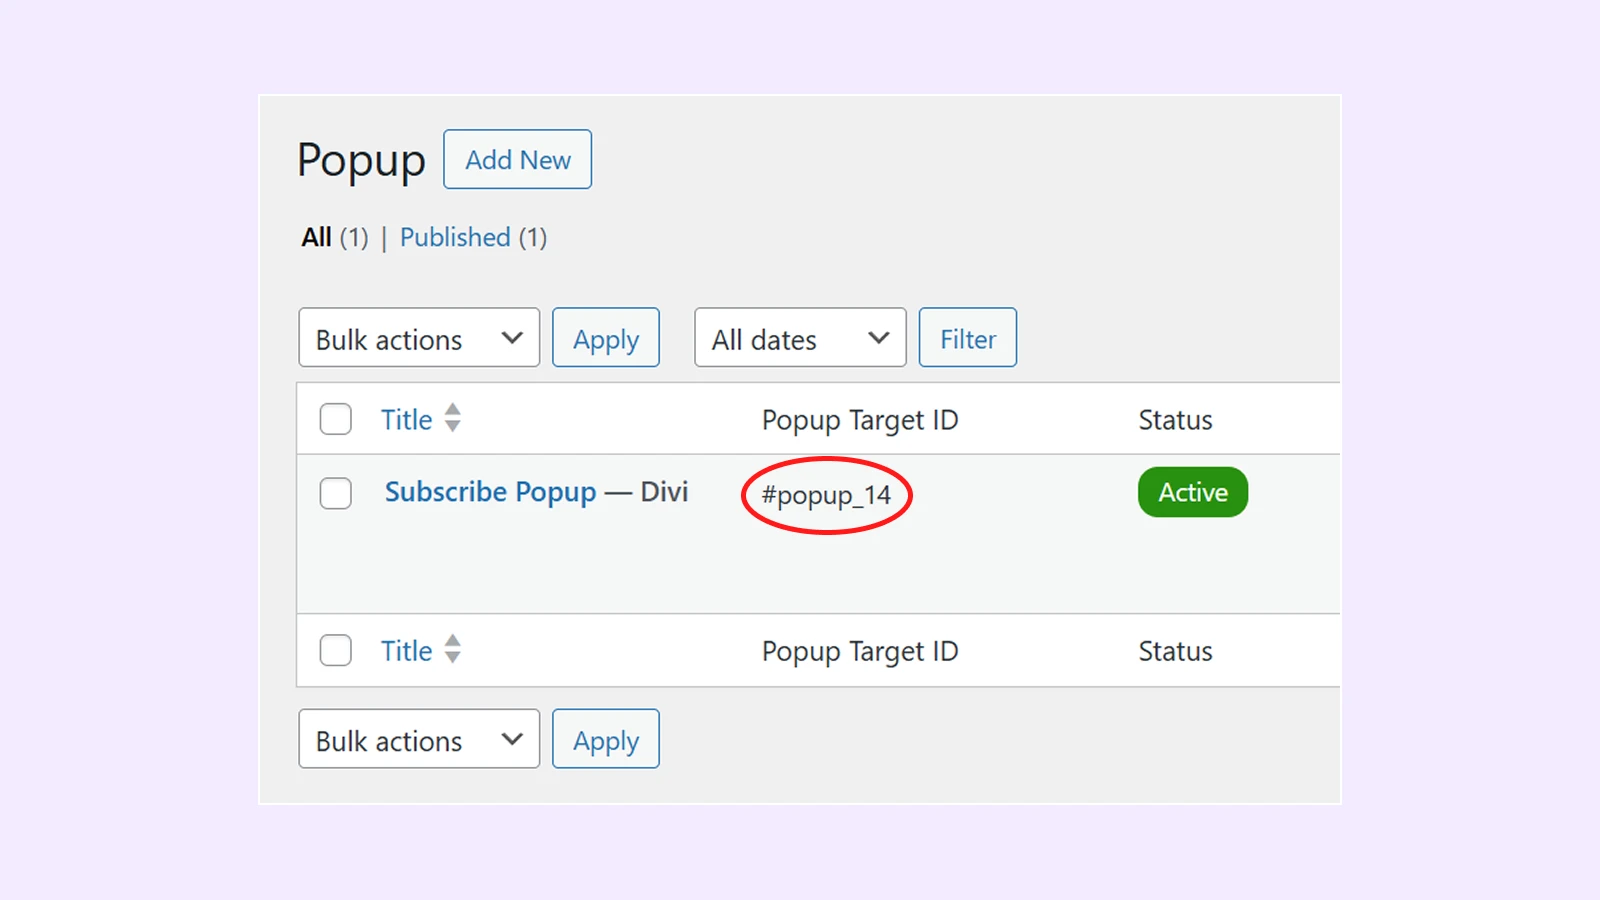
- Go to WordPress Dashboard > Divi > Theme Builder.
- Click the edit icon for the Global Header in the default website template.
- Hover over the menu and click the Module Settings icon.

- Now click on the edit item of the “Button” item.
- Scroll down to the “Button URL” field and paste the copied Popup ID.
- Save the page and your popup should now work as expected.
Note: You will need to manually update the Popup ID for all custom headers in the Theme Builder.
Step 15: Manually set the side widget for your Home Page
- Go to WordPress Dashboard > Appearance > Widgets
- Under the sidebar area, Click the plus“+” button, search for “Tag Cloud”, and click on it, then update.
Step 16: It’s time to set the homepage of your site by following the steps below:
- Go to WordPress Dashboard > Settings > Reading.
- Under the "Your homepage displays" section, select "A static page."
- Select "Home" from the homepage dropdown menu.
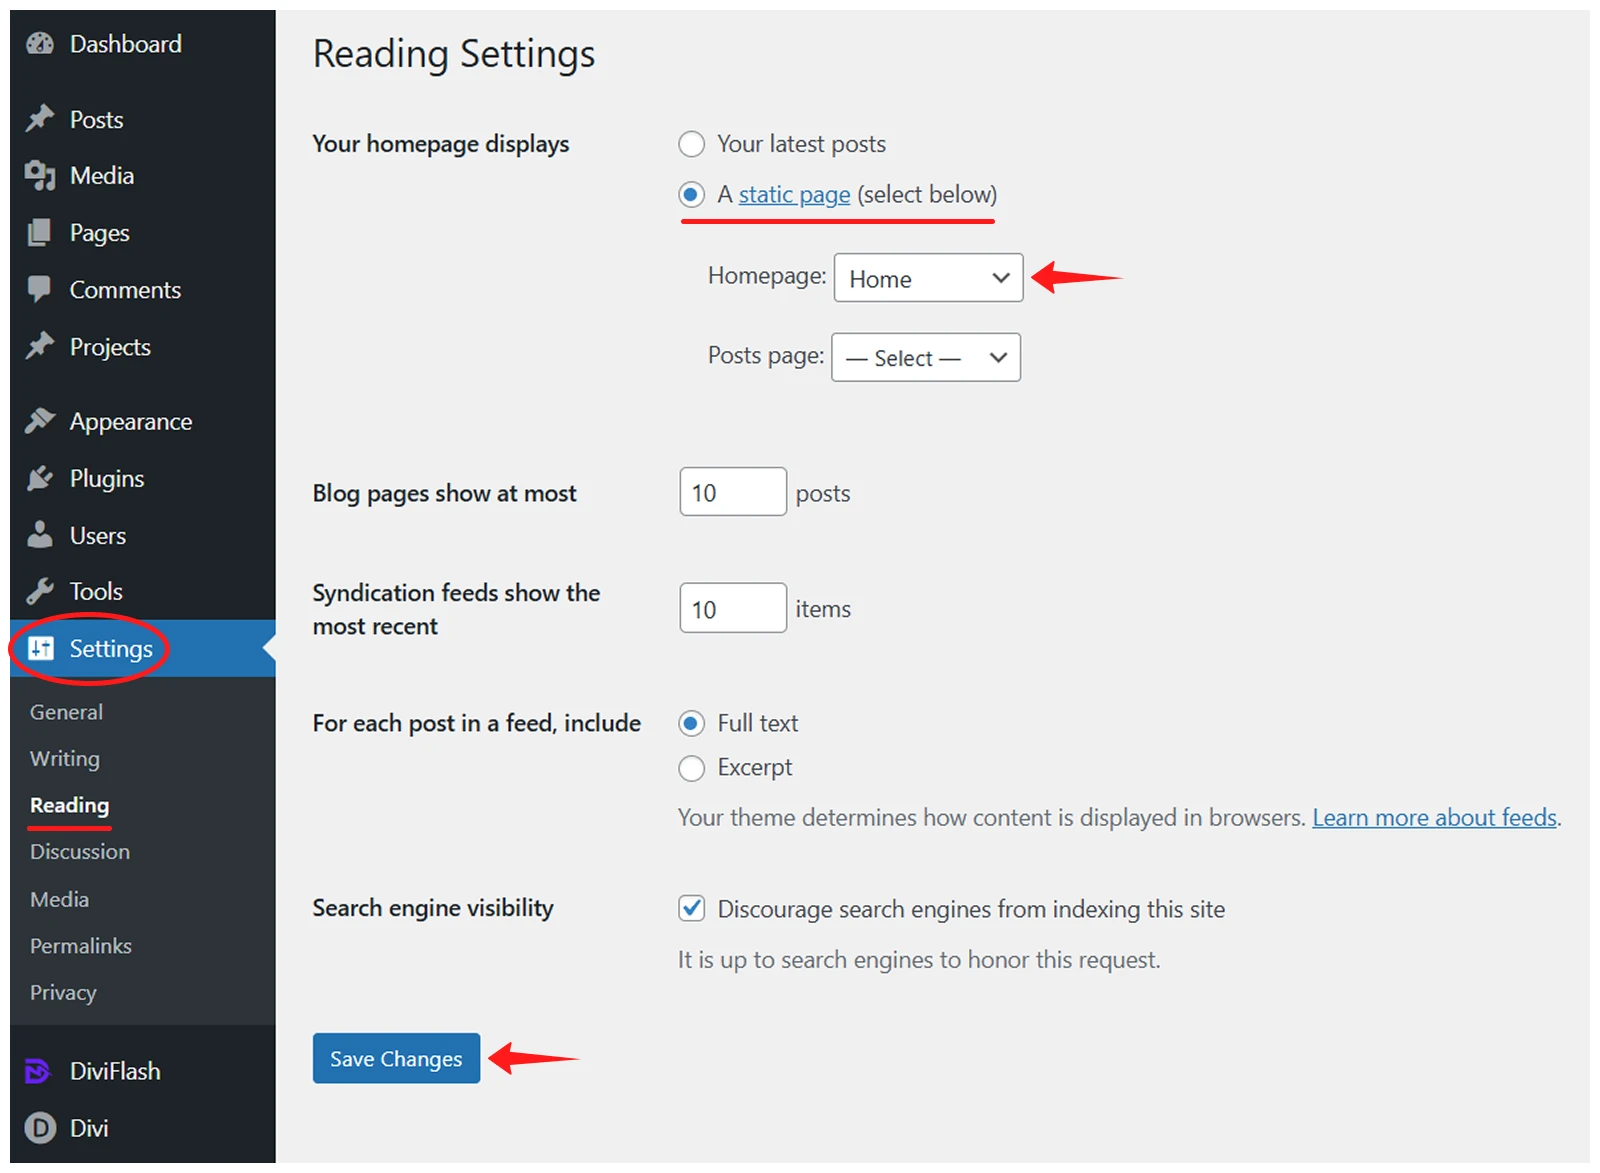
- Now, click on the "Save Changes" to save your changes.
Step 17: Next, create a menu for the imported layout. You can follow the Divi Layout Menu Customization doc for directions.
Now your website should look exactly the same as the Megazine layout!
Any Questions?
If you have any questions, please feel free to contact our support team at [email protected]