
The Divi Image Effects extension (introduced in v5.6.0) adds 8 reveal styles to Divi’s native Image module, with controls for animation timing, stagger, and more.
Important Note: This extension works only with Divi 5 and adds its settings directly to Divi’s native Image module.
Let’s see how to set it up and use the available effects.
Enable the Divi Image Effects Extension
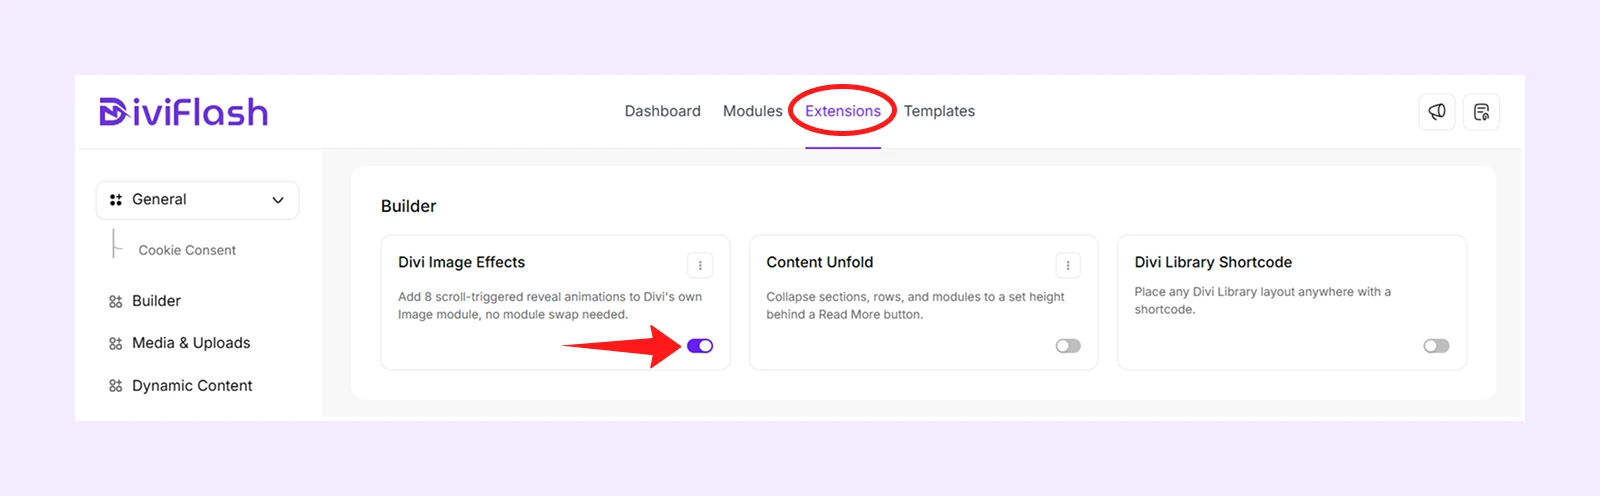
- Go to your WordPress Dashboard.
- Navigate to DiviFlash > Extensions > Builder.
- Find Divi Image Effects and toggle it ON.
Apply an Divi Image Effects
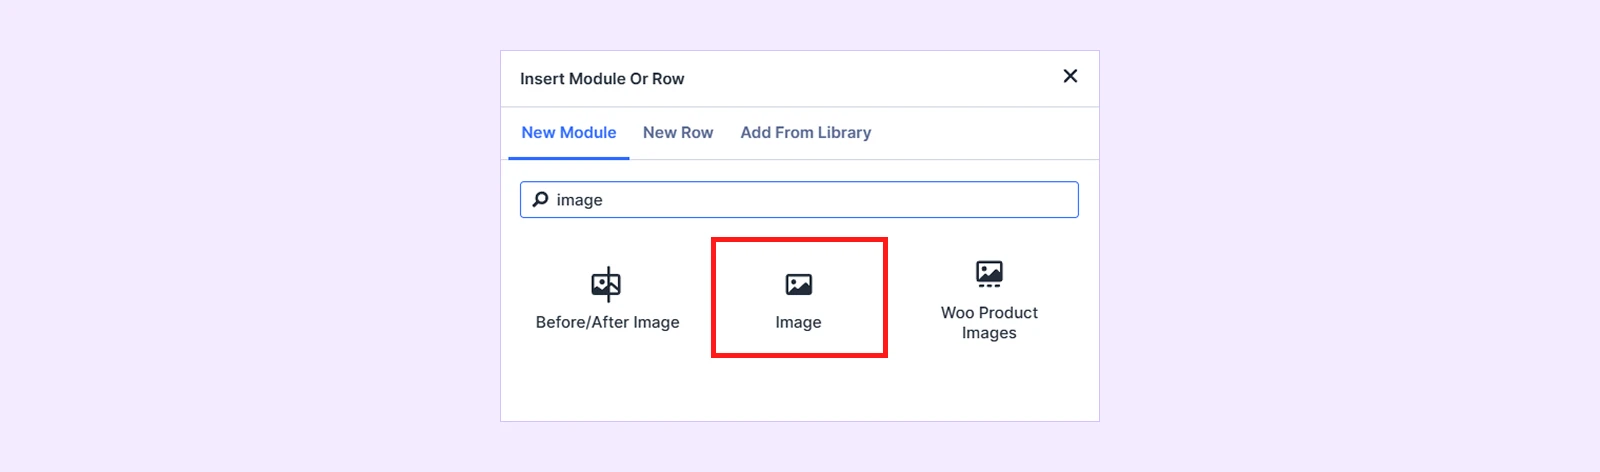
- Open a page with the Divi Visual Builder.
- Add a new Image module or open an existing one.
- Go to Content tab > Divi Image Effects
- Enable Enable Reveal Animation.
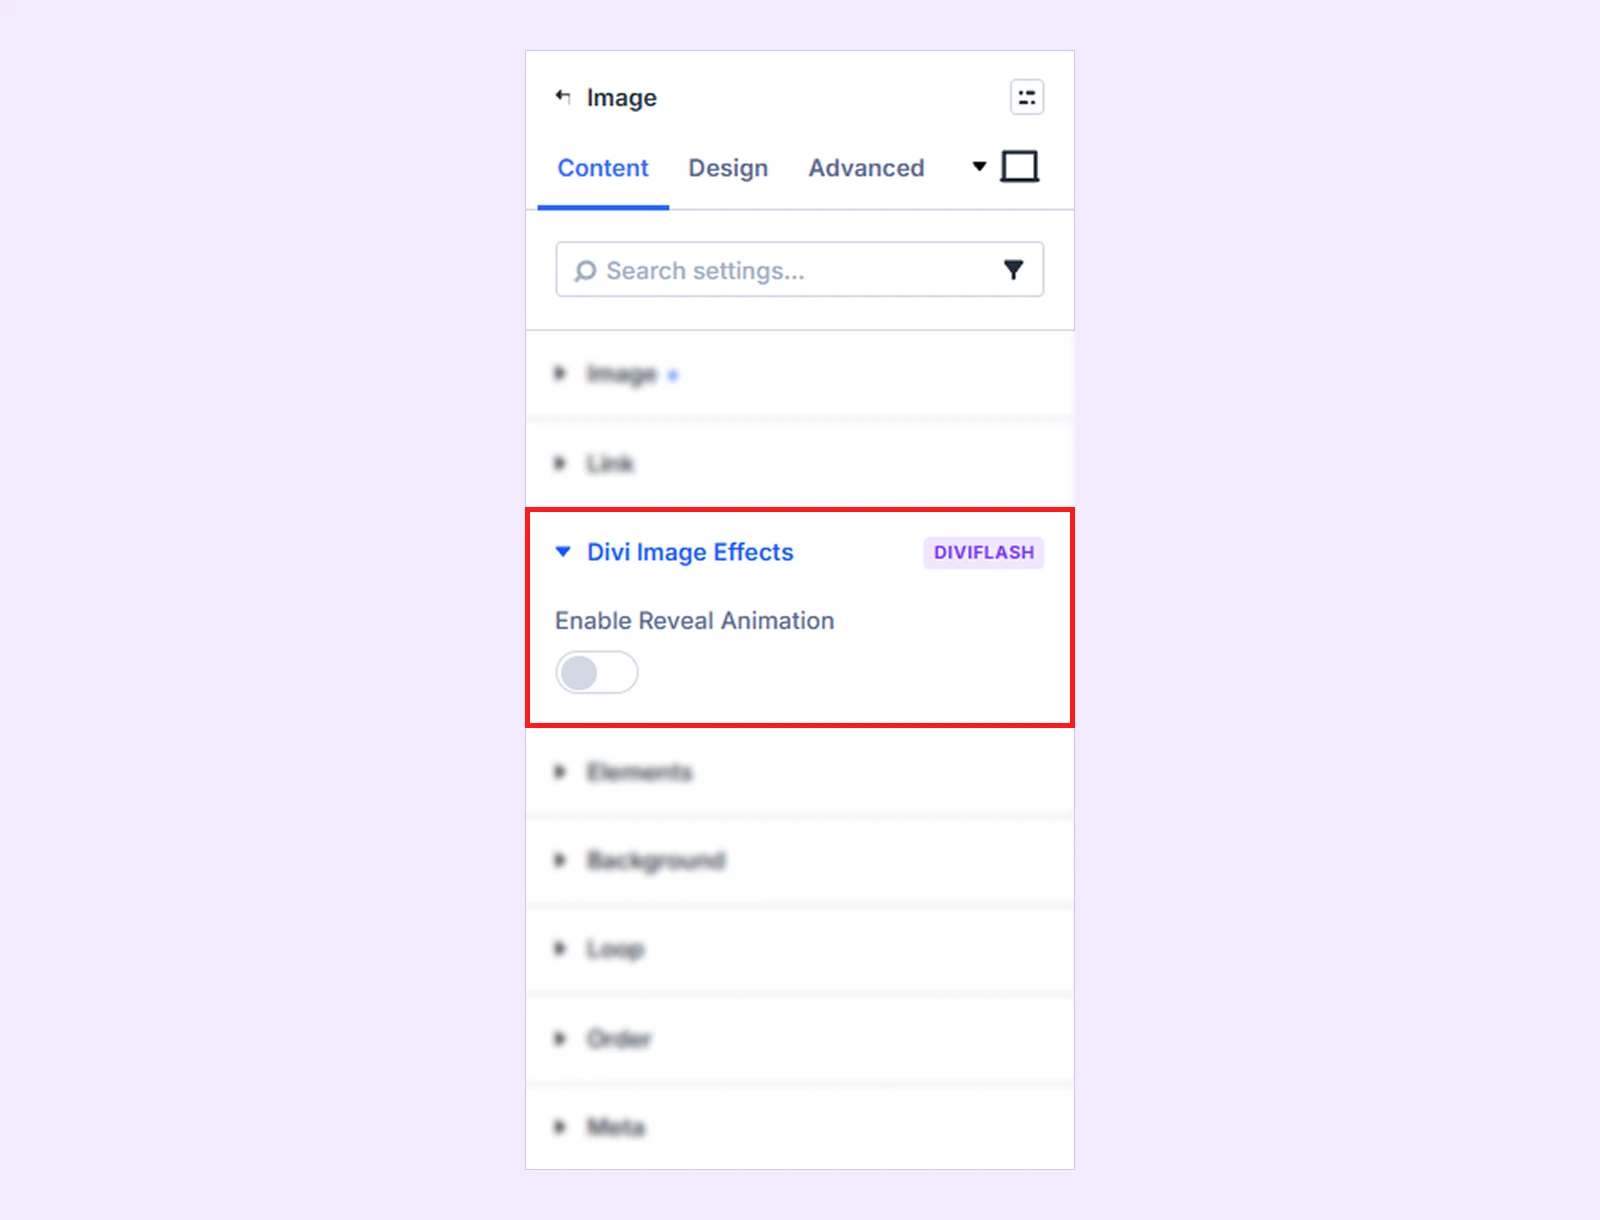
Once enabled, the available Divi Image Effects settings will appear in the Image module’s Content tab.
Divi Image Effects Settings
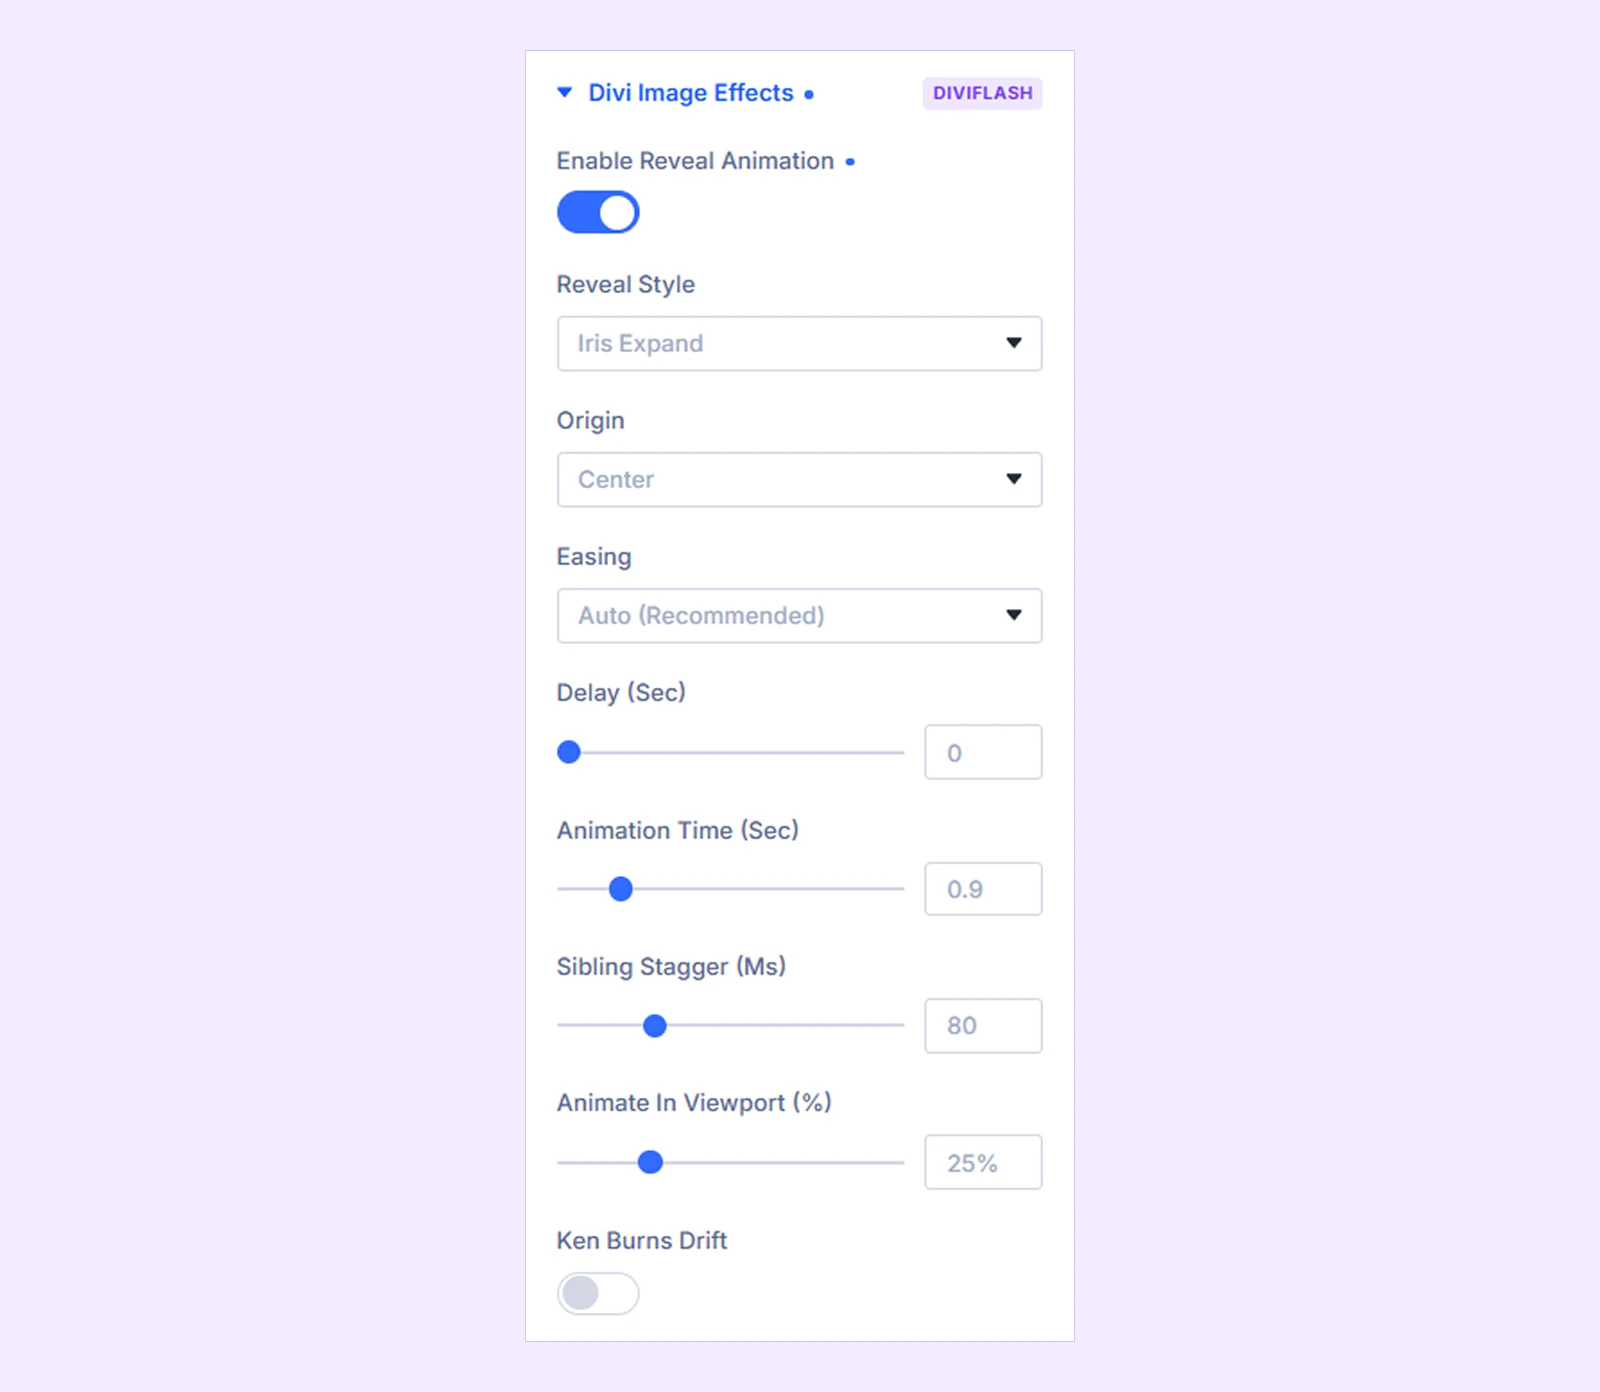
- Enable Reveal Animation: Enable or disable the reveal animation for the image.
- Reveal Style: Choose how the image will be revealed. You can choose from:
- Line-Led Sweep
- Iris Expand
- Frame Open
- Organic Mask Growth
- Cinematic Push
- Counter-Slide Parallax
- Skewed Slide-In
- Slat Reveal
Depending on the selected Reveal Style, the following settings may appear:
- Direction: Choose the direction in which the reveal moves. (Available for Line-Led Sweep, Counter-Slide Parallax, and Cinematic Push.) You can choose from:
- Left to Right
- Right to Left
- Top to Bottom
- Bottom to Top
- Origin: Choose where the reveal starts. (Available for Iris Expand and Organic Mask Growth.) You can choose from:
- Top Left
- Top Center
- Top Right
- Center Left
- Center
- Center Right
- Bottom Left
- Bottom Center
- Bottom Right
- Axis: Choose how the image is split for the Slat Reveal effect. (Available for Slat Reveal.) You can choose from:
- Horizontal
- Vertical
- Reveal Color: Choose the color of the glowing line that moves along the reveal edge. (Available for Line-Led Sweep.)
- Slats: Set how many strips the image is divided into. (Available for Slat Reveal.)
- Zoom: Control how zoomed-in the image appears at the start of the reveal. (Available for Counter-Slide Parallax, Cinematic Push, and Skewed Slide-In.)
- Skew: Control how much the image is tilted before it moves into place. (Available for Skewed Slide-In.)
- Frame Inset: Control how small the starting frame is before it expands to reveal the full image. (Available for Cinematic Push and Frame Open.)
- Edge Softness: Control how soft or defined the edge of the reveal mask appears. (Available for Organic Mask Growth.)
- Cell Stagger (ms): Set the delay between the start of each slat’s reveal. (Available for Slat Reveal.)
- Easing: Choose how the animation speeds up and slows down. This setting applies to all Reveal Styles. You can choose from:
- Auto (Recommended)
- Sharp (Wipes)
- Soft (Movement)
- Gentle (Filters, 3D)
- Overshoot
- Ease Out
- Ease In Out
- Linear
- Delay (Sec): Set how long to wait before the reveal starts after the image enters the viewport.
- Animation Time (Sec): Set how long the reveal animation takes to complete.
- Sibling Stagger (ms): Add a delay between animated Image modules in the same container so they reveal one after another.
- Animate In Viewport (%): Set how much of the image’s height needs to be visible before the reveal starts.
- Ken Burns Drift: Enable a continuous slow zoom-and-drift effect after the reveal animation finishes. When enabled, the following settings will appear:
- Drift Zoom: Set how far the image zooms in during the drift.
- Drift Time (Sec): Set how long one zoom-in movement takes before it reverses.
Need Help?
If you have any questions or need assistance, contact our support team at [email protected].